


5
InstallationtoatandlevelCeiling
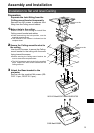
Assembly and Installation
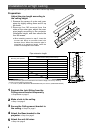
Preparation:
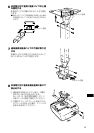
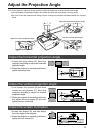
Separate the Joint tting from the
Ceiling-mount bracket temporarily
RemovefourM5screwstoseparateJoint
ttingfromtheCeiling-mountbracket.
1
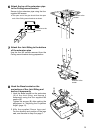
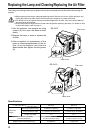
Make a hole in the ceiling
Makeaholeintheceilingtoinstallthe
Ceiling-mountbracketandcables.
●Whendeterminingtheholeposition,usethe
suppliedtemplatesheet.
●Thedirectiontothescreenisindicatedonthe
templatesheet.
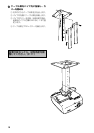
2
Secure the Ceiling-mount bracket to
the ceiling
UsefourM13screws,tosecuretheCeiling-
mountbrackettotheceilingwiththearrow
facingtowardthescreen.
●BeforesecuringtheCeiling-mountbracket,be
suretoremovethetemplatesheet.
●TheM13screwsarenotincludedinthesupplied
parts.PreparetheM13screwssuitableforthe
ceilingstructure.
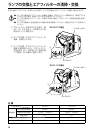
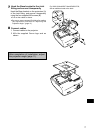
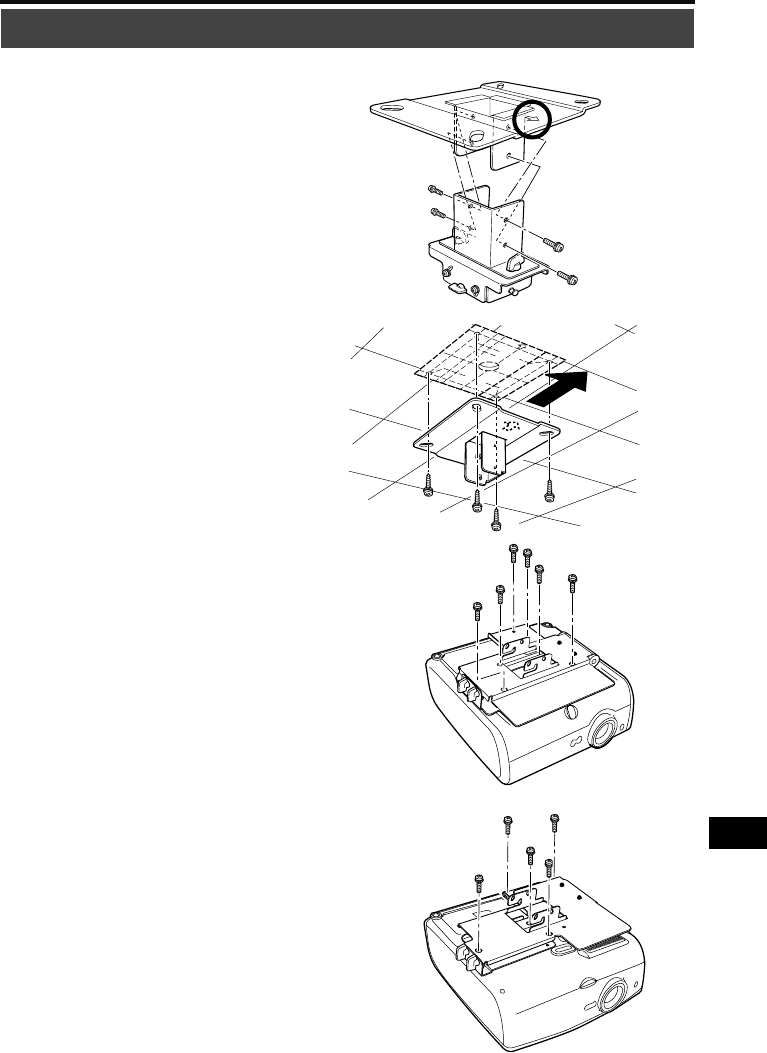
3
Attach the Base bracket to the
projector
SecurewiththesuppliedM4screws(RS-
CL07
:
6pcs.;RS-CL10
:
5pcs.).
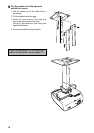
WUX10MarkII/SX7MarkII/SX60/X700
SX80MarkII/SX800
Directiontothe
screen
Directiontothe
screen