


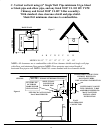
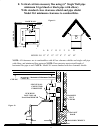
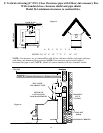

Select an installation location that will give the best airflow from the front of the
heater to the remainder of the home.
PREPARING THE STOVE FOR INSTALLATION
1. Inspect the unit for any obvious physical damage.
2. Plug the power cord into a 115V AC outlet to test the motor and fan when optional motor is
being used. “Do not run power cord under unit or in high traffic areas”.
3. Check the primary air draft control to ensure that it slides freely.
4. Remove any items from within the firebox. Spread a dropcloth on the floor behind the
heater. Next, tilt the heater so that the back is on the drop cloth.
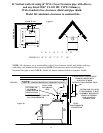
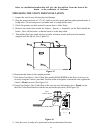
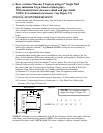
5. Then obtain four legs, attach the legs to holes in bottom of unit with bolts and washers
supplied with the leg kit. (See Figure 15).
Figure 15.
6. Reposition the heater to the upright position.
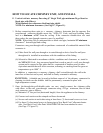
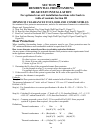
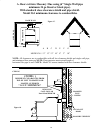
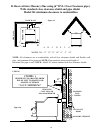
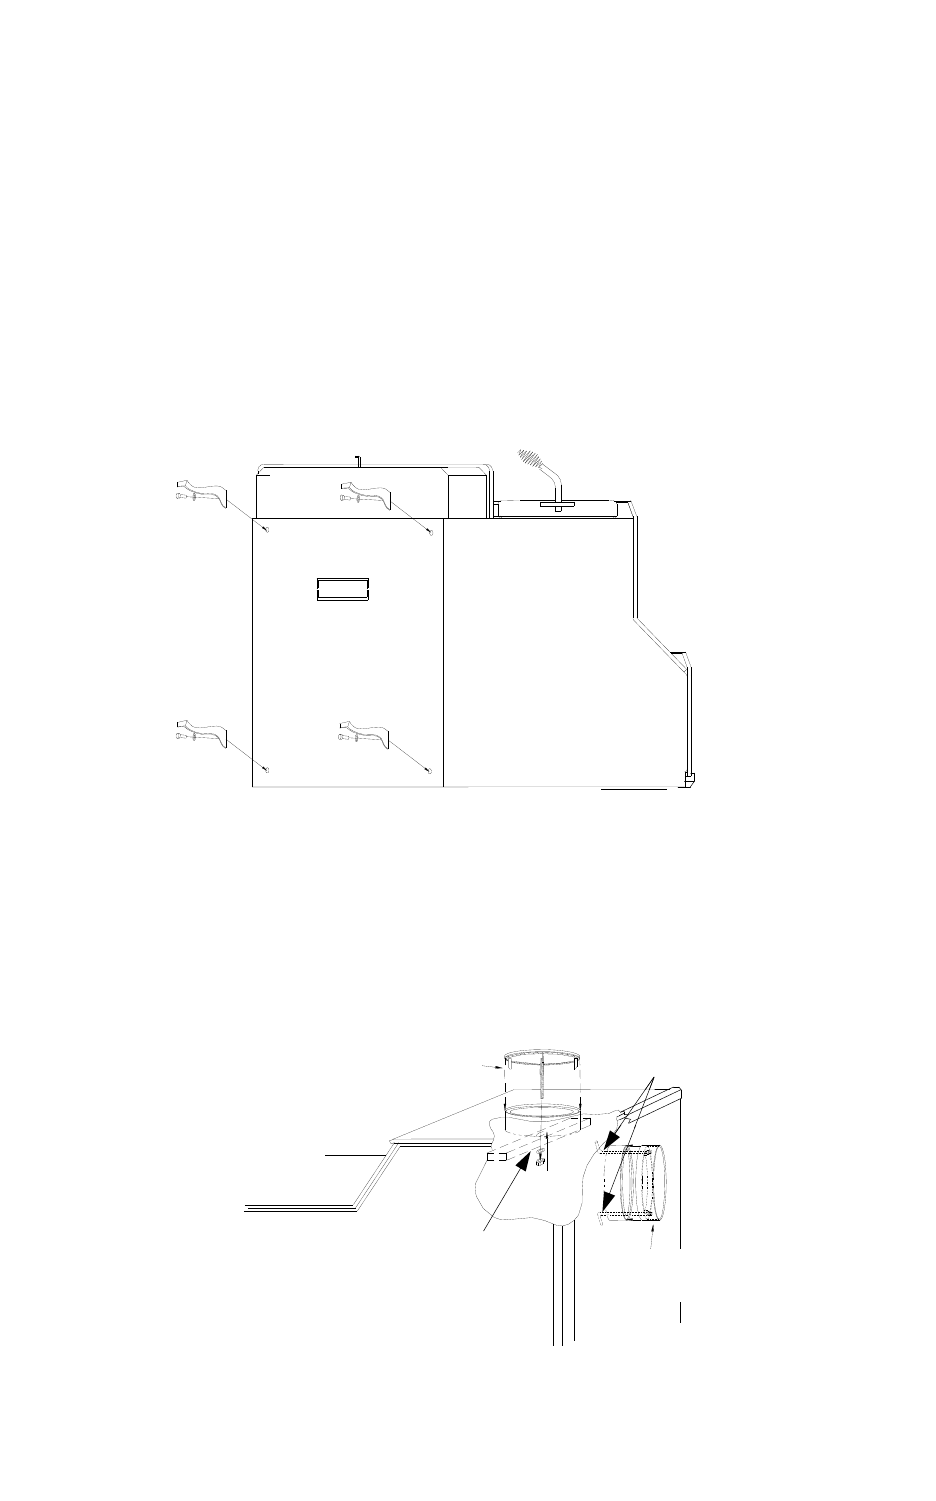
7. Next fasten New Buck’s Cast Collar Part number MA6CHIMNB to the flue exit of stove to
be used, using the J hook’s provided. Position collar with gasket towards the unit, tighten the
J hook’s Firmly secured. (See Figure 16).
8. Fasten New Buck’s Flue Collar Plate to the exit not used for burning stove. Firmly secure
the Flue Collar Plate Bracket with the nut and washer provided .(See Figure 16).
Figure 16.
9 . Now the stove is ready to be positioned in the predetermined location.
J - HOOK
FLUE COLLAR PLATE BRACKET
NEW BUCK
CAST COLLAR
FLUE
COLLAR PLATE
21