Table 3 — Daily Schedule Planner
DAY
OF THE
WEEK
SCHEDULE
Occupied 1 Occupied 2 Occupied 3 Unoccupied
Start / Stop / Heat / Cool Start / Stop / Heat / Cool Start / Stop / Heat / Cool Heat /Cool
Monday /// /// /// /
Tuesday /// /// /// /
Wednesday /// /// /// /
Thursday /// /// /// /
Friday /// /// /// /
Saturday /// /// /// /
Sunday /// /// /// /
NOTE: The cooling temperature set point must be higher than the heating temperature set point. (The temperature difference may be changed in the
advanced setup configuration.)
OPERATION
The Mode button selects the operating mode of the thermo-
stat. If OFF is selected, the thermostat will not enter Heat-
ing or Cooling mode. If HEAT is selected, the thermostat will
only enter Heating mode (if the room temperature is below
the heating set point). If COOL is selected, the thermostat
will only enter Cooling mode (if theroom temperature isabove
the cooling set point).If AUTO is selected, the thermostat will
enter Heating or Cooling mode based on the room tempera-
ture and the heating and cooling set points. If PROGRAM
ON is selected, the stored schedule is enabled and the ther-
mostat will follow the Occupied and Unoccupied schedules
stored in its memory.
I. AUTO-CHANGEOVER
When the thermostat mode is set to AUTO, the thermostat
will provide automatic changeover from Heating to Cooling
mode and Cooling to Heating mode when required. The ther-
mostat will automatically switch to maintain the desired tem-
perature setting. The thermostat does not need to be manu-
ally changed from heating to cooling or cooling to heating
operation.
II. LIGHT-ACTIVATED OPERATION
A light sensor is provided on the thermostat for light activa-
tion. The thermostat must be in Program On mode for light
activation to be initiated. When the sensor detects light (the
space is occupied), the thermostat will enter Occupied 1 mode
and heat or cool according to the Occupied 1 set points. If
the room is dark, the thermostat will follow its programmed
schedule.
NOTE: Light activation does not work in Holiday mode.
III. TWO-STAGE OPERATION
The second stage of heat or cool is turned on when the first
stage has been on for a minimum of 2 minutes and the tem-
perature differential from the set point is equal to or greater
than the set point plus the deadband plus 2 degrees.
IV. CLOCK BACKUP
In the event of a power loss, the thermostat will keep time
for a minimum of 48 hours without external power or
batteries.
V. FAN OPERATION
If Fan On is selected, the fan will run continuously during
occupied schedule (except when Mode is switched to OFF).
The fan will be off during unoccupied schedule except during
heating or cooling operation.
If Fan On is not selected, the fan will only operate during
heating or cooling operation.
VI. EMERGENCY HEAT
Emergency heat is available for heat pump applications. To
turn on emergency heat, pressand holdthe Fanbutton. While
holding the Fan button, press the UP button for 2 seconds.
An ‘‘EH’’ will be displayed. During emergency heat, the fan
will operate and the second stage of heat will be energized
(locking out the first stage compressor). To exit emergency
heat, press and hold the Fan button. While holding the Fan
button, press the UP button for 2 seconds. During emergency
heat, only OFF and HEAT modes are available.
VII. ELECTRIC HEAT
When the Electric Heat option in the advanced setup is set
to ON (configured by installer), the thermostat will turn on
the fan immediately any time there is a heat demand. This
feature should only be used on electric heating applications.
Do not use with gas heat.
VIII. HOLIDAY MODE
When the thermostat is in Holiday mode, the thermostat will
operate under Unoccupied set points. To configure and acti-
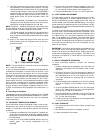
vate the Holiday mode, press the Holiday button. The ‘‘HOL’’
icon will be displayed along with the remaining days of Holi-
day mode operation. Press the UP or DOWN ARROWS to se-
lect the number of days that the holiday schedule will be in
effect. A value of 0 disables Holiday mode. The duration can
be set from 1 to 99 days. The thermostat will enter Holiday
mode on midnight of the next day after the mode has been
activated. Holiday mode will remain in effect until midnight
of the last configured day.
If the Holiday mode is in effect, the number of days remain-
ing will blink on and off and the ‘‘Unoccupied’’ icon will be
displayed. The Override button will be active during Holiday
mode. The Dry Contact Switch is ignored.
To turn off the Holiday mode before the remaining config-
ured days have passed, press the Holiday button to enter into
the Configuration mode. Press the DOWNARROW to set the
number of days to zero. Holiday mode will be
disabled.
—7—


