SERVICE
NOTE: The following steps should be performed by a quali-
fied service person.
WARNING:
Before installing or servicing unit, turn
off main power to system to avoid shock hazard or in-
jury from rotating parts. There may be more than one
disconnect switch. Turn off accessory heater power if
applicable. Electrical shock can cause personal injury
or death.
I. CLEANING
Inspect unit interior at the beginning of each heating and cool-
ing season or as operating conditions require. To inspect and
clean, the unit top must be removed.
A. Unit Top Removal
NOTE: When performing maintenance or service procedures
that require removal of the unit top, be sure to perform all of
the routine maintenance procedures that require top re-
moval, including: coil inspection and cleaning, and conden-
sate drain pan inspection and cleaning.
Only qualified service personnel should perform mainte-
nance and service procedures that require unit top removal.
Refer to the following top removal procedures:
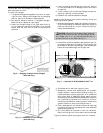
1. Remove 7 screws on unit top cover surface. Save all screws.
2. Remove 2 screws that secure unit top cover flange. Save
all screws.
3. Lift top from unit carefully. Set top on edge and ensure
that top is supported by unit side that is opposite duct
side.
When maintenance and/or service procedures are concluded,
carefully replace and secure unit top to unit, using screws re-
moved in Steps 1 and 2.
B. Repairing Refrigerant Leaks
Proceed as follows to repair a refrigerant leak and to charge
the unit.
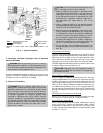
1. Locate leak and ensure that refrigerant system pres-
sure has been relieved and recovered from both high-
and low-pressure ports.
2. Repair leak following accepted practices.
NOTE: Install a filter drier whenever the system has been
opened for repair.
3. Add a small charge of nitrogen vapor to system and leak-
test unit.
4. Evacuate refrigerant system if additional leaks are not
found.
5. Charge unit with R-22 refrigerant, using a volumetric-
charging cylinder or accurate scale. Refer to unit rating
plate for required charge. Be sure to add extra refrig-
erant to compensate for internal volume of filter drier.
NOTE: See Adjusting Refrigerant Charge on page 16.
C. Condenser Coil, Evaporator Coil, and Condensate
Drain Pan
WARNING:
Be careful! Coil fins are sharp. Protect
hands with gloves when cleaning or handling coil.
Inspect the condenser coil, evaporator coil, and condensate
drain pan at least once each year. Proper inspection and clean-
ing requires the removal of the unit top. See Unit Top
Removal section above.
The coils are easily cleaned when dry; therefore, inspect and
clean the coils either before or after each cooling season.
Remove all obstructions (including weeds and shrubs) that
interfere with the airflow through the condenser coil. Straighten
bent fins with a fin comb. If coated with dirt or lint, clean the
coils with a vacuum cleaner, using a soft brush attachment.
Be careful not to bend the fins. If coated with oil or grease,
clean the coils with a mild detergent-and-water solution. Rinse
coils with clear water, using a garden hose. Be careful not to
splash water on motors, insulation, wiring, or air filter(s). For
best results, spray condenser-coil fins from inside to outside
the unit. On units with an outer and inner condenser coil, be
sure to clean between the coils. Be sure to flush all dirt and
debris from the unit base.
Inspect the drain pan and condensate drain line when
inspecting the coils. Clean the drain pan and condensate drain
by removing all foreign matter from the pan. Flush the pan
and drain tube with clear water. Do not splash water on the
insulation, motor, wiring, or air filter(s). If the drain tube is
restricted, clear it with a ‘‘plumbers snake’’ or similar probe
device. Ensure that the auxiliary drain port above the drain
tube is also clear.
II. EVAPORATOR FAN AND MOTOR
Refer to Care and Maintenance section for procedure.
III. CONDENSER FAN
CAUTION:
Keep the condenser fan free from all
obstructions to ensure proper cooling operation. Never
place articles on top of the unit. Damage to unit may
result.
1. Shut off unit power supply.
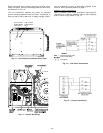
2. Remove condenser-fan assembly (grille, motor, motor cover,
and fan) by removing screws and flipping assembly onto
unit top cover.
3. Loosen fan hub setscrews.
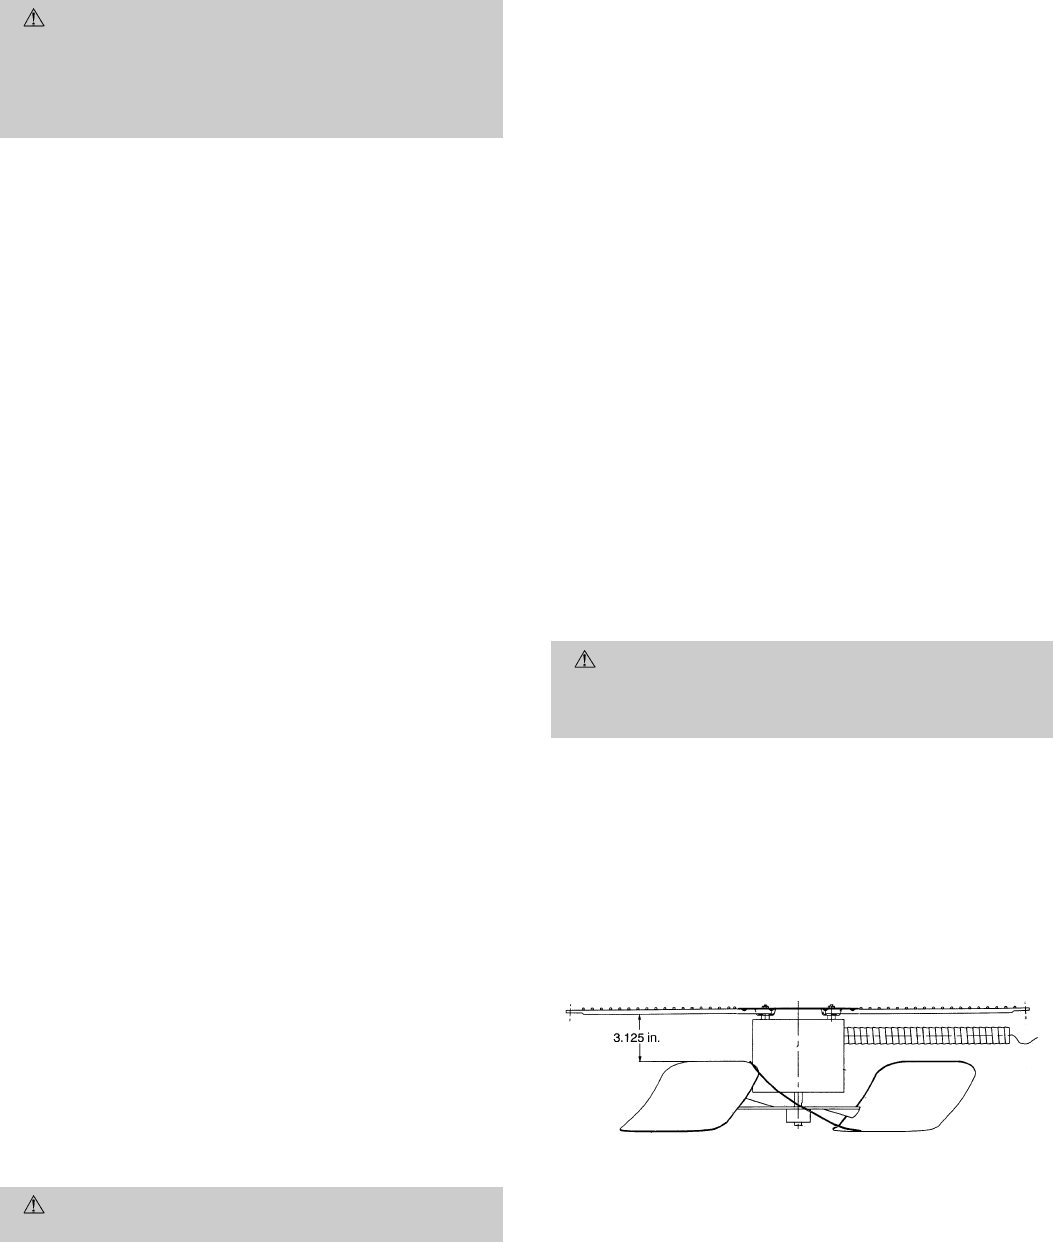
4. Adjust fan height as shown in Fig. 18.
5. Tighten setscrews.
6. Replace condenser-fan assembly.
Fig. 18 — Condenser-Fan Adjustment
—15—


