


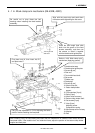
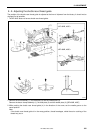

4. ASSEMBLY
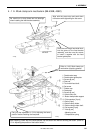
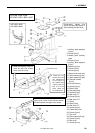
KE-434B, 435B, 436B
KE-434C, 4
35C, 436C, 484C
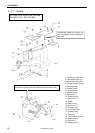
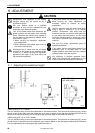
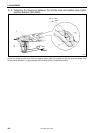
Provisionally tighten this
screw, and then fully tighten it
after installing the belt cover.
<KE-435B, 435C>
<
KE-436B, 436C>
3444Q
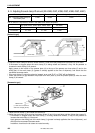
1. Auxiliary plate supports
[4 pc
s]
2. Screws [4 pcs]
3. Needle plate auxiliary
plate
4. Screws [4 pcs]
5. Auxiliary plate supports
[2 pcs]
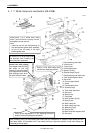
KE-430B, 430C series
98
1) Insert horizontally from the
front so that the X-feed
lever cover is on top.
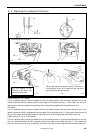
6
. Washers [4 pcs]
7. Screws [4 pcs]
X-feed lever cover
8.
Screws [4 pcs]
9. Shuttle race cover assy
10. Pl
ain washers [2 pcs]
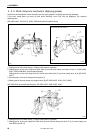
2) Loosen the four
screws and make
fine adjustments
to the height of
the needle plate
auxiliary plate so
that it is at the
same height as
the needle plate.
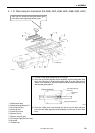
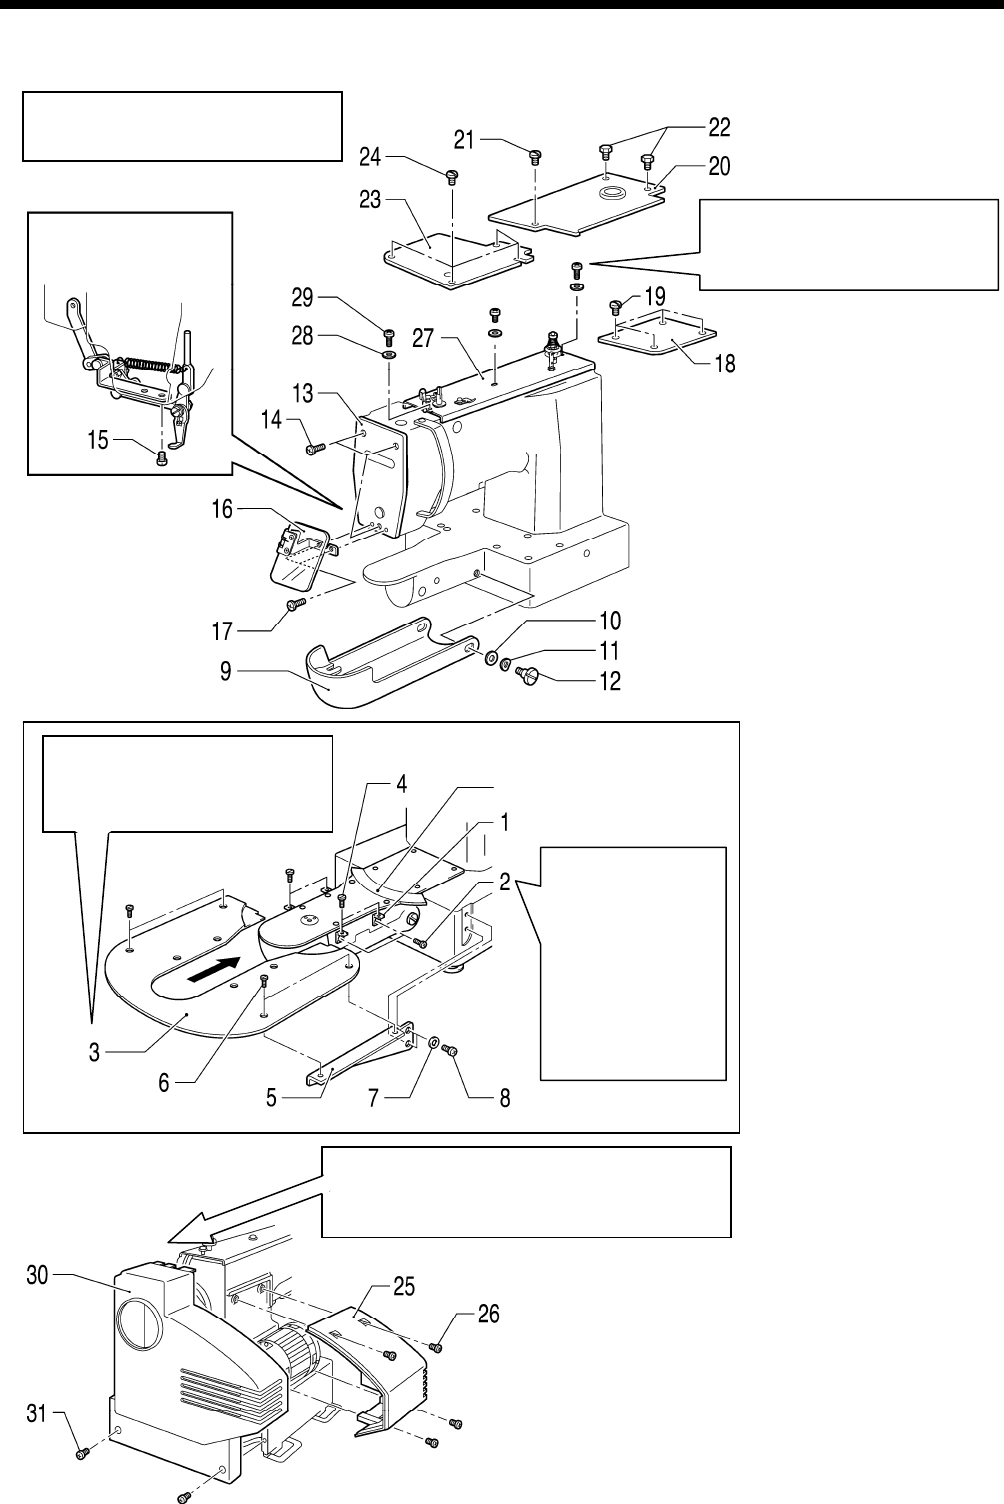
1
1. Wave washers [2 pcs]
12. Shoulder screws
[2 pcs]
13. Face plate assy
14. Screws [3 pcs]
15. Bolts [2 pcs]
16. Eye guard assy
17. Screws [2 pcs]
18. Bed cover, R
3445
Q
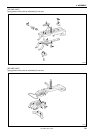
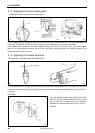
19. S
crews [4 pcs]
Insert this part of the belt cover into the
upper cover, install it with the two screws,
and then tighten the upper cover screw.
20. Be
d cover, LR
21. S
crew
22. Bolts [2 pcs]
23. Bed cover, LF
24. Screws [4 pcs]
25. Frame side cover
26. Screws [4 pcs]
27. Top cover
28. Plain washers [3 pcs]
29. Screws [3 pcs]
30. Belt cover
3446Q
31. S
crews [2 pcs]