


Express® Lavatory System SS-Series
SS-3/AST/WH97TAS Installation Instructions - For Service Only
10
5/11/04 Bradley Corporation • 215-1240 Rev. D; EN 03-813
Installation Instructions
continued . . .
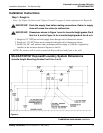
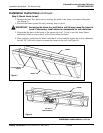
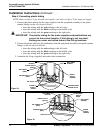
Step 5: Connecting plastic tubing
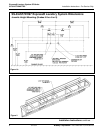
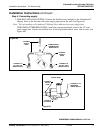
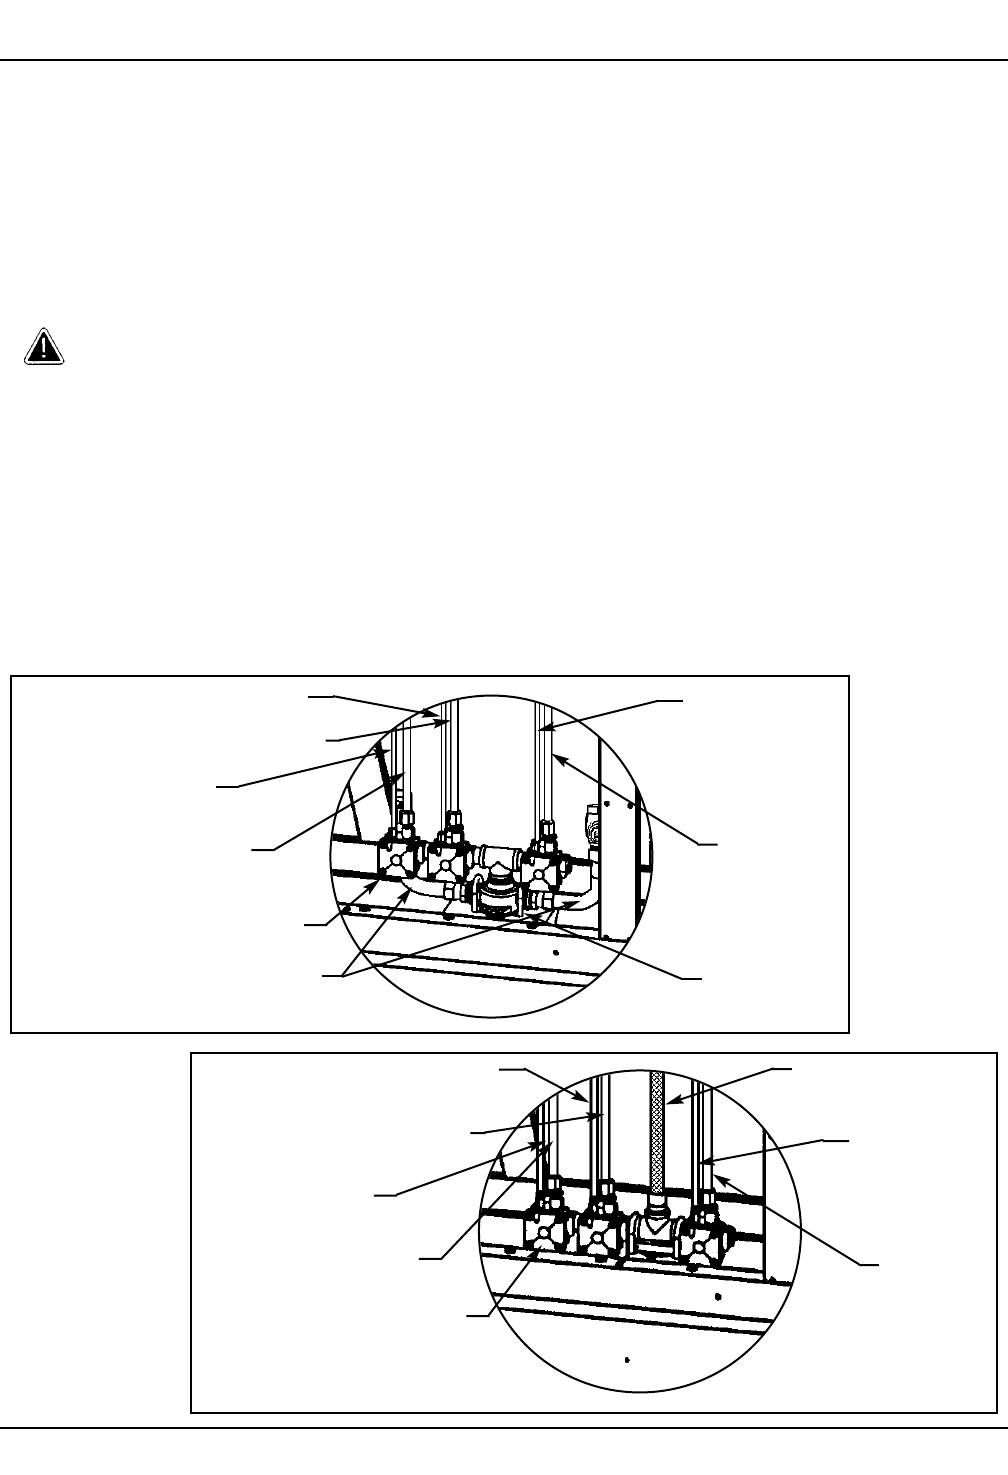
NOTE: Refer to Figure 7a for hot and cold supplies, and refer to Figure 7b for tempered supply.
1. Connect the plastic tubing for the water supplies from the sprayhead assembly to the quick-
connect fittings on the air valve as follows:
• insert the tubing with the red marking to the left valve
• insert the tubing with the black marking to the middle valve
• insert the tubing with the green marking to the right valve
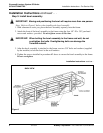
IMPORTANT: The plastic tubing for the water supplies and pushbuttons are
pre-cut to the correct lengths. If the tubing is cut too short,
kinking can occur and cause leaks at the fitting locations.
2. Connect the plastic tubing for the pushbuttons from the sprayhead assembly to the quick-connect
fittings on the air valve as follows:
• insert the tubing with the red marking to the left valve
• insert the tubing with the black marking to the middle valve
• insert the tubing with the green marking to the right valve
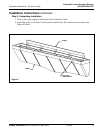
3. Assemble the P-trap (supplied) and make drain connections.
AIR TUBING
(GREEN)
AIR TUBING
(RED)
AIR TUBING
(BLACK)
Figure 7b
Figure 7a
VERNATHERM™
MIXING VALVE
FLEXIBLE
SUPPLY
HOSES
WATER SUPPLY
(BLACK)
WATER
SUPPLY
(GREEN)
AIR VALVE
WATER SUPPLY
(RED)
AIR VALVE
WATER
SUPPLY
(GREEN)
AIR TUBING
(GREEN)
AIR TUBING
(BLACK)
WATER SUPPLY
(BLACK)
WATER SUPPLY
(RED)
AIR TUBING
(RED)
FLEXIBLE
SUPPLY
HOSE