


DSDA iSCSI Disk Array Series Configuration through the Web Interface | en 11
Bosch Security Systems Installation Guide V 1 | 2008.08
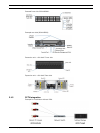
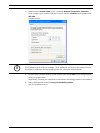
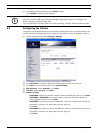
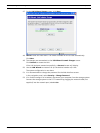
8. Click Modify next to the network interface labeled e0a and configured with IP address
10.10.10.10.
9. Enter the IP address information for the network. Change IP Address and Netmask to
the desired value. Leave Broadcast blank.
Example screen:
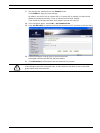
10. Set Media Type to 10/100/1000 Mbit Auto-negotiate.
Leave the Trusted option enabled.
11. Click Apply to confirm the changes. As this reconfigures the network interface you are
connected to, the page will fail to load after clicking the Apply button.
12. Reset the network settings of your computer to its original settings or settings suitable
for your CCTV network.
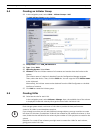
13. Reconnect to the FilerView interface using the new IP address of the storage system.
Enter http://<newIPaddress>/na_admin and log in using root as the user name and
leaving the password blank.
14. On the FilerView start page click the FilerView icon to open the administration interface
again.
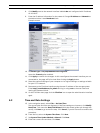
5.2 Time and Date Settings
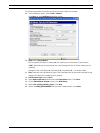
15. In the navigation panel, select Filer > Set Date/Time.
The current date and time are displayed. If the time settings are incorrect, click Modify
Date/Time. This starts the Date/Time Wizard. While the wizard guides you through the
set-up, click Next to go to the next step. Click Cancel, if you do not want to continue the
procedure.
16. From the list, select the System Time Zone. Click Next.
17. Set System Time Update Method to Manual. Click Next.
18. Enter the current time and date. Click Next.