INSPECTION AND SERVICE
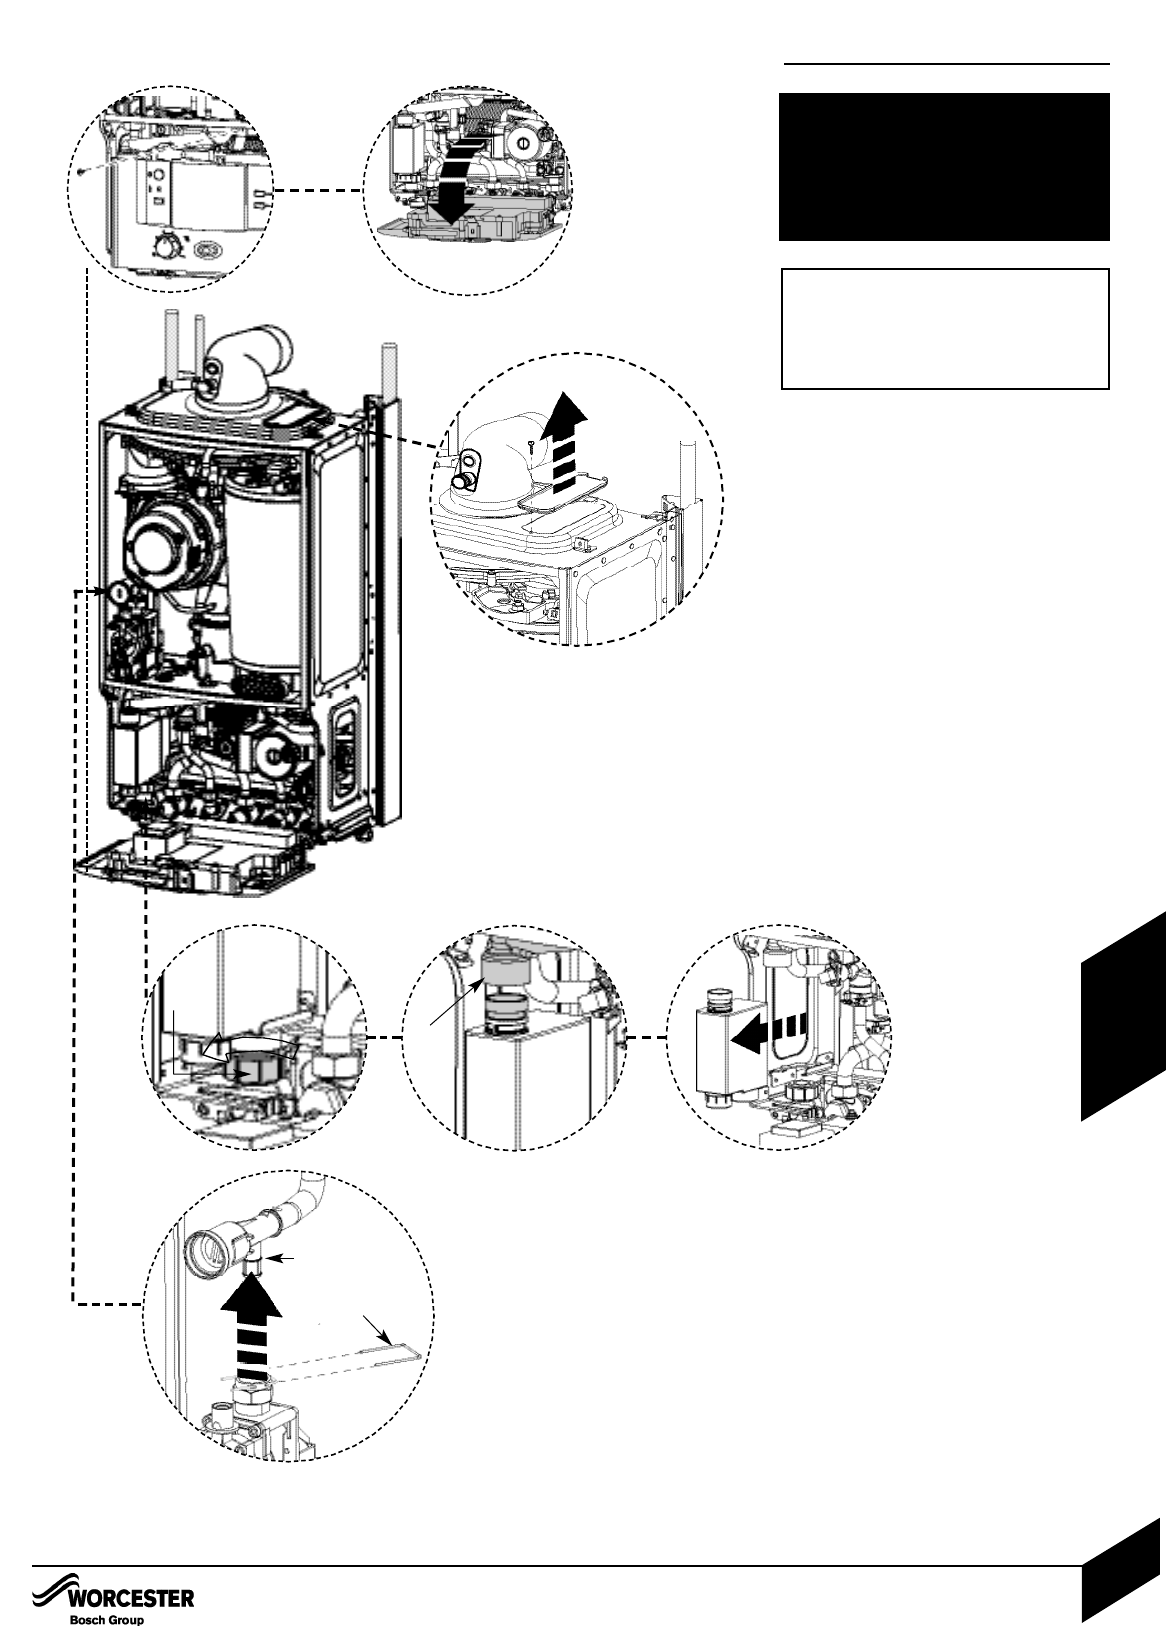
To Clean the Heat Exchanger
1 With outer case and base panel removed and
the power isolated from the appliance,
remove the cover panel (A) by removing the
retaining screw (B).
2 Remove clip (C) from gas valve outlet.
Pull gas adjustment assembly (D) free from
the plastic connection on the gas valve.
Pull gas adjustment assembly (D) forward to
clear case.
Removing Siphon
3.1 Undo plastic nut (E) on the siphon outlet.
Drop condensate tube away from siphon.
3.2 Remove hose (F).
3.3 Remove siphon
Siphon
The siphon body is transparent so contents
can be examined for any blockage.
If necessary flush with clean water.
1
A
B
2
C
D
3.3
3.2
3.1
F
E
INSPECTION AND SERVICE
INSTALLATION & SERVICING INSTRUCTIONS FOR WORCESTER GREENSTAR 24 i junior/28 i junior
8 716 107 336b (11/05)
38
SERVICING
& SPARES
COMBUSTION TESTING MUST BE CARRIED
OUT BY A COMPETENT PERSON. IT MUST
NOT BE ATTEMPTED UNLESS THE PERSON
CARRYING OUT THE COMBUSTION CHECK
IS EQUIPPED WITH A COMBUSTION
ANALYSER CONFORMING TO BS 7927 AND
IS COMPETENT IN IT’S USE.
IMPORTANT: IF THE JOINT
BETWEEN THE AIR/GAS MANIFOLD
AND THE HEAT EXCHANGER IS
DISTURBED THE SEALING GASKET
MUST BE REPLACED.


