15.4.11 Combustion Chamber Insulation
The insulation pads are manufactured from a material in
accordance with COSHH.
Remove the casing, inner casing cover and combustion chamber
cover.
Front Insulation: Unscrew the clamp at the top of the
combustion chamber cover to replace insulation.
Side Insulation: Release the clip at the bottom and slide
out the insulation.
Rear Insulation: Remove the burner blade assembly and
cover the burner injector.
Remove the fan and flue hood assembly.
Remove the side insulation pads.
Unscrew the combustion chamber rear panel and lower.
Cut the rear insulation board to remove it from the boiler.
Cut the replacement board approximately 90mm from the
top so that the joint will be behind the heat exchanger.
Slide in the top section followed by the bottom section.
Refer to Fig.37.
On replacement ensure that the fixing screw returns
through the hole in the rear bracket.
15.4.12 Heat Exchanger
Shut off the gas and electricity supplies.
Drain the appliance.
Protect the electrical components.
NOTE: Some water will remain in the heat exchanger.
Remove the casing, inner casing cover, combustion chamber
cover, heat exchanger baffles, fan and flue hood assembly,
burner blade assembly and the access plate at the left hand side
of the inner casing.
Pull off the leads from the sensor and overheat thermostats. Pull
off the clip to remove the sensor and unscrew the overheat
thermostat.
Pull out the clips securing the flow and return pipes and remove
them from the manifolds. It will be necessary to disconnect the
pipes from the system adjacent to the boiler.
Unscrew the slotted hex head screw at the base of the
combustion chamber rear panel.
Slide the panel upwards and unscrew the two screws exposed at
the right and left hand sides at the rear.
Unscrew the four hex head screws, two at each side, securing the
steel side plates to the inner casing.
Lower the combustion chamber rear panel by pulling the lower
fixing point in front of the securing bracket.
Unscrew the two M6 nuts whilst supporting the heat exchanger
(the approximate weight is: 9/14CBi - 18kg, 14/19 and
19/24CBi - 24kg).
Lift out the heat exchanger assembly complete with side plates
and manifolds. Take care as the combustion chamber rear panel
is now unattached.
Transfer the side plates to the new heat exchanger
Fit the new heat exchanger in the reverse order.
Re-commission the appliance. Refer to Section 12.
31
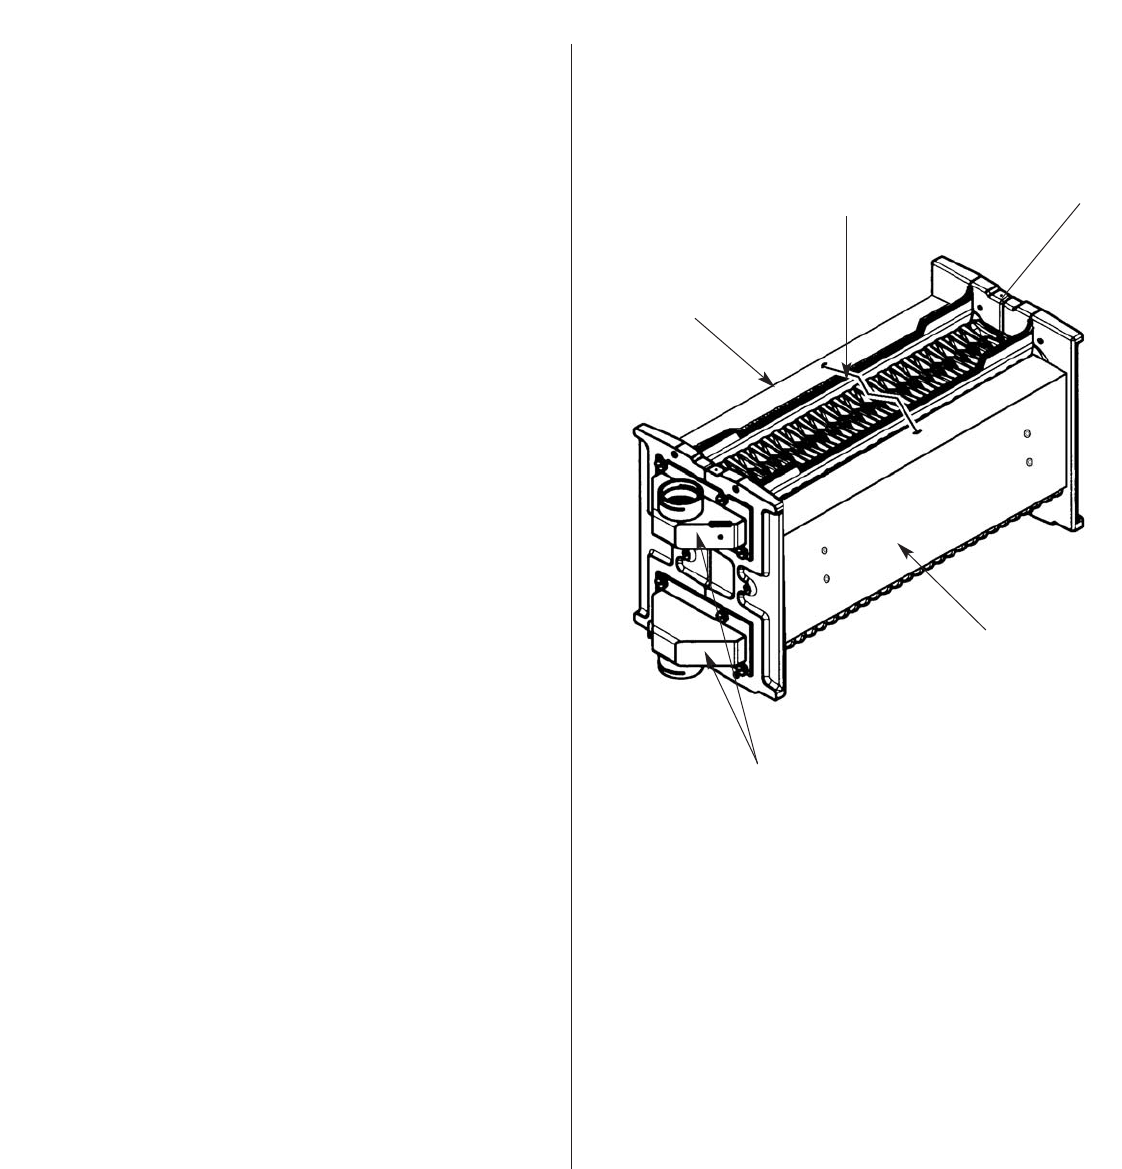
Fig. 41. Heat Exchanger Baffles in Position
on the Heat Exchanger
1
1
2
1. Heat exchanger baffle
2. Wire fixing clip
3. Heat exchanger
4. Flow and return manifolds
3
4


