11.2.9 Vertical Adaptor for Horizontal Flues
An adapter is available for an initial short section of vertical flue.
Refer to Fig. 25.
Measure and cut the flue as described in Section 11.2.7.
The first, vertical, section (equivalent to dimension X) is
measured from the top of the boiler casing. Cut the vertical
section of the extension duct to 167mm less than the measured
distance. Do not remove the socketed ends.
The minimum measured distance is 167mm.
Seal the air duct to the turret using silicone sealant.
11.2.10 Fitting of the Flue Assembly without access
to the Terminal
An internal flue fixing kit (WHS part No. 7 716 191 019) is
available from Worcester, Bosch Group.
NOTE: A larger diameter opening (Ø150mm) in the wall is
required. Refer to Table 2.
Prepare the flue assembly as described in Section 11.2.6 - 11.2.8.
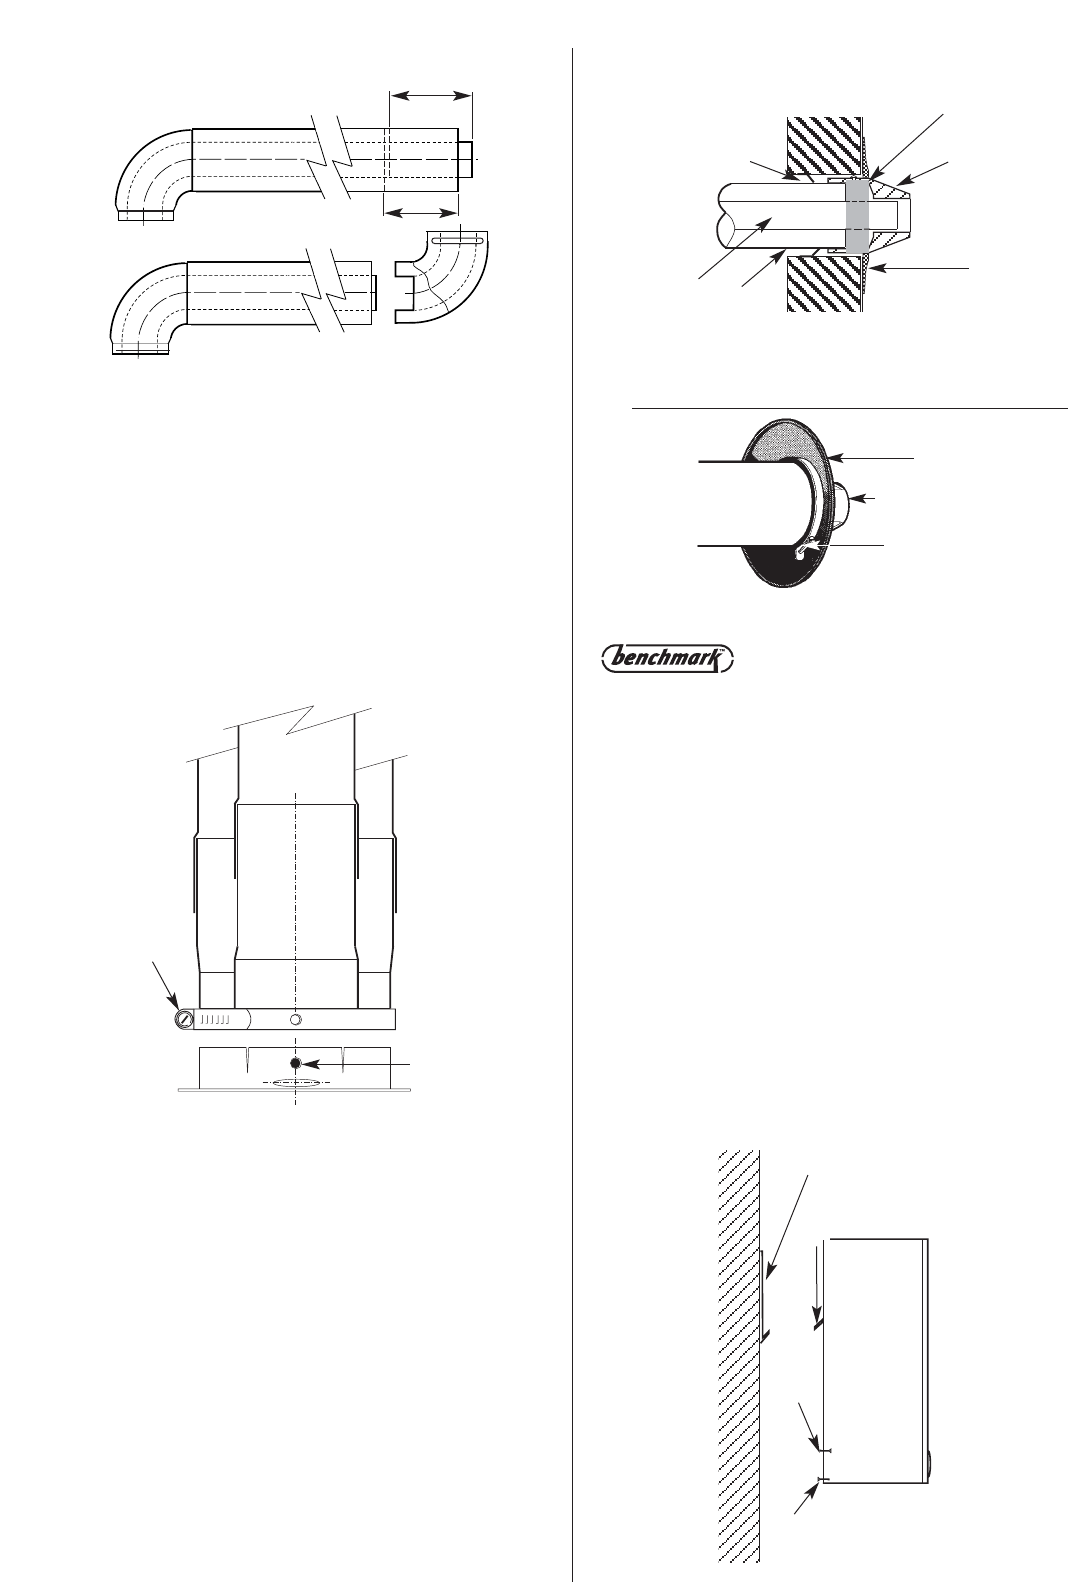
Fit the rubber sealing gasket centrally onto the terminal
assembly and tighten the clamp. Refer to Fig. 26.
Apply the plastic tape to the air duct in contact with the external
brickwork.
From inside push the assembly through the wall so that the
gasket flange is against the outer face. Refer to Fig. 26.
It may be necessary to adjust the legs of the flue centring ring.
11.2.11 Install the Boiler
IMPORTANT: Thoroughly flush the system before connecting the
boiler. Any system cleanser must be fully flushed from the system
before adding any inhibitor.
(i) Lift the boiler onto the wall mounting plate. See Fig. 27.
(ii) Level the boiler using the two levelling feet at the base of the
back panel.
(iii) Fit the bottom fixing screw (or optional security screw).
(iv) Connect the gas supply using the nut and olive supplied in the
literature pack - details of the position are shown in Fig. 3.
(v) Connect the flow and return pipes to the system. It is
important that the flow and return pipes are not fixed
near to the boiler using clips that put a strain on the
connections.
A drain point should be fitted close to the appliance if bottom
connections are made.
Always consider the possible need to disconnect and remove
the boiler.
21
120mm
100mm
Fig. 24 - Elbow to Flue Turret
Assembly.
Flue Turret
Bend
Fig.25 Vertical Adaptor
Flue Duct
Air Duct
Adaptor
Flue Spigot
Fig.26 . Terminal assembly for internal
fitting of the flue.
5
4
1
3
2
1. Flue centring ring
2. Air duct
3. Flue duct
4. Rubber sealing gasket
5. Flue Terminal
Rubber sealing
gasket
Clamping ring
Flue terminal
Tape
Fig. 27 . Fixing the appliance to the wall
mounting plate.
Appliance
1. Levelling feet (2)
2. Fixing or security
screw
3. Boiler support
4. Wall plate
4
3
2
1
Fixing screw hole
Clamping
ring


