


T
i
g
h
t
e
n
R
e
l
e
a
s
e
8
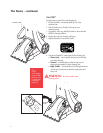
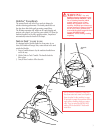
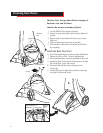
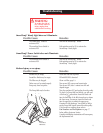
4. Set the tank down and rotate the handle forward to
unlatch the lid. Lift off and set the lid aside.
5. Find the mouth of the bladder and fill to the bottom of the
neck with hot tap water.
NOTE: Fill the Bladder with water only.
6. Replace the tank lid matching the lid and tank edges.
Handle must be in forward position to reinstall.
7. Rotate the handle to the carrying position to re-latch
the lid.
8. Replace tank in machine base, seating firmly in place.
9. Rotate handle back down to the latched position.
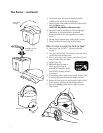
When it’s time to empty the Tank-in-Tank
™
10. Remove the Tank-in-Tank
™
– follow steps 1 and 2
on page 7.
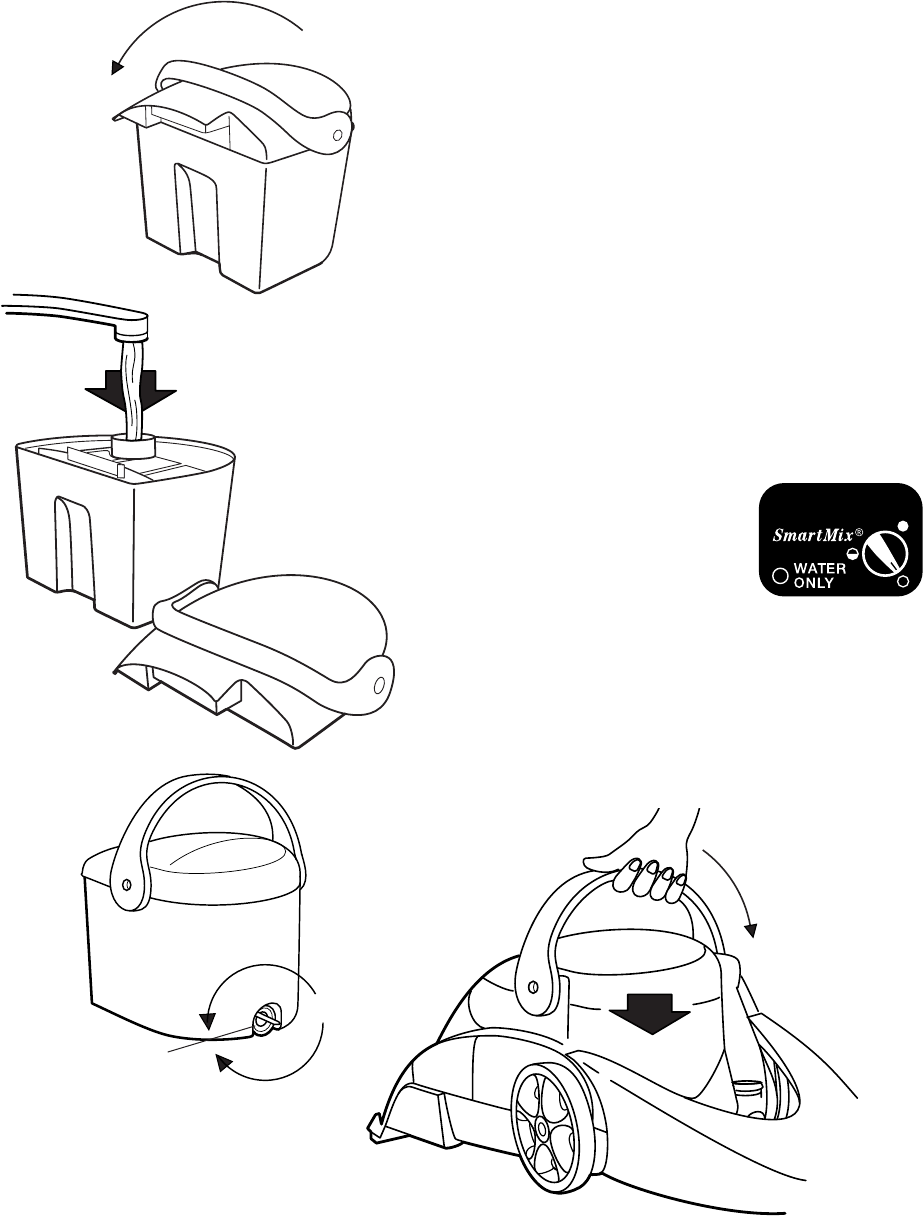
11. Carry the Tank-in-Tank,
™
like a bucket, to the sink where
you will dispose of the dirty water.
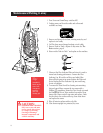
12. Place in or at edge of sink, turn the Tank Drain Cap and
remove to release the dirty water.
13. Replace Drain Cap.
14. Refill with clean tap water as
above, steps 5 through 9,
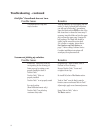
and refill the SmartMix
®
Bottle
with BISSELL cleaning solution,
as necessary.
15. If the cleaning job is complete, rinse out the Tank-in-Tank
™
by rinsing clean water between the bladder and tank.
16. Replace the Tank Drain Cap and return the Tank-in-Tank
™
to the machine, following steps 6 through 9 above.
17. Refer to the Putting it Away section, page 14, for the
final cleanup.
Rotate Handle
to Unlatch
Fill Bladder only with
clean tap water.
Latched
Tank Drain Cap
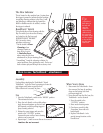
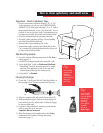
When filling bottle or
storing unit, set
dial to:
The Basics - continued