


USER MANUAL
ENGLISH
SR 1301 B 1463436000(1)2008-05 A
25
CLOSED POCKET FILTER CLEANING AND
INTEGRITY CHECK
NOTE
The polyester closed pocket fi lters are normally kept
clean by using the fi lter shaker supplied with the
machine.
If necessary, they can be cleaned externally
according to the following procedure.
When the fi ltering surfaces are worn, the fi lter must
be replaced.
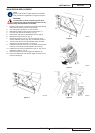
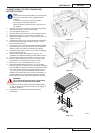
Drive the machine on a level fl oor and engage the parking 1.
brake with the pedal (75) and the lever (68).
Turn the ignition key (67) to “0”.2.
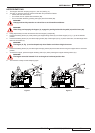
Open the hood (22) and fasten it with the support rod (36).3.
Disconnect the vacuum system motor connector (30).4.
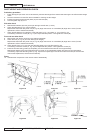
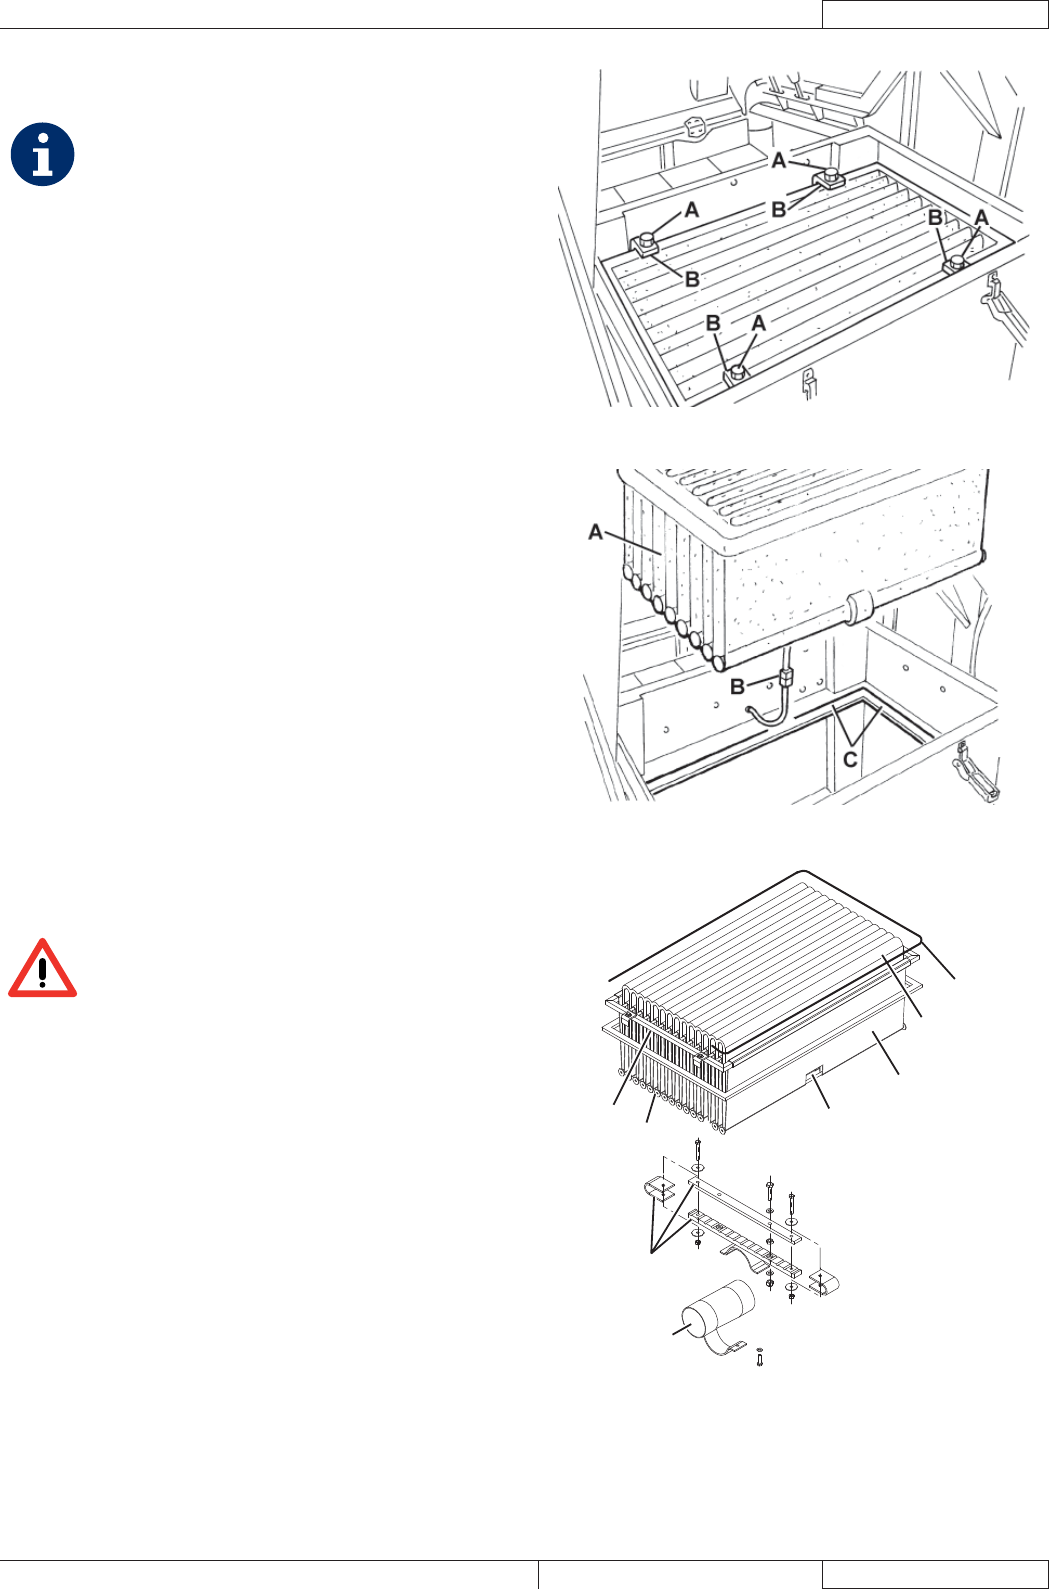
Release the fasteners (A, Fig. 12) and remove the vacuum 5.
system cover (B).
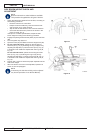
Unscrew the knobs (A, Fig. 16) and remove the brackets (B).6.
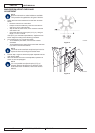
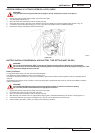
Disconnect the fi lter shaker connector (B, Fig. 17) and 7.
remove the dust fi lter (A).
In an outdoor area, and with the operator wearing suitable 8.
equipment (gloves, mask, glasses), remove the polyester
fi ltering surface, according to the following procedure.
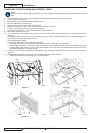
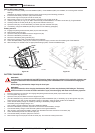
Remove the fi lter shaker motor (A, Fig. 18) by unscrewing 9.
the two mounting screws.
Open the fi lter shaker motor support unit (B, Fig. 18) 10.
completely, and release the fi ltering pocket tension rods (C).
Remove all the fi ltering pocket tension rods (D, Fig. 18).11.
Open the upper retaining cord (E, Fig. 18) of the closed 12.
pocket fi lter to remove it from the upper frame (F).
Remove the inner pocket separator (G, Fig. 18).13.
Clean the polyester fi bber surface (H, Fig. 18) from the 14.
dirty side (by using an external vacuum cleaner), spreading
it out completely or cleaning pocket by pocket. At the same
time, clean both surfaces of the pocket separator (G, Fig.
18), thus removing anything deposited on them. Check
the fi ltering surface for tears and replace it if necessary. It
is also possible to use compressed air (maximum 6 Bar),
blowing the air from the clean side towards the dirty side.
WARNING!
Do not wash the fi lter with water. The polyester
fi bber can shrink and become unusable.
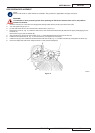
If necessary, clean the fi lter compartment rubber gasket 15.
(C, Fig. 17) along its perimeter and check it for integrity. If
necessary, replace it.
Assemble the components in the reverse order of 16.
disassembly.
P100229
Figure 16
P100230
Figure 17
B
A
E
F
D
C
H
G
P100231
Figure 18