


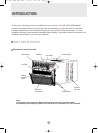


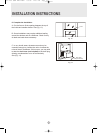
2. Preparation to Remove the
Air Conditioner Slide-Out Chassis
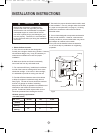
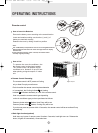
A. Remove total of (4) Philips screws securing
the chassis to the cabinet. There are (2) screws
on each side. The set of screws closest to the
front of the unit secure the front panel to the
cabinet. The set of screw closest to the rear of
the unit secure the cabinet to the chassis.
See (Fig. 1).
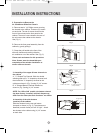
B. Remove the front panel assembly from the
cabinet by gently pulling it.
C. Grasp the pull handle at the front of the
slide-out chassis and carefully slide the
air conditioner out of the cabinet. See (Fig. 2).
Note: Screws must be reinstalled upon
completion of the window installation to
secure slide-out chassis.
Please seek assistance for this procedure.
Fig. 2
Fig. 1
Right side
Philips screws
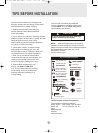
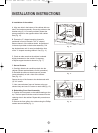
Shutter Frame
Right Shutter
1/4" screw
For 8K to 12K models
Channel
1/4" Screw
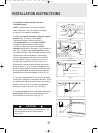
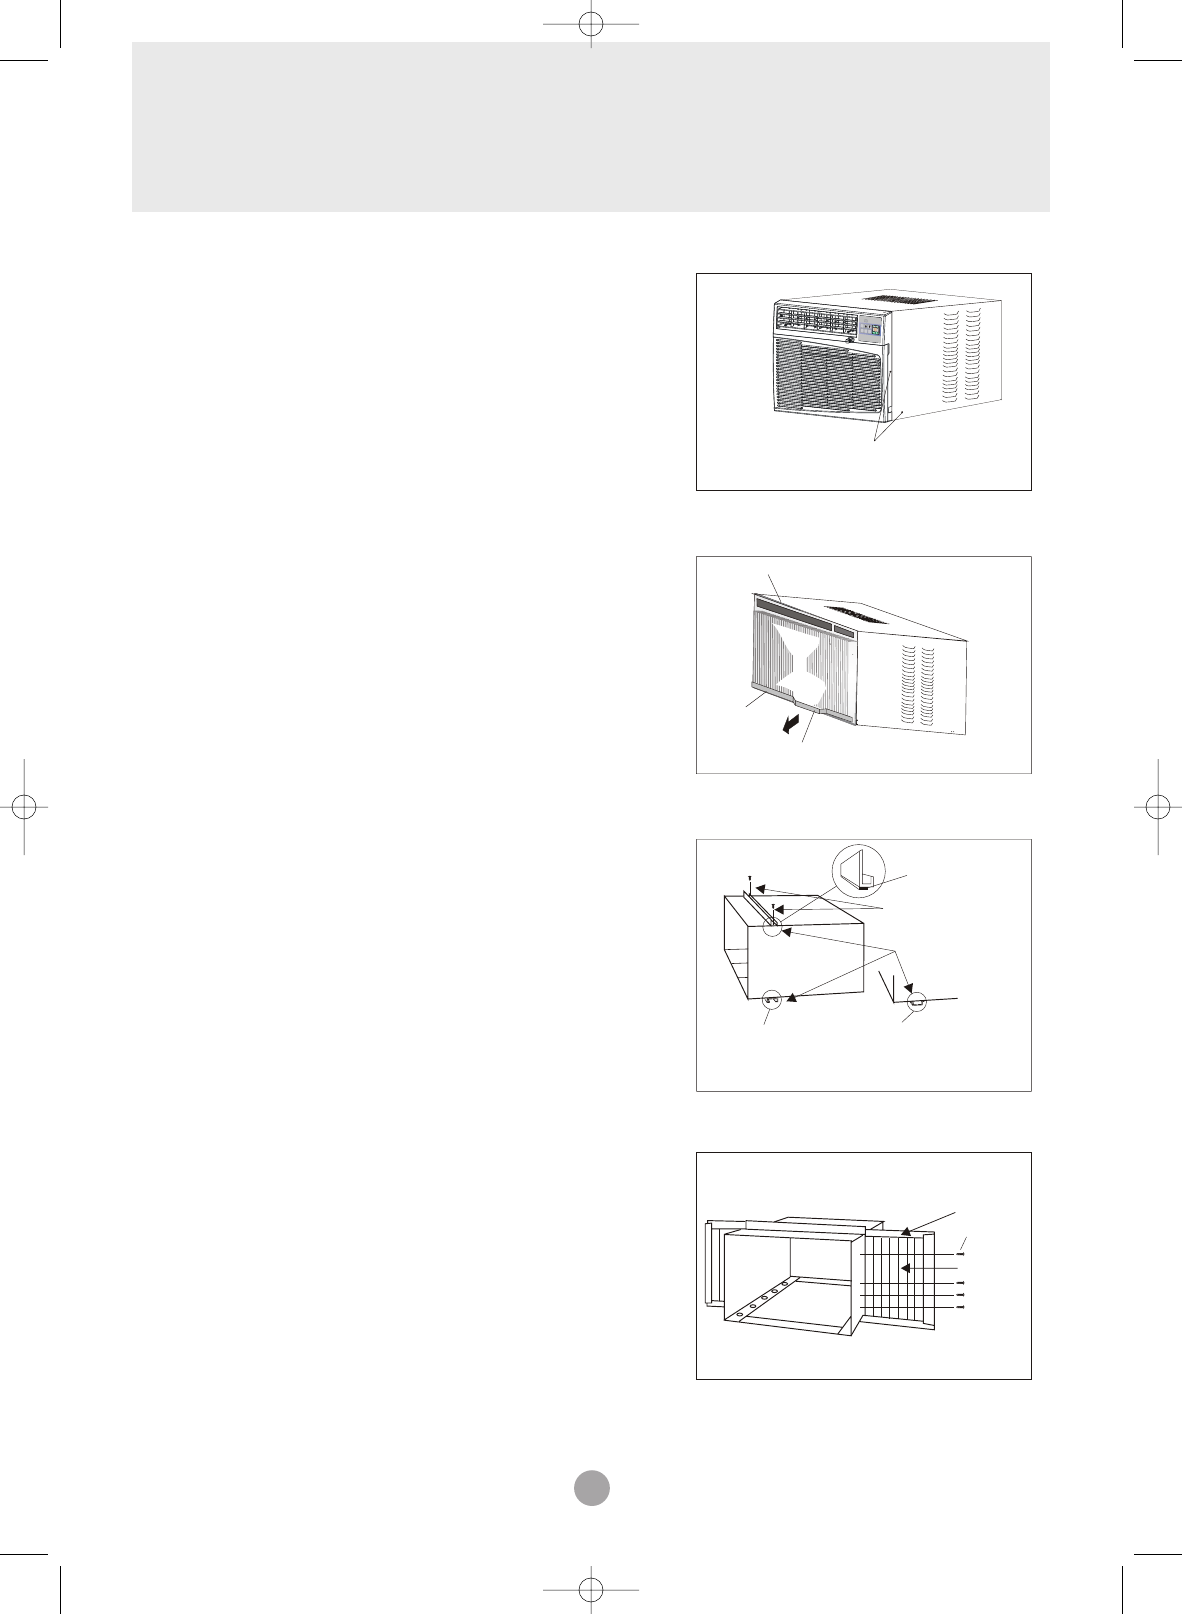
Fig. 3
Fig. 4
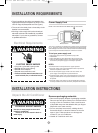
3. Assembly of the upper & lower channels to
the cabinet
A. " L" Shaped Top Channel: Stick the double
adhering seal to the " L" shaped top channel, and
then Install the "L" shaped top channel to the
cabinet as shown in (Fig. 3) using (5) 1/4" screws.
B. "n" Shaped Bottom Channel installed as
shown in (Fig. 3)using (4) 1/4" screws.
NOTE: For 15K to 24K models, the bottom channel
has been factory- installed, and their shapes may
differ from the others,but their functions are similar.
4. Assembly of the side shutters
(curtains) to the cabinet.
Slide the shutters into the top and bottom
channels as shown in (Fig. 4). The shutters are
identified (on each frame) as "left" & "right". Attach
the shutters to the cabinet using (4) 1/4" screws
on each side.
Double
Adhering seal
For 15K to 24K models
(Factory-installed).
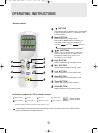
F
H
R
F
AN
S
P
E
E
D
M
O
D
E
O
F
F
O
N
/
T
I
M
E
R
A
irc
o
n
d
it
ion
e
r
WA
IT
TH
R
E
E
M
I
N
U
T
E
S
B
E
FOR
E
R
E
S
T
A
R
T
I
NG
Coil
Pull Handle
Chassis
9
INSTALLATION INSTRUCTIONS
WAC 8-24 USER MAN FINAL 3/2/05 12:13 PM Page 11