6
System Start-Up
1) Remove the prefilter cartridge from its packaging. Remove the red cap from the cartridge and moisten the o-rings with water Insert the
cartridge interconnect into the filter head. Be sure that the ears on the cartridge line up with the spaces in the head. Then, turn the cart-
ridge 1/4 turn to the right.
NOTE: Be sure to install the cartridges into the proper heads by matching the icons on the cartridge labels with the icon on the heads.
2) Repeat Step 1 for the RO Membrane.
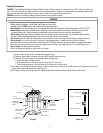
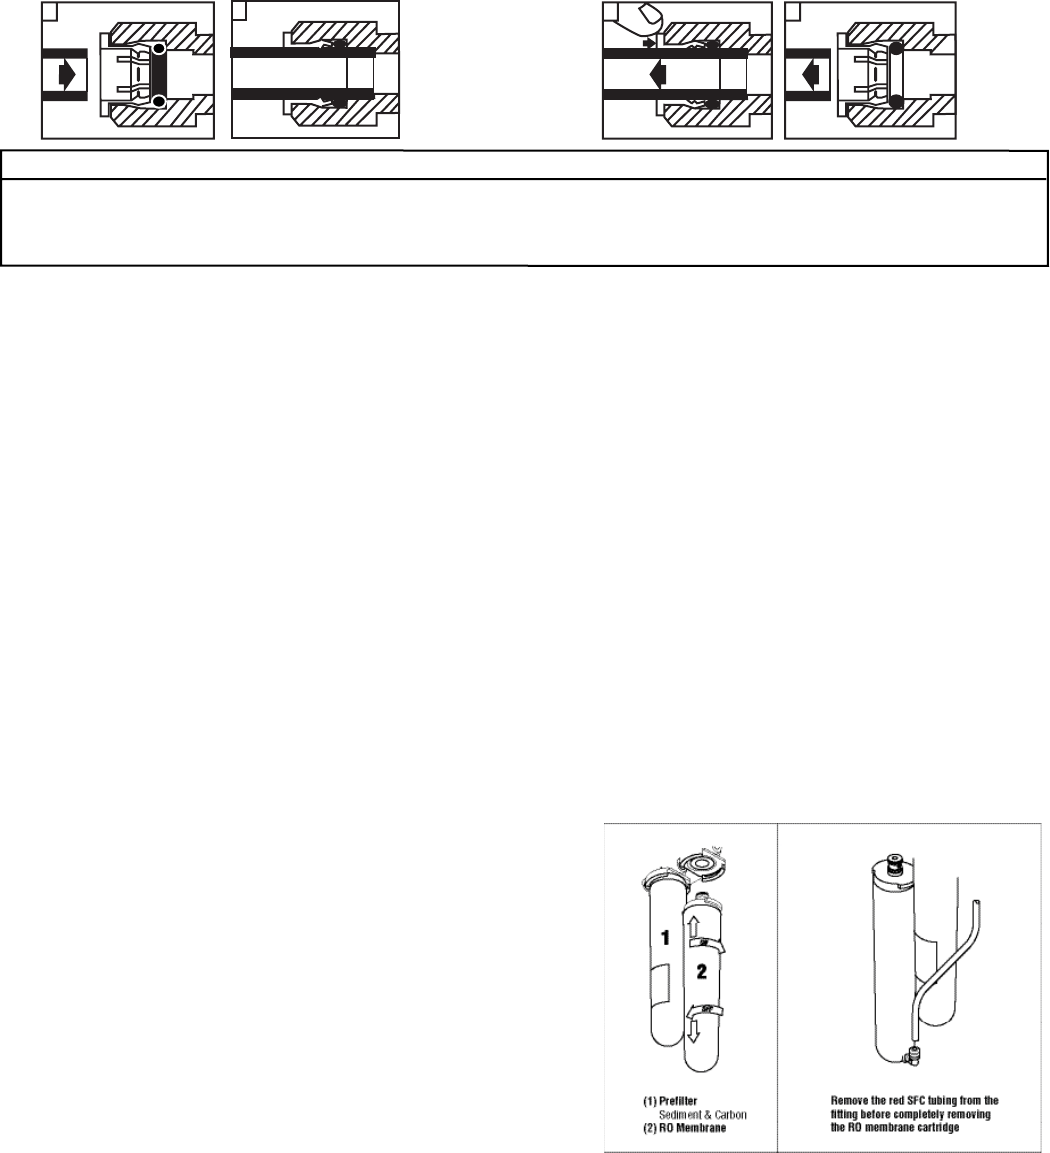
3) Remove the plug from the RO cartridge and attach the SFC tubing (red tube included with the included with the cartridge). See Figure 4.
Connect 1/4”red tube to the SFC connector. Run the red tube to the drain. CAUTION: DO NOT CUT THE RED SFC TUBE. It controls the
flow of water to drain.
4) Check that all plumbing connections are secure.
5) Open tank shut-off valve and inlet water valve. Turn on the beverage booster pump and check the system for leaks. If any leaks are
noted, turn off the water supply and/or booster pump and correct the leak before proceeding. If a leak is detected at a push-in fit-
ting, refer to Figure 3.
6) Divert the Water Sample Valve outlet to drain.Open valve and let water run through the RO system to drain for 10 minutes.
7) Close valve. NOTE: Please allow the water tank to fill (approximately 60 minutes) before using steamer.
Pre-filter Cartridge & RO Membrane Cartridge Change-out Instructions
Pre-filter Cartridge (Replace every 12 months)
1)
Close
Depressurize system.
Depressurize system.
tank shut-off and inlet valves (see Figure 2).
2)
Turn used prefilter cartridge 1/4 turn to the left. 3)
Pull down on cartridge. 4)
Discard used cartridge.5)
Remove red cap from new cartridge and moisten the o-ring with water. 6)
Insert
of new cartridge into the filter head. Be sure that
the ears on
the cartridge line up with the spaces in the head.
Turn new cartridge 1/4 turn to the right. 7)
Open tank shut-off and inlet valves (see Figure 2). 8)
9)
Check for leaks.
NOTE: Be sure to install the cartridge into the proper head by matching
the icon on the cartridge label with the icon on the head.
RO Membrane Cartridge (Replace every 24-36 months)
1) Close tank shut-off and inlet valves (see Figure 2).
2)
Turn used
RO membrane cartridge
1/4 turn to the left.
3)
Figure 4
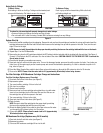
To Attach Tubing
Push tubing in as far as it will go. Tubing must be inserted past
o-ring and hit backstop. Pull tube to ensure it is secured.
To Release Tubing
Push in grey collet to release tubing. With collet held,
pull tubing straight out.
Using Push-In Fittings
Figure 3
1 1
2
2
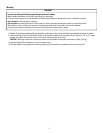
To reduce the risk associated with property damage due to water leakage:
• Ensure all tubing and fittings are secure and free of leaks.
• Do not install unit if collet is missing. Contact 3M if collets are missing from any fittings.
CAUTION
10) Divert the Water Sample Valve outlet to drain.Open valve and let water
run through the RO system to drain for 10 minutes.
11) Close valve. NOTE: Please allow the water tank to fill (approximately
60 minutes) before using steamer.


