2 - 3
Initial Setup
Step 1. Install the Main Battery Pack
The terminal is shipped with the battery packaged separate from the unit. Follow the steps below to
install the main battery. For information on how to remove the battery, see Replacing the Main Battery
Pack on page 2-6.
Before you attempt to use, charge, or change the battery in the terminal carefully read all the information under
Equipment Intended for Use in Potentially Explosive Atmospheres, starting on page 2-1 and the Guidelines
for Battery Pack Use and Disposal on page 3-13.
Ensure all components are dry prior to placing the battery in the terminal. Mating wet components may cause
damage not covered by the warranty.
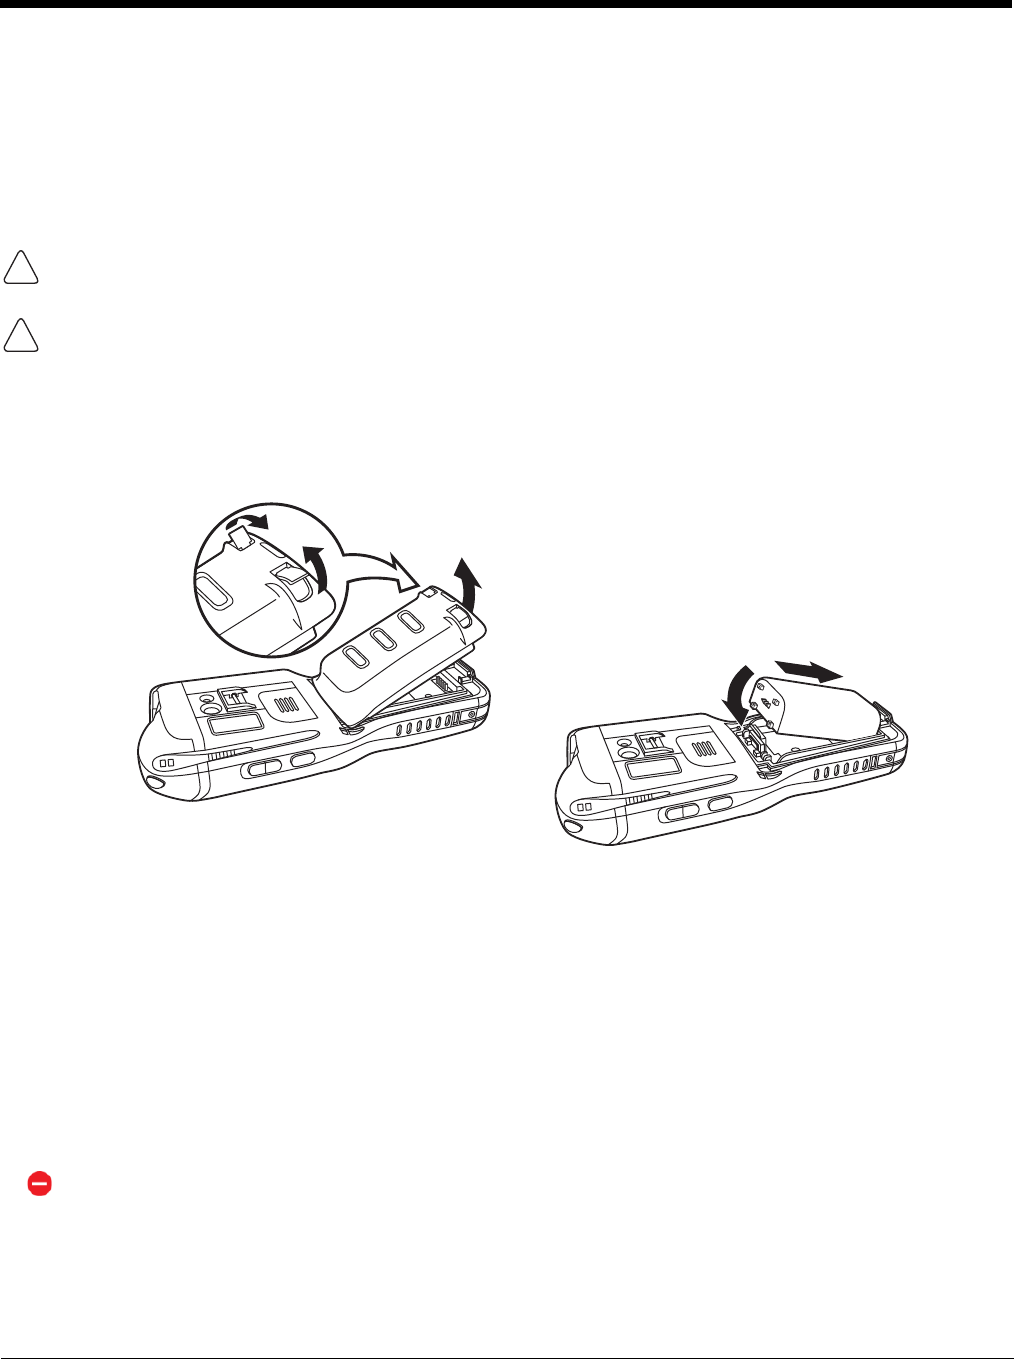
1. Release the hook securing the hand strap to the back panel of the terminal near the speaker.
2. Remove the battery door by lifting up the latches near the base of the battery door.
3. Insert the battery into the battery well.
4. Replace the battery door. Apply pressure to engage the door latch.
Note: The battery door must be installed prior to powering the unit.
5. Reattach the hand strap.
Battery Error Notification
If your terminal displays the following indicators, replace the main battery pack with a Honeywell new
Honeywell battery pack. For information on how to remove the main battery pack from the terminal, see
Replacing the Main Battery Pack on page 2-6.
• appears in the Title bar at the top of the touch screen
• The General Notification LED flashes red
• A Notification appears on the Tile bar at the bottom of the touch screen
Note: Replace only with battery pack model 99EX-BTSC (PN 99EX-BTSC-2) or 99EX-BTEC (PN 99EX-BTEC-2)
manufactured for Honeywell International Inc.
