6
AC power ssocket
Once you have completed all connections to the amplifier, plug the AC
Power Cable into an appropriate mains socket. The amplifier is now
ready for use.
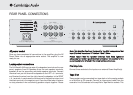
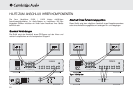
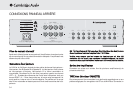
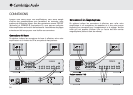
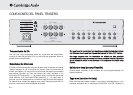
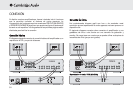
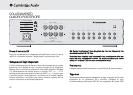
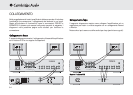
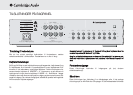
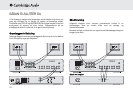
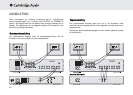
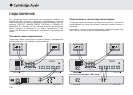
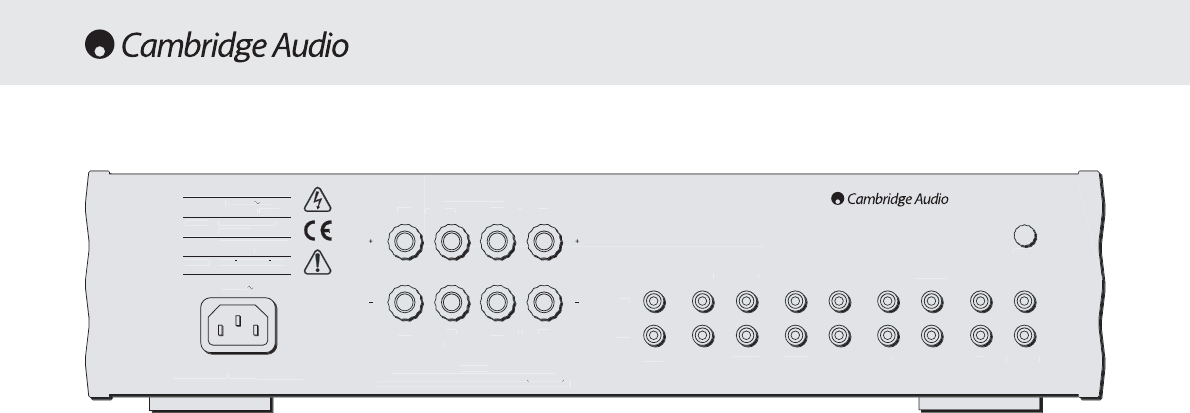
Loudspeaker cconnections
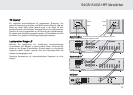
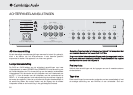
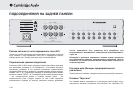
The 540A and 640A have two sets of Loudspeaker terminals on the rear
panel, speakers A and B. Speakers A are the main speaker terminals,
speakers B are the secondary switchable speaker terminals. Connect
the wires from your left channel loudspeaker to the LEFT + & - terminals,
and likewise the wires from the right channel loudspeaker to the RIGHT
+ & - terminals. In each case the red terminal is the positive output, and
the black terminal is the negative input. Care should be taken to ensure
no stray strands of wire are shorting speaker outputs together. Please
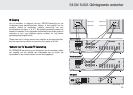
Note: TThis aamplifier hhas bbeen ddesigned ffor uuse wwith lloudspeakers tthat
have aa nnominal iimpedance oof bbe
tween 44 aand 88 oohms.
Please eensure tthat tthe sspeaker tterminals hhave bbeen ttightened
adequately tto pprovide a
a ggood eelectrical cconnection. IIt iis ppossible ffor tthe
sound qquality tto bbe aaffected iif tthe sscrew tterminals aare lloose.
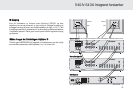
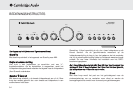
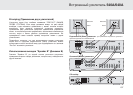
Pre aamp oouts
Connect these sockets to the inputs on an external Power Amplifier(s).
Tape mmon
These sockets can be connected to a tape deck or to the analog sockets
on a MiniDisc or CD recorder. Connect an interconnect cable from the
recorder's Line Out sockets to the amplifier's Tape Monitor sockets. This