26
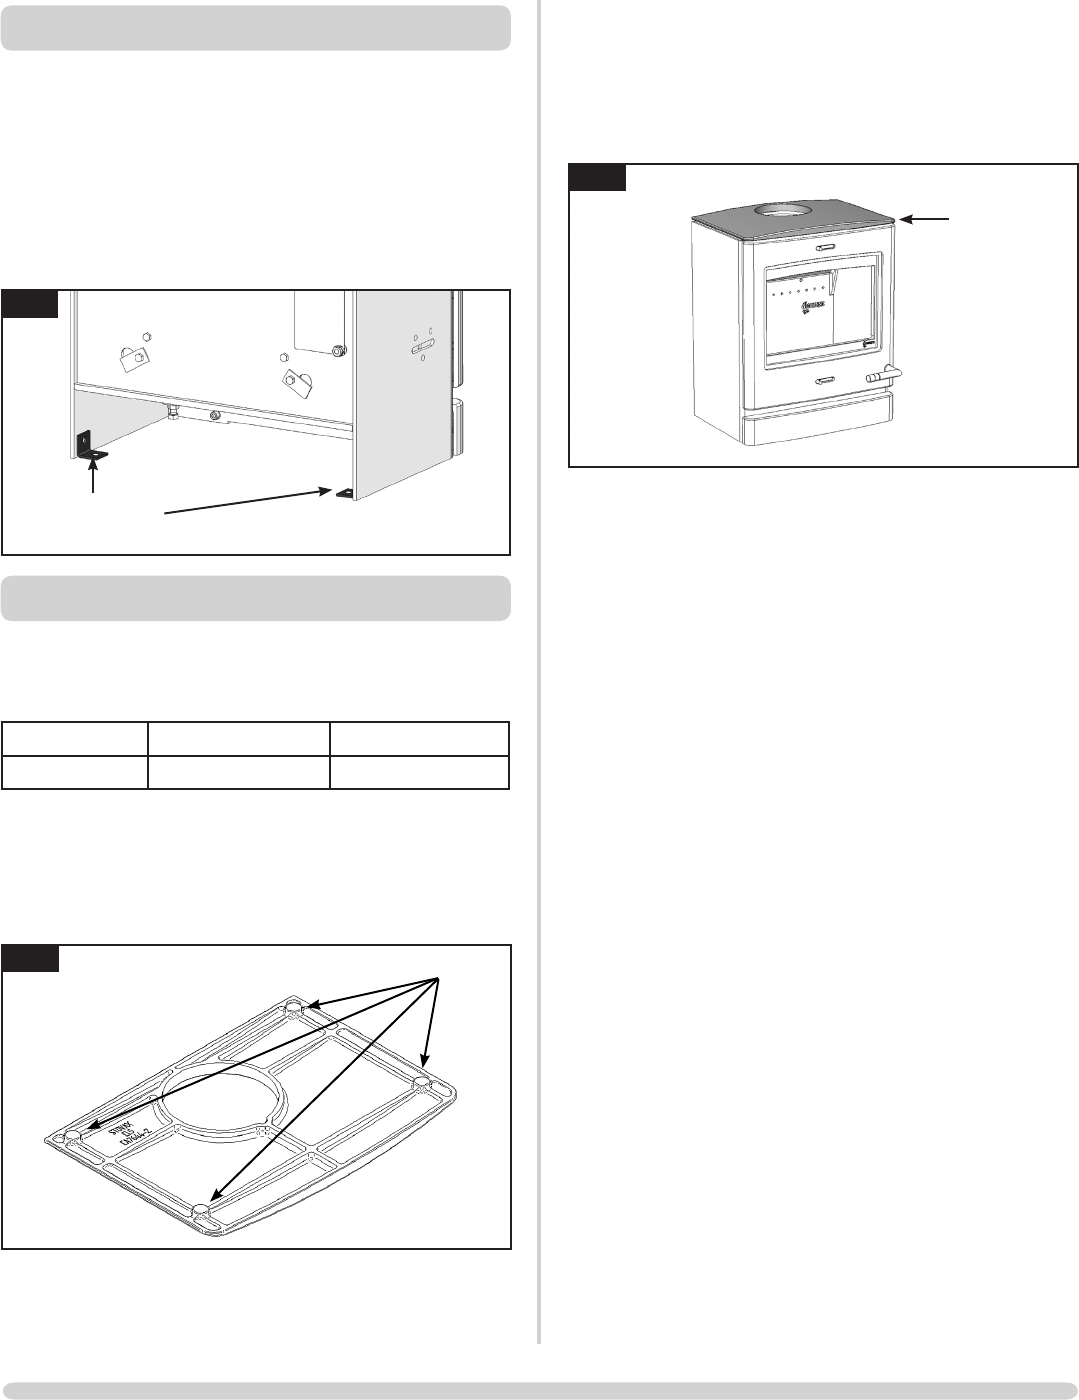
6.2 Place the cast top plate feet down on top of the appliance.
—Ensure the cast top is flush with the front and sides of the
appliance.
—For the top flue version, position the cutout over the flue
ring.
14
PR8744
Line up edges
of cast top
plate with the
appliance
5. HEARTH FIXING
5.1 If the appliance is to be fixed to the hearth then use the
hearth mount locking tabs shown in Diagram 12.
—Position the appliance where required on the hearth
and mark the location of the two fixing holes in
the hearth mounts.
—Drill the required sized holes into the hearth.
—Use suitable fasteners to fix in place.
12
PR8755
Fixing holes in
hearth mounts
6. CAST TOP
This appliance can be fitted with an optional cast top plate.
The type of plate will depend on whether the appliance is
installed with a top* or rear flue exit.
Top Flue Rear Flue
Yeoman CL8 yM-CL8Ct yM-CL8Ctr
* The cast top must be fitted at the same time as the flue
connection (see Installation Instructions, Sections 1 & 6).
6.1 The cast top plate has 4 cast feet on the bottom to space it
off the top of the appliance by 6mm and allow the door to
open freely.
13
PR8756
Cast feet
INSTALLATION INSTRUCTIONS


