11
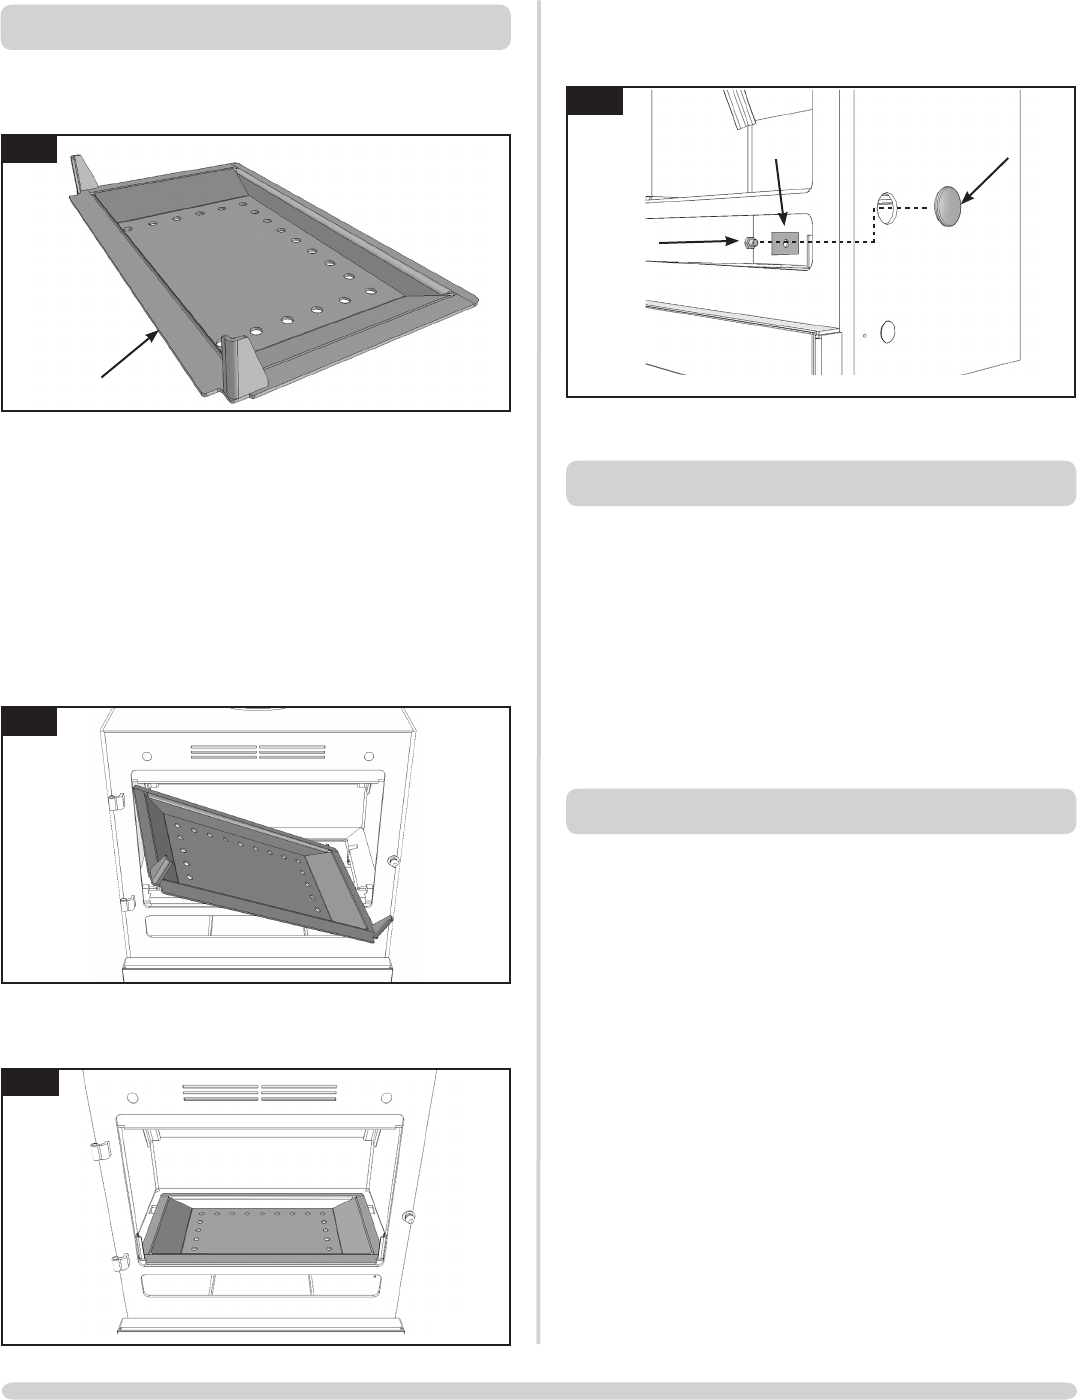
—Fit the plug supplied into the hole where the riddling
mechanism is normally located and secure with
bolt and clamp (also supplied, see Diagram 15).
15
PR8865
Plug
Clamp
Bolt
—Replace the log bar.
9. EXTENDED BURNING
9.1 It is possible to get the appliance to burn for extended
periods of time. In order to do this:
—De-ash prior to final refuelling.
—Set air controls to low combustion settings.
This will gradually blacken the glass but it will clear when
operated at a high temperature for a short period.
—Use smokeless fuel or small, thick logs.
10. OVER-FIRING
10.1 Do not over-fill with fuel or run at high temperatures for
long periods or over-firing can occur. If the flue pipe, flue
collar or top plate glow red the appliance is over-firing.
Close the air controls to reduce the temperature.
10.2 Over-firing can cause permanent damage to the
appliance.
8. WOOD BURNING TRAY
8.1 In order to burn wood continuously in this appliance a
Wood Burning Tray should be fitted (see Diagram 12).
12
PR8862
Front edge
8.2 Remove the multi-fuel grate from the appliance (see
Installation Instructions, Section 5).
8.2 To fit the Wood Burning Tray:
—Remove the log bar.
—Hold the tray flat with the front edge pointing forwards
(see Diagram 12).
—Tilt diagonally and insert through the front of the stove
(see Diagram 13).
13
PR8863
—Place tray flat on the fixings on the firebed (see
Diagram 14).
14
PR8864
USER INSTRUCTIONS


