10
PROGRAMMING
Wired Remote Temperature Sensing
One remote temperature sensor can be installed indoor or
outdoor and connected to the thermostat by a maximum
cable length of 100 meters (300 ft). Three terminals, +, S & -
are provided on the terminal block to connect to the White-
Rodgers standard wired remote sensor. This sensor will be
read by the thermostat only when 24VAC is present.
When used as indoor sensor, the readings can be weighted
with the local sensor for specific program periods. User can
enable or disable the remote sensor in the installer configu-
ration mode and also the outdoor temperature can be
selected to show on the display.
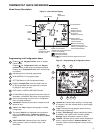
Once in the installer configuration mode, momentarily press
the
or touch key until display indicates Remote (at the
top left of the LCD) and OFF (default – in clock digits).
Pressing
or touch key will toggle the operation and
display from Remote OFF to Remote On.
When Remote On is selected, press key for the display to
indicate Remote In (for indoor remote).
The
or keys will toggle the operation and display from
Remote In to Outdoor Remote.
When any remote is selected the temperature will display in
the clock digits for one second alternating with the current
time for three seconds when in Run Schedule mode.
Outdoor Remote will indicate at the top left of display for
outdoor remote reading.
Only Remote will show at top left for indoor remote reading.
(
o
F or
o
C will not indicate with remote temperature readings).
Sensing Range:
Outdoor temperature range is -40 to 140
o
F
Indoor temperature range is 32
o
F to 99
o
F
Weight of Remote Reading:
When in view schedule mode the weight of the indoor remote
sensor will be shown in the left actual temperature digits
designated as A2 (default for average weight), H4 (high
weight) or L1 (low weight). The period (Morning, Day,
Evening, Night) will also be shown to the right of the weight
value in the actual temperature digits.
When in view schedule mode, press
and keys at the
the same time to sequence the indoor remote temperature
sensor weight from A2 to H4 to L1 and back to A2 for each of
the program period times for each day. (The H4 weight is
twice the weight of A2 and A2 is twice the weight of L1).
When Remote In is selected (with Remote selected to On),
press
key for the display to indicate the status of the local
sensor LS On (default for thermostat local sensor opera-
tional). The and keys will toggle the function and
display from LS (shown in actual temperature digits) and On
(shown in clock digits) to LS OFF to designate the local
sensor is disabled.
The local sensor may be disabled only if the indoor remote
sensor is enabled and functional.
If the indoor remote sensor is disabled or not functional, the
local sensor will automatically enable and display in the run
schedule mode.
The actual temperature displayed in the run mode is the
mathematical weighted sum of the two temperature sensors
– local and indoor remote.
(Outdoor remote sensor is not used for this computation).
If the remote sensor is absent or not enabled then the actual
temperature will be as measured by the local sensor.
Dual Fuel Temperature Set Point
The Thermostat can monitor outside temperature through an
outdoor remote sensor if installed and switch to gas heat and
inhibit the compressor when in heat pump mode and outside
temperature is below a user selectable value. This tempera-
ture is called the dual fuel temperature set point. This
eliminates the need for a fossil fuel kit.
For this feature to be functional the following conditions are
to be met:
1. The thermostat must be in heat pump mode;
2. The outdoor temperature sensor must be enabled and
operational.
Once in the installer configuration mode, momentarily press
or touch screen key until the display indicates dF (for
dual fuel) in the actual temperature digits and 5 (default) in
clock digits.
Pressing the
or touch keys will increment the dual fuel
temperature setpoint from 5 to 50 (default unit is Fahrenheit).
When the dual fuel temperature setpoint is any value above
5
o
F this feature is enabled. If the actual outdoor temperature
is lower than this temperature setpoint the heat pump will be
inhibited. If the balance point temperature setpoint is 5
o
F the
feature is disabled.
When the dual fuel feature is enabled, the shut down of the
compressor stage(s) are delayed a programmable time with
a default of 60 seconds after the auxiliary stage is energized
to minimize the time that the system may blow cooler air.
Only when the dual fuel feature is enabled and the
is
pressed after the dual fuel feature dF is selected, the display
will indicate Cd (for compressor delay) in actual temperature
digits and 60 (default) in clock digits.
Pressing the
or touch keys will increment the compres-
sor delay time to 99 seconds or decrement down to 0
second.
If the
or touch keys are held depressed, the setpoint
will increment or decrement one degree at the rate of one
degree every one half second for the first three seconds and
thereafter at double the speed.


