13
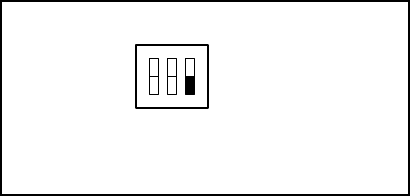
switch to the OFF position (see figure be-
low). Leave the battery out of the thermostat
for at least two minutes, to allow the ther-
mostat to reset itself. See AUTOMATIC
CHANGEOVER to determine proper posi-
tions of Group B option switches #1 and #2.
EMR (ON)
Switch #1 (see AUTOMATIC CHANGEOVER)
Switch #2 (see AUTOMATIC CHANGEOVER)
Switch #3 OFF
• AUTOMATIC CHANGEOVER — If you have
a heating/cooling system, you can set the
thermostat to automatically switch the sys-
tem from heating to cooling as needed. (If
you have a heating only system, Group B
option switch #1 should be OFF and option
switch #2 should be ON.) To enable auto-
matic changeover, you must move Group B
option switch #1 to the ON position and
switch #2 to the OFF position. Turn off 24
VAC power to the thermostat. Then remove
the thermostat body from the wall. Check
the position of Group B option switches #1
and #2 (the first two switches on the left). If
they are in the correct positions, simply put
the thermostat back on the wall and restore
24 VAC power. If the switches are not cor-
rectly positioned, remove the battery, then
use a pencil or small screwdriver to move
the switches to the correct positions (see
figure on next page). Leave the battery out
of the thermostat for at least two minutes,
to allow the thermostat to reset itself. Re-
place the battery, reprogram the thermo-
ON
123
Group B
Option
Switches


