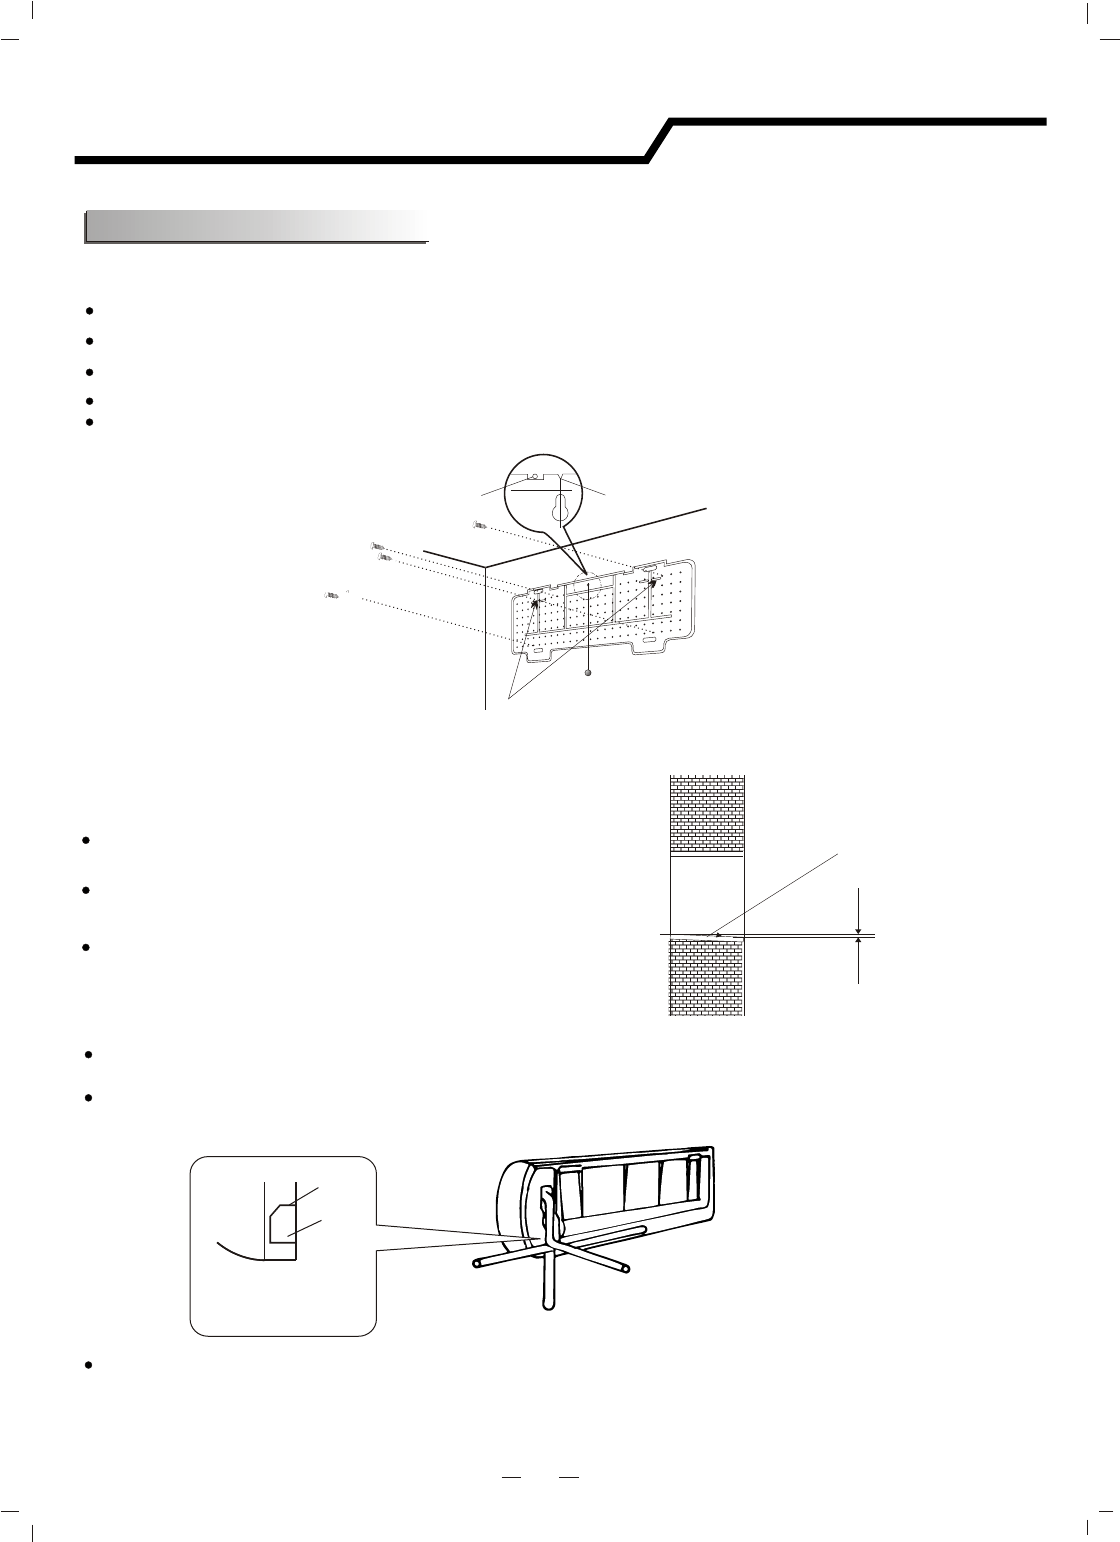
Piping direction
1
2
3
4
trough
Note: When installing the pipe at the directions
1,2 or 4, saw the corresponding unloading piece
off the indoor unit base.
Unloading
piece
Saw the unloading piece
off along the trough
Put the piping (liquid and gas pipe) and cables through the wall hole from outside or put them through
from inside after indoor piping and cables connection complete so as to connect to outdoor unit.
Decide whether saw the unloading piece off in accordance with the piping direction.(as shown below)
3. Indoor Unit Piping Installation
17
Installation instructions
Note: The shape of your mounting plate may be different from the one above, but installation method is similar.
I
nd
o
o
r
Outdoor
Wall hole sleeve
( hard polythene tube
prepared by user)
5mm
(tilt downward)
Install a sleeve through the wall hole to keep the wall
tidy and clean.
Drill a hole on the wall. The hole should tilt a little
downward toward outside.
Decide the position of hole for piping according to the
location of mounting plate.
2. Drill a Hole for Piping
. Keep the mounting plate horizontally with a horizontal ruler or dropping line.
Drill holes of 32mm in depth on the wall for fixing the plate.
Insert the plastic plugs to the hole, fix the mounting plate with tapping screws.
Inspect if the mounting plate is well fixed. Then drill a hole for piping.
1. Installing the Mounting Plate
Decide an installing location for the mounting plate according to the indoor unit location and piping direction.
Dropping line
holes for fixing
Mounting plate
Hook the line here
Line drops from here
Indoor unit installation
After connecting piping as required, install the drain hose. Then connect the power cords. After connecting,
wrap the piping, cords and drain hose together with thermal insulation materials.


