12
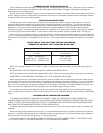
GENERAL INSTRUCTION
Gas burners require the services of an experienced technician for proper setting and adjustment. If the burner does not
appear to be operating properly, DO NOT ATTEMPT TO ADJUST THE BURNER YOURSELF, but call in a competent
serviceman.
A homeowner should be able to check several possible causes of shutdown before calling in a serviceman. The following
check list may eliminate the need for a service call or at least provide information for the serviceman.
1. Check thermostat. Make sure that it is set at the desired room temperature. If the thermostat is damaged or loose on the
wall, have it replaced or repaired.
2. Check fuses in service box for the burner circuit. Replaceable type fuses should not be loose in the socket. If a fuse is
blown out or if in doubt, replace with the same size and type. If circuit breaker are in the service box, check position of
indicator. If tripped, reset.
3. Check on-off switch for the burner circuit, it may have been accidentally turned off.
4. With the thermostat set 10 degrees above room temperature, the burner should start automatically. If it does not start,
check pilot. If no flame is visible, relight pilot following lighting instructions.
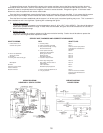
It is advisable, periodically, to visually inspect the burner. Check air inlet blower to make sure it is not clogged or
blocked. Check air shutter to make sure that it has not been tampered with, make sure that it is in the same position as
when final adjustments were made. Check blower wheel to see if it is dirty or full of lint. Open observation door and
check pilot flame. If the flame does not appear normal or if in doubt, call a serviceman.
The areas around the conversion burner should be kept clear and free of combustible materials, gasoline and other
flammable vapors and liquids.
The flow of combustion and ventilating air to the burner must not be blocked or obstructed in any manner.
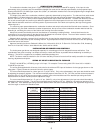
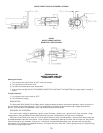
CLEANING OF BURNERS: Remove the burner from the appliance and visually inspect the blast tube for any deterioration.
On burners equipped with standing pilot or intermittent ignition, inspect pilot burner for dust or corrosion and clean if necessary.
Check pilots, thermo-couples, electrodes, etc. with illustrations in the owner’s manual for proper locations.
Check flame spreaders if applicable for any deterioration and replace if necessary.
Remove corrugated flame ring from the end of the venturi and clean. Visually inspect the inside of the venturi for any
excessive rust or corrosion and clean if necessary. Replace corrugated flame ring and reinstall burner.
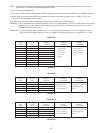
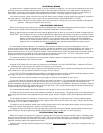
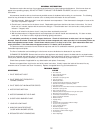
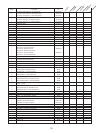
TROUBLE CHART
SYMPTOMS CAUSE
1. PILOT DOES NOT LIGHT
2. PILOT GOES OUT FREQUENTLY
DURING STANDBY.
3. PILOT GOES OUT WHEN MOTOR STARTS.
4. MOTOR DOES NOT RUN.
5. MOTOR RUNNING BUT NO FLAME.
6. SHORT NOISY BURNER FLAME.
7. LONG YELLOW FLAME.
8. MAIN GAS VALVE DOES NOT
CLOSE WHEN BLOWER STOPS.
9. REGULATOR VENT LEAKING GAS.
a. Air in Gas Line.
b. High or low gas pressure.
c. Blocked pilot orifice.
a. Restriction in the pilot gas line.
b. Low gas pressure.
c. Blocked pilot orifice.
d. Loose thermocouple connection on 100% shut off.
e. Defective thermocouple or pilot safety switch.
f. Poor draft condition.
g. Draft tube set into or flush with inner wall of combustion chamber.
a. Restriction in pilot gas line.
b. High or low gas pressure.
c. Excessive pressure drop when the main gas valve opens.
a. Burned out fuse or current off.
b. Thermostat or limit defective or improperly set.
c. Relay or transformer defective.
d. Motor burned out.
e. Improper wiring.
a. Pilot out.
b. Thermocouple not generating sufficient voltage.
c. Very low or no gas pressure.
d. Vent in regulator plugged.
e. Defective regulator.
a. Air shutter not open enough.
b. Air openings or blower wheel clogged.
c. Too much input.
a. Hole in diaphragm.


