


Electrical (Cont.)
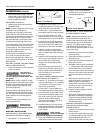
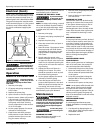
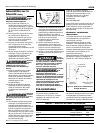
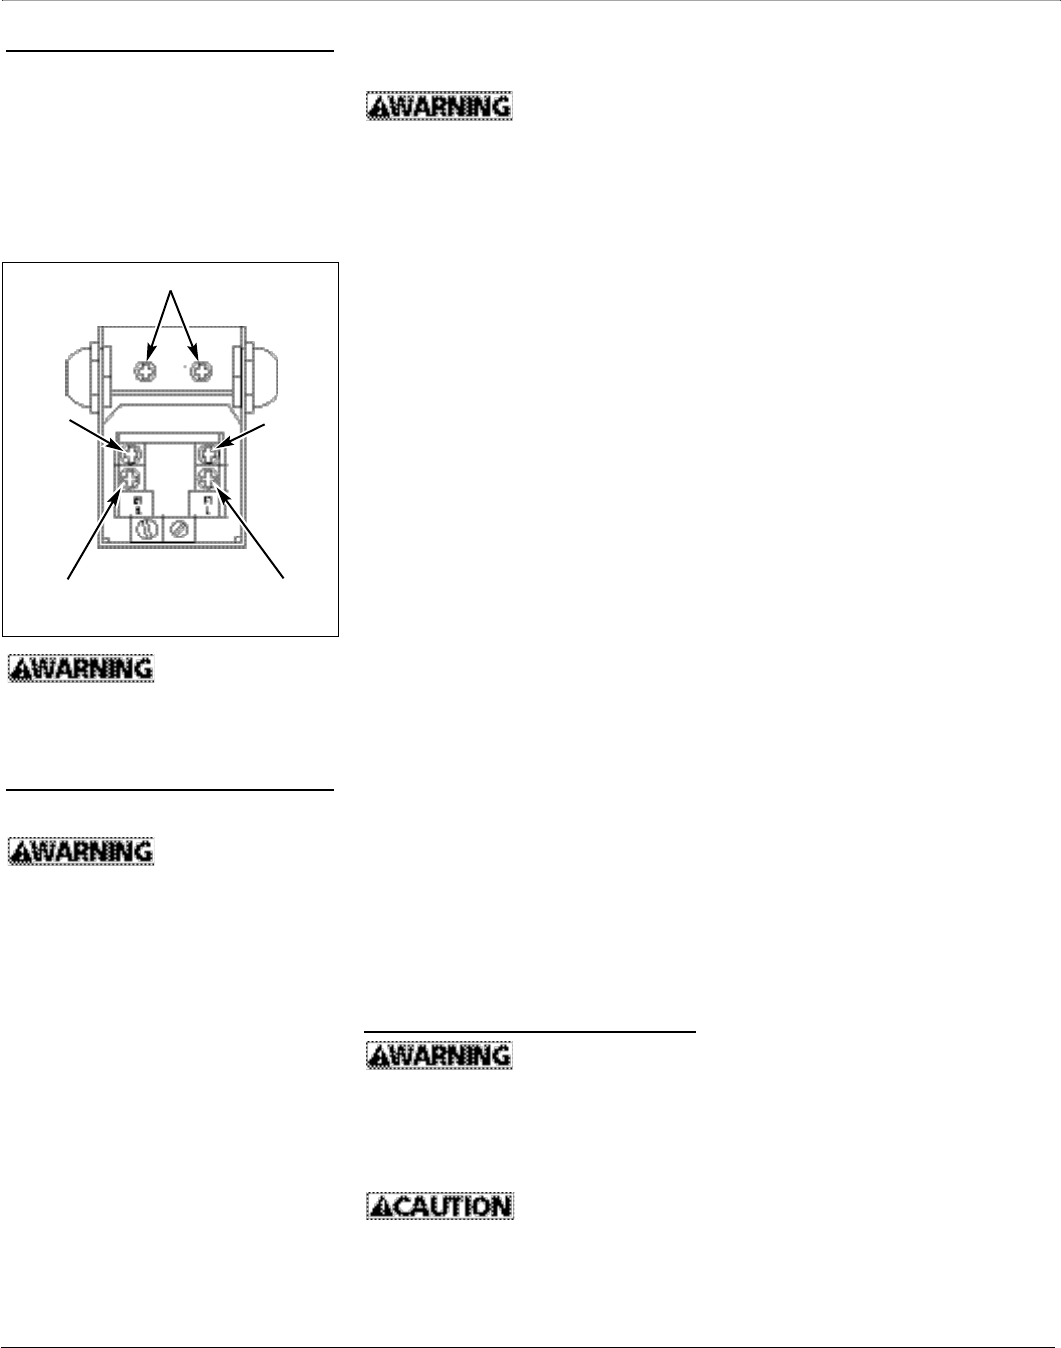
There is only one proper ground termi-
nal on the unit. The terminal(s) is locat-
ed under the pressure switch cover, is
painted green and is identified as GRD.
The ground connection must be made
at this terminal (Figure 11). The ground
conductor must not be smaller than
the circuit conductors supplying the
motor.
Disconnect power
and release all pres-
sure from the system before attempting
to install, service, relocate or perform any
maintenance.
Operation
PRIMING THE SHALLOW WELL PUMP
To prevent damage
to the pump, do not
start motor until pump has been filled
with water.
1. Remove prime plug.
2. Fill pump and piping completely
full of water.
3. Replace the prime plug.
4. Open a faucet to vent the system.
5. Start the motor. Water will pump in
a few minutes. If pump fails to
prime in 5 minutes, stop motor and
refill pump with water. Priming
time is proportional to the amount
of air in inlet pipe.
6. Let the system operate for several
minutes to flush all pipes.
7. Close faucet and allow pump to
build pressure in tank. When the
pressure reaches the cut-out set-
ting, the motor will stop.
1. Remove drain plug and prime plug
to vent the system.
2. Drain all piping to a point below
the freeze line.
DRAINING THE TANK
Conventional tanks can be drained by
opening an outlet at the lowest point
in the system. Remove plug or the air
volume control to vent the tank.
Precharged tanks force virtually all the
water from the tank when system pres-
sure is released. No draining is neces-
sary.
RESTARTING PUMP
If the pump has been serviced, drained
or has not been used for some time, be
sure there is water in the pump hous-
ing (volute) and the piping to the well.
There must be water in the pump hous-
ing (volute) at all times when the pump
is running to avoid internal damage of
seal members (See Priming the Shallow
Well or Priming the Deep Well
Sections).
WATERLOGGED TANKS:
CONVENTIONAL
When a tank system has an inadequate
ratio of air and water, the pump will
start and stop often and eradically.
1. Disconnect the power to the pump.
2. Open the lowest faucet in the sys-
tem to release all pressurized water
in the system.
3. Prime the pump (See Priming the
Shallow Well or Priming the Deep
Well Sections).
4. Reconnect the power to the pump.
NOTE: As the pump refills the tank with
water, the air volume control supplies
the tank with the correct air to water
ratio for the system to operate. If the air
volume control is good, the pump will
shut off at the desired cut-off and will be
adjusted correctly.
WATERLOGGED TANKS:
PRECHARGED
If a precharged tank becomes water-
logged, the bladder is normally leaking
or broken.
1. Test the tank by depressing the air
valve. The air valve will expel water if
the bladder is broken.
2. Replace the tank.
6
JCU50
Operating Instructions and Parts Manual
The system is now in operation and will
automatically cycle on demand.
PRIMING THE DEEP WELL PUMP
To prevent damage
t
o the pump, do not
start motor until pump has been filled
with water.
NOTE: For deep well priming, a control
valve (not included) must be installed
on or near the pump discharge. A ball
or globe valve will work for this appli-
cation.
1. Remove prime plug.
2. Fill pump and piping completely full
of water.
3. Replace the prime plug.
4. Close the control valve and open a
nearby faucet.
5. Start the motor. The pressure inside
the pump body will build almost
immediately as the pump, jet and
piping become completely filled
with water.
6. Slowly open the control valve.
Water will begin to flow. Continue
to open the control valve until maxi-
mum flow is achieved. Opening the
valve too far will cause the water to
stop flowing.
7. Adjust the valve until there is a
steady flow of water. The valve
should be opened as much as possi-
ble without losing pressure.
8. Let the system operate for several
minutes to flush all piping.
9. Close the faucets and allow the
pump to build pressure in the tank.
When the pressure reaches the cut-
out setting, the motor will stop.
The system is now in operation and will
automatically cycle upon demand.
Maintenance
Disconnect power
and release all pres-
sure from the system before attempting
to install, service, relocate or perform any
maintenance. Lock the power disconnect
in the open position. Tag the power dis-
connect to prevent unexpected applica-
tion of power.
Protect the pump
from freezing dur-
ing winter conditions.
DRAINING THE PUMP
Drain openings are provided on all
models. To drain the pump:
Figure 11 - Electrical Connections
www.waynewatersystems.com
Motor
Motor
Line
Line
Ground