4
Step 1 Remove static cling decal from the Heater Touch Screen Display.
Step 2 Plug Heater into approved wall outlet. DO NOT turn Heater on.
Step 3 Place 2 AA batteries (included) into Remote. Aim Remote at Heater. Recommended to be
within 3 feet for programming the Heater.
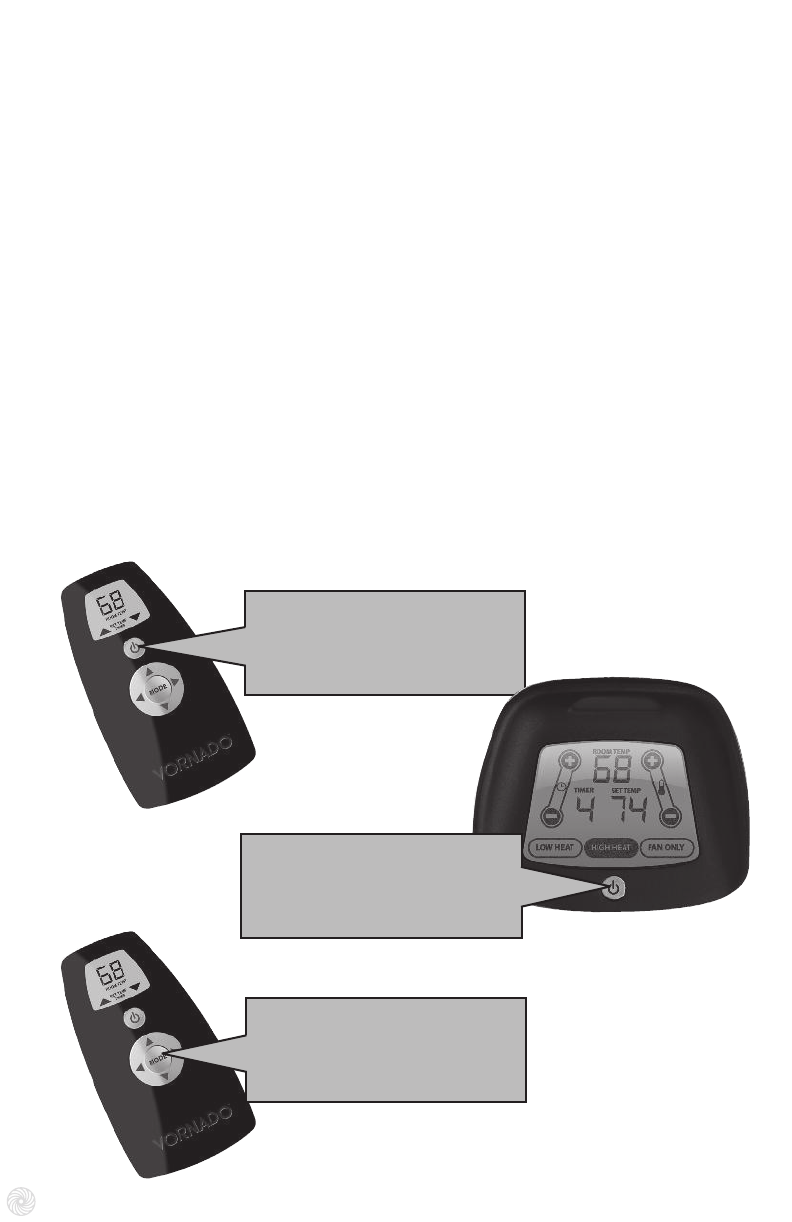
Step 4 Press and hold the Remote POWER button for approximately 3 seconds, until display
flashes one time. The Remote now has generated a new communication signal.
Step 5 Press and Hold the Heater POWER button for approximately 3 seconds, until the display
begins to flash. The Heater is now ready to recieve the new communication signal.
Step 6 Press the Remote Mode button one time. The Heater display will stop flashing and glow
solid. The Remote and Heater are now linked.
Step 7 Set the Heater to desired heat setting, temperature setting and timer duration.
The Remote does not need to be programmed for the Heater to function properly using only the
main touch-screen display.
Note: You should only need to set up the connection one time upon first use of your Heater. If for
some reason the Remote loses its connection – repeat the Remote Control Quick Start Instructions.
Remote Control Quick Start Guide
REMOTE
POWER BUTTON
Press and hold for 3 seconds
HEATER DISPLAY
POWER BUTTON
Press and hold for 3 seconds
REMOTE
MODE BUTTON
Press Once
www.sylvane.com 1-800-934-9194


