


www.desatech.com
115121-01B20
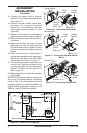
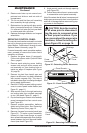
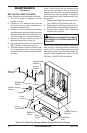
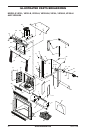
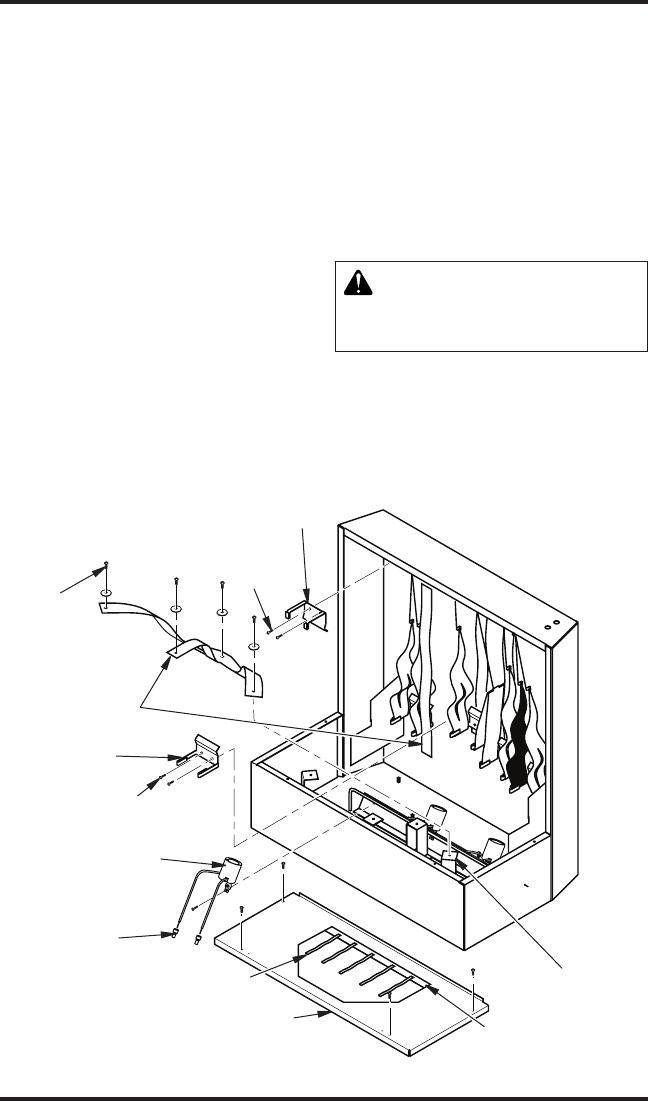
Figure 39 - Replacing Fixtures (Shown without FIrebox for Clarity)
Screws and
Washers
Hanger
Screws
Reective
Ribbon
Lamp
Fixture
Crimp
Connectors
Screws
Reective
Ribbon
Cellophane
Tape
Base
Cover
REPLACING LAMP FIXTURES
Lamp xtures may be replaced as follows:
1. Turn off all power to replace at circuit
breaker or fuse.
2. Locate any of 3 defective lamp xtures
and trace wiring to crimp connectors in
harness and disconnect.
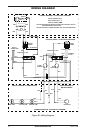
3. Remove 2 crimp connectors in harness
and disconnect white and black wires on
defective xture. See Wiring Diagram, Fig-
ure 28 on page 14, for proper locations.
4. Remove 2 Phillips screws at base of
defective xture (see Figure 39).
5. Remove old xture and mount new xture
with 2 Phillips screws removed prior.
6. Twist bare ends of white and black wires
to corresponding wires in main harness
and secure them with 2 crimp connectors
provided.
MAINTENANCE
Continued
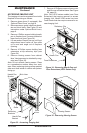
Note: There should be no exposed bare
wire at any connection. Wiring should be
secured with wire ties, as short as possible,
and kept away from fan blades. If additional
parts are required, see Replacement Parts,
on page 22.
7. Replace each light bulb with proper color,
(see Replacing Light Bulbs, page 14).
8. Restore power and check lamp circuit op-
eration before reassembling imaging unit.
9. Reassemble imager. See Accessing
Imaging Unit, page 16.
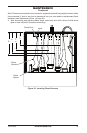
Make sure power is turned off
at supply prior to disassembling
this unit.
IMPORTANT: Be sure to inspect components
and wiring for damage before connecting
power to unit. If any components are found
damaged, contact an authorized dealer for
original DESA replacement part(s) or call
DESA at 1-866-872-6040 for referral.
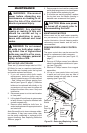
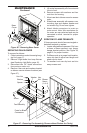
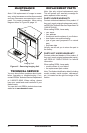
Upper Hanger
Bracket
Bottom Hanger
Bracket
Ribbon Support
Bracket