


USSC 3
6039&6039T ASSEMBLY
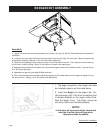
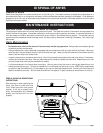
Assembly
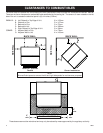
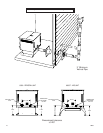
1. Unpack unit and make sure all components are included; (4) Legs, (2) Ash Pan Guide Rails and all hardware for
installation.
2. Inside the unit are two(2) Ash Dump Covers located to the left and right of the burnpot. Remove these for leg
and guiderail assembly. (See pg. 15 for ash dump cover desciption)
3. Fold the corner padding from the carton and lay it on the floor behind the unit. This is used to hold the heater up
off the floor to install the legs. Gently tilt the heater on its back, door opening up.
4. Assemble the guiderails to the heater with the bottom flanges turned to the outside as shown. Use the four(4)
#10 Tek Screws provided.
5. Assemble the legs using the eight(8) Bolts as shown.
6. After all bolts and screws have been tightened properly, set the heater back up on the legs and replace the two
ash dump covers. (See pg. 15 for ash dump cover placement)
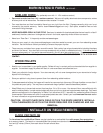
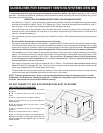
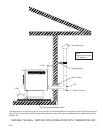
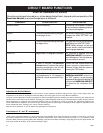
1. The Auger is packed in the hopper and must
be installed properly as illustrated below.
2. Insert the
Auger
into the auger tube. Ro-
tate the auger until it fits into the coupling that
is already installed on the auger motor drive.
Seat the auger firmly. The Auger cannot be
turned by hand once installed properly.
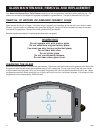
NOTE:
Initial burn off may cause slight smoke and
odor the first few hours of operation.
Operate outside if possible
Continue with Installation