


6 MS-SVN015-EN
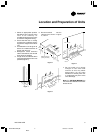
0.83"(21)
0.83"(21)
8.5"(215)
B
A
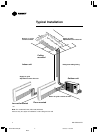
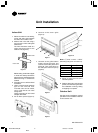
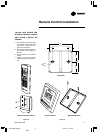
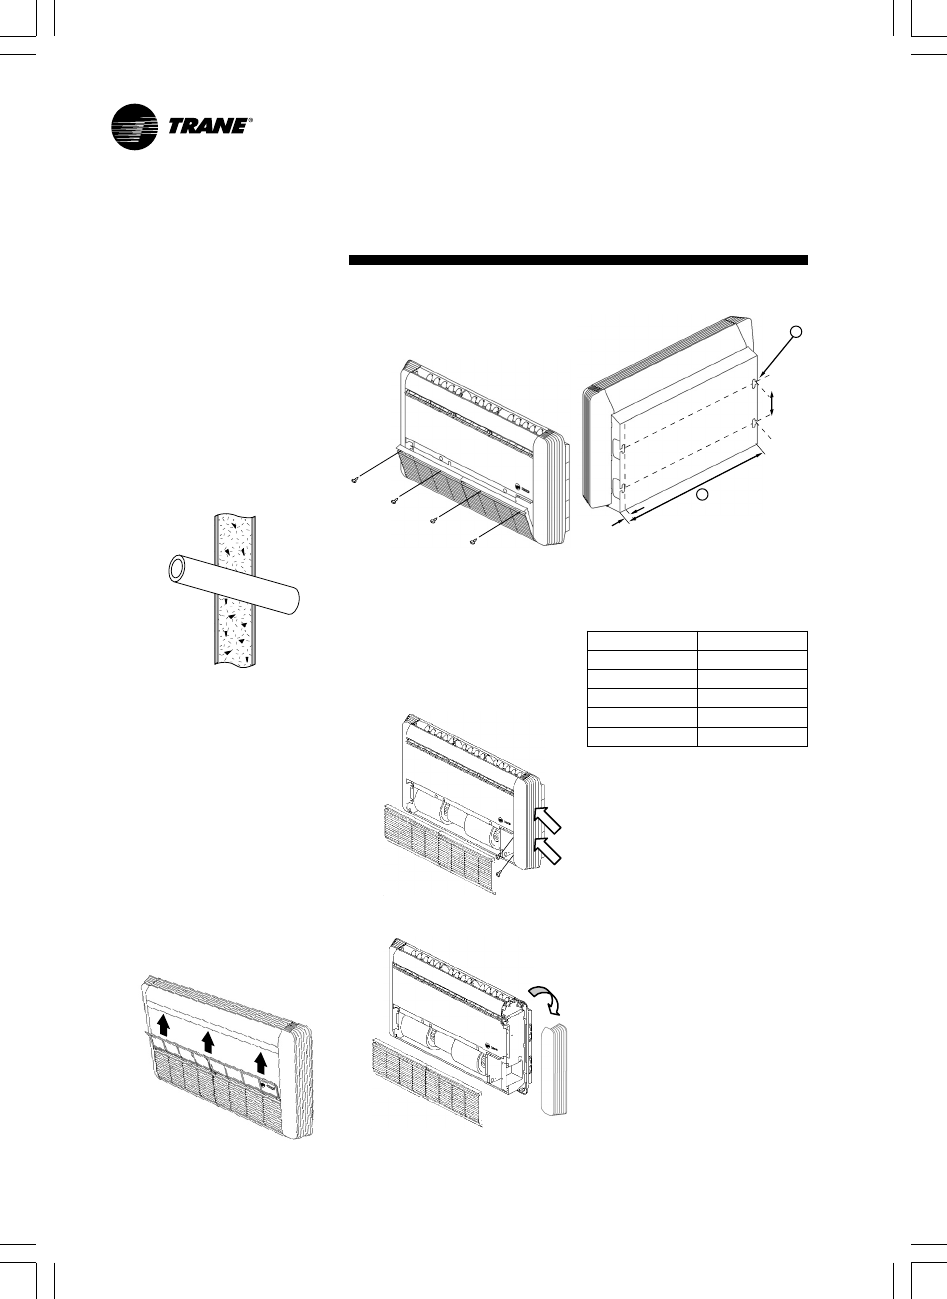
Unit Installation
Indoor Unit
1. Select a location to route tubing,
wiring and drain pipe between
the indoor and outdoor units.
2. Make a hole in the wall using a
key hole saw or hole-cutting drill
attachment.
The hole should be made at a
slight downward slant to the
outdoor side (Figure 5).
Before cutting, check that no pipes
or studs are directly behind the
place to be cut. Avoid areas where
electrical wiring or conduits are
located.
3. Place the unit on a solid and level
foundation.
4. Tubing, wiring through and drain
pipe of low wall and floor
mounted units can be routed,
rear or right side of unit when
facing front.
Ceiling mounted can be routed
straight downward.
5.
Pull air filters upward (Figure 6).
Figure 5
6. Unscrew at the return grille
(Figure 7).
7. Unscrew at the grille bottom
hinges, pull out the screw, and
unscrew at the side panel front
(Figure 8). Then, push down on
the side
panel front and pull up
(Figure 9).
Note: = A 0.49" x 1.575" - 4 SLOT
(Mounting hole) (12.5 mm 40.0 mm)
Unit Size B
MCX 512-518 36.2" (920)
MCX 524 46.1" (1,170)
MCX 530-536 55.9" (1,420)
MCX 042-048 65.7" (1,670)
MCX 060 75.6" (1,920)
8. Place or hang the unit at the
selected position.
9. Replace both right and left side
panels, and the return grille after
the installation of wiring, tubing
and piping is complete.
Outdoor Unit
See the proper installation method
provided in the Installation Manual
for the outdoor unit.
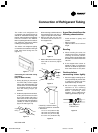
Indoor side
Figure 6
Pull
Pull
Figure 7
Figure 8
Figure 9
Outdoor side
Figure 10
MS-SVN015-EN.p65 6/27/07, 11:23 AM6
Black