Toshiba
–4–
Air-dischage direction kit
Installation Manual
EN
Changing the setting
• The setting is changed by using a wired remote controller. (For the details, Refer to “Changing procedure”
described below.)
• Perform “Setting the louver lock (Louver position fixing)”.
CAUTION
When the ceiling is higher than the specification, the fan control is required. So, in that case, perform the “high ceiling
setting” other than the setting described below.
The setting should be performed according to the instructions described on the installation manual attached to the
indoor unit.
“Changing procedure”: Change the setting while the device stops.
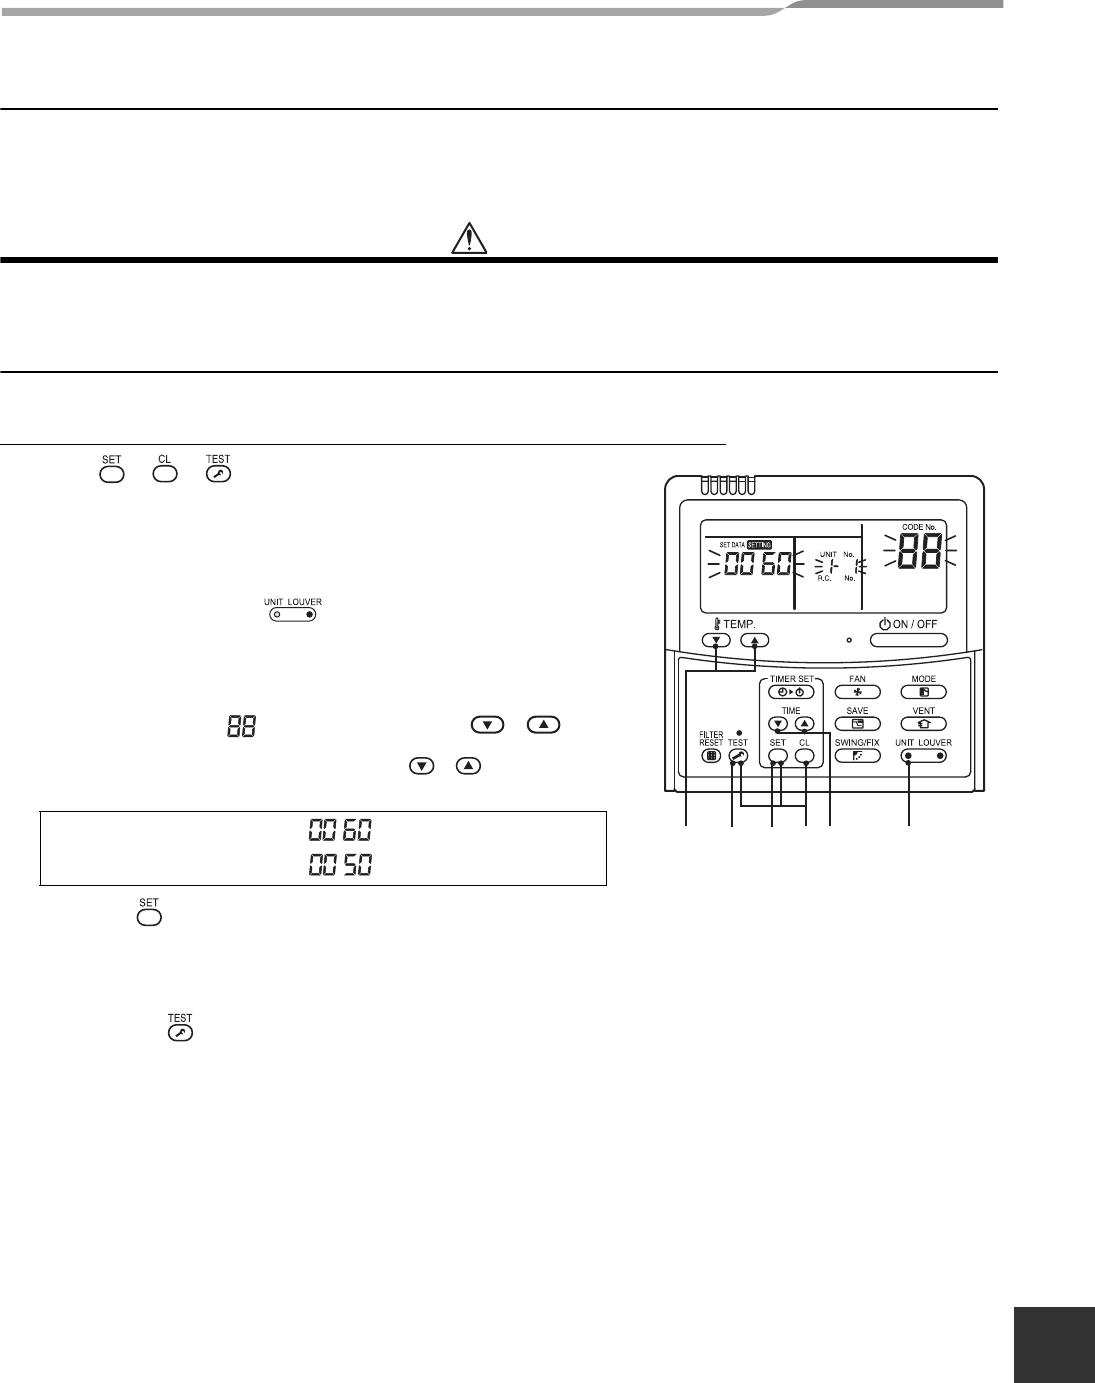
1 Push + + buttons simultaneously for more than 4
sec.
The unit No. displayed at first shows the indoor unit address of the
header unit in group control operation. The fan operation of the
indoor unit (header unit), selected at this time, is carried out.
2 Every time when UNIT (Left button) is pushed, the No.
in the group cotrol operation are displayed in order.
The fan operation of the indoor unit, selected at this time, is carried
out.
3 Set the CODE No. by using the TEMP. / button.
4 Set the setting data by pushing TIME / buttons for the
TIME setting.
5 Push the button. (The setting completes if the setting
data are displayed.)
When changing the setting of other indoor unit in the group control
operation, return to
2.
6 Pushing the button enters to the normal stop status.
3-way air flow......................
2-way air flow......................
5
14 263
4-EN
+00EH99678401.BOOk Page 4 Friday, November 13, 2009 2:38 PM


