No.
Part name
Electric parts
assembly
Remarks
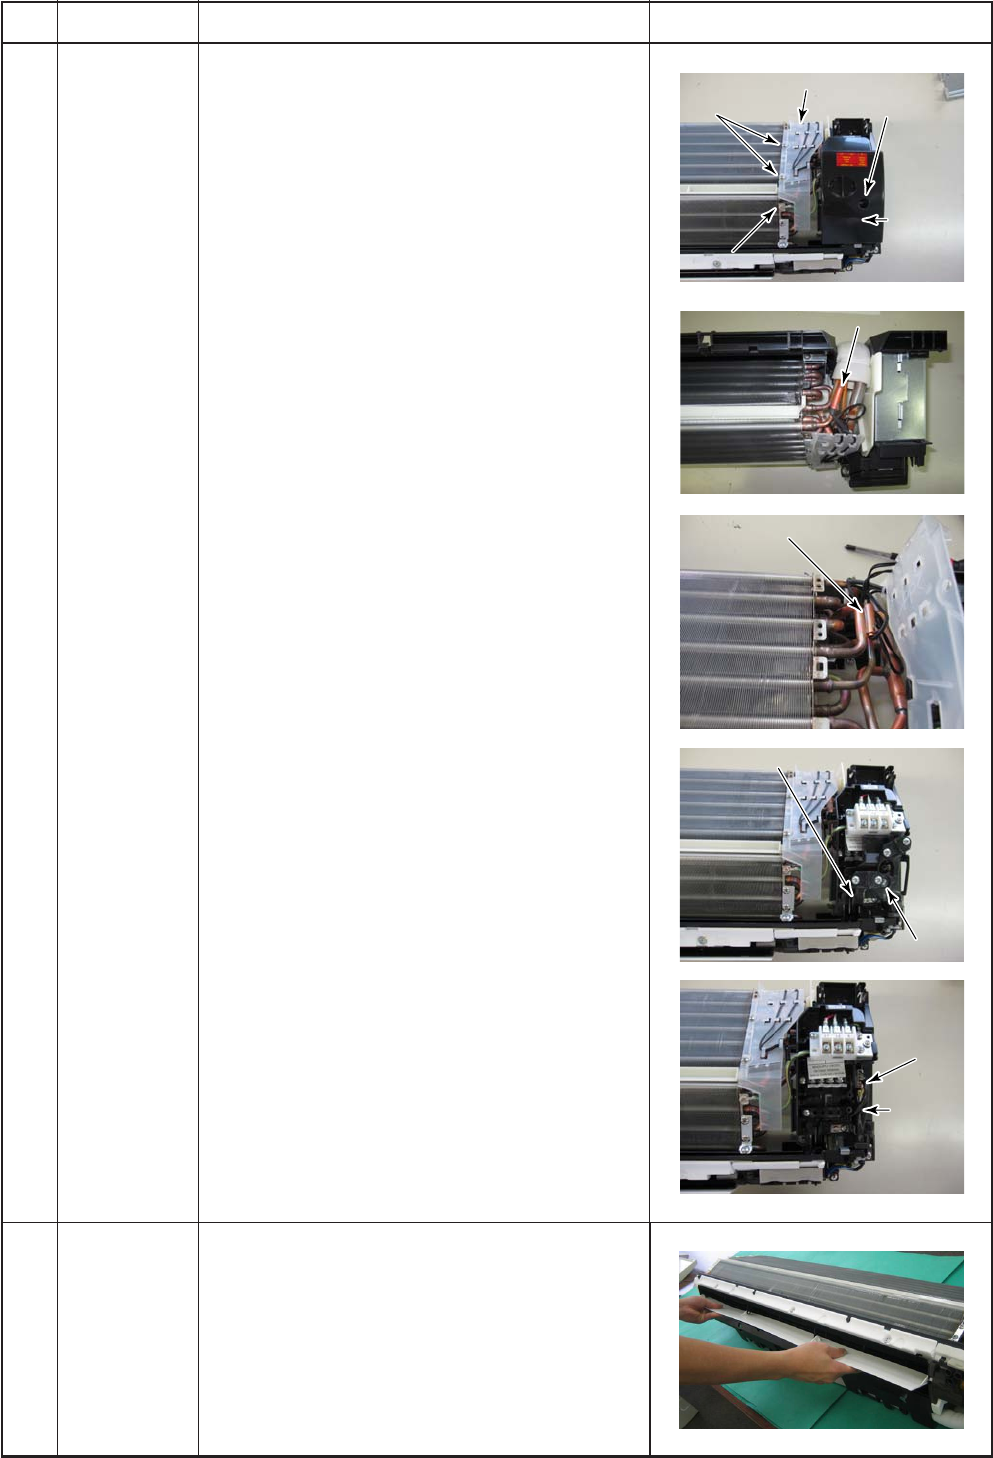
Drain guide
Drain guide
fixing screw
fixing screw
Earth screw
Earth screw
Earth screw
Drain guide
Drain guide
Connector cover
Connector cover
fixing screw
fixing screw
Connector
Connector
cover
cover
TCJ sensor
TCJ sensor
(Ø
6 sleeve provided)
6 sleeve provided)
TC sensor
TC sensor
(Ø
6 sleeve not provided)
6 sleeve not provided)
Drain guide
fixing screw
Drain guide
Connector cover
fixing screw
Connector
cover
TCJ sensor
(Ø6 sleeve provided)
TC sensor
(Ø6 sleeve not provided)
Fan motor
Fan motor
connector
connector
Louver
Louver
motor
motor
connector
connector
Fixing screw
Fixing screw
Fan motor
connector
Louver
motor
connector
Fixing screw
Clamp base
Clamp base
Clamp base
Horizontal
louver
1) Remove shaft of the horizontal louver from
the back body. (First remove the left shaft,
and then remove other shafts while sliding
the horizontal louver leftward.)
Procedures
1) Perform work of item
.
2) Take off drain guide fixing screws (2pcs)
3) Pull out TC and TCJ sensors from the
senser holder of the heat exchanger.
(When reassembling the elect parts ,be
careful to the attaching positions of every
seneor. TC and TCJ sensors resemble in the
shapes , so distinct them by making ,etc.
when mounting them.)
4) Take off the connentor cover mounting screw
(1pc.) and then remove the connector cover.
5) Take off the clamp base mounting screw
(1pc.) and then remove the clamp base.
FILE NO. SVM-12004
6) Remove the fan motor connector (5P) and
the connector for louver motor (5P) from the
P.C. board.
7) Disengage the display unit by simply
pushing at the top of the display unit.
8) Remove the fixing screw that secures the
electrical parts box assembly, LED assembly
and remove the assembly.
– 90 –


