Page 36 of 53
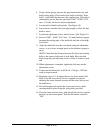
4. Using a feeler gauge, measure the gap between the rotor and
knife cutting edges. Check each rotor knife to find the “high
knife” or the knife that measures the smallest gap. If the gap is
substantially greater than the specified 0.006” - 0.008” (0.15
mm – 0.2 mm), the knives need readjustment.
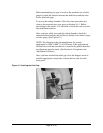
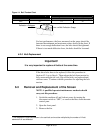
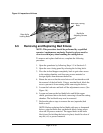
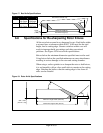
5. Loosen the bed knife locking bolts. (See Figure 16.)
6. Leave the two outside bolts just tight enough to allow the bed
knife to move.
7. Loosen the adjustment screws and lock nuts. (See Figure 16.)
8. Insert a 0.006” – 0.008” (0.15 mm – 0.2 mm) thickness gauge
between the cutting edge of the bed knife and that of the high
rotor knife.
9. Adjust the bed knife into the rotor knife using the adjustment
screws, so as to leave enough space for the thickness gauge to
move.
NOTE: Check that the distance between the fixed and rotating
knife is the same at both ends of each knife. Move the bed
knife using the push adjusting screws a little at a time on each
end.
10. When adjustment is complete, tighten the lock nuts on the
adjustment screws.
11. Torque the bed knife bolts to 95 lbs./ft. (13 Kgm., 128 Nm)
using a torque wrench.
12. Repeat the steps 4-11 to adjust the rear (or down stroke) bed
knife. Turn the rotor slowly for one complete revolution,
checking the exact distance between all the rotary knives and
the bed knives.
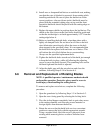
13. Close the hopper and replace the screen and screen cradle,
securing them in place using the swing bolts provided.
14. Close the front and rear doors, and unlock the power or replace
the fuses in the control panel. Turn the disconnect switch to
“ON”.


