


-6- Shop Fox
®
Fence
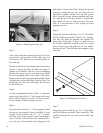
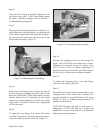
Figure 2. Attaching the front rail.
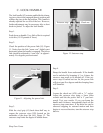
drill chuck. Loosen the chuck, detach the tap and
continue turning the tap into the hole with an
adjustable wrench. Advance the tap half a turn,
back it out half a turn, advance another half turn,
etc. until the tip of the tap extends
1
⁄2" beyond the
hole. Back the tap out and proceed to the next
hole. It is not necessary to use cutting oil when
tapping cast iron.
Step 6.
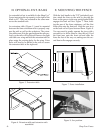
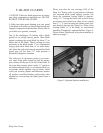
Mount the front rail with the
3
⁄8''-16 x 1'' Hex Bolts
and Flat Washers provided. Figure 3. It is impera-
tive that the front rail mounts flat against the
front edge of the table. If there is a gap between
the front rail and the extension wing, it is a good
idea to loosen the wing and move it over until it
touches the rail. This will add extra support to the
front rail.
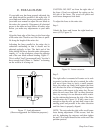
Step 3.
If the front and back mounting holes do not line
up with the existing holes in the table top, you
will need to drill and tap new mounting holes in
the table top.
Position the back rail according to the instructions
in Step 1. Clamp the rail to the table saw using C-
clamps or bar clamps. The use of wood clamping
blocks will ensure a secure, non slip set-up. Mark
the oval mounting holes on the edge of the table.
Remove the rail and centerpunch the middle of the
outlined slots on the table edge. Refer to Step 2 for
positioning the front rail and repeat this process
for the front rail.
Step 4.
At each centerpunch location, drill a
1
⁄8" diameter
starter hole, then drill a
5
⁄16" hole using the bit sup-
plied with the Shop Fox
®
Fence. It is not necessary
to use cutting oil when drilling cast iron.
Step 5.
Tap each hole with the
3
⁄8" - 16 tap supplied. Hold
the tap in a tap wrench if one is available. If a tap
wrench is not available use a
3
⁄8 " or
1
⁄2" electric
drill that is set on slow speed. Treat it as though it
were a drill bit. After the first few rotations how-
ever, the tap will invariably start slipping in the
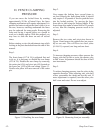
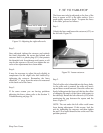
Step 7.
Mount the rear rail with the
3
⁄8''-16 x 1'' Hex Bolts
and Flat Washers provided. There should be 2 flat
washers between the rear rail and the table top.
Figure 4.
Figure 3. Mounting the front rail.