


8 TOLL FREE: 1-800-798-7398 9www.sharkclean.com
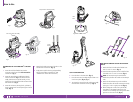
ASSEMBLING THE LIFT-AROUND
™
CANISTER
VAC
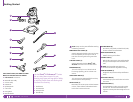
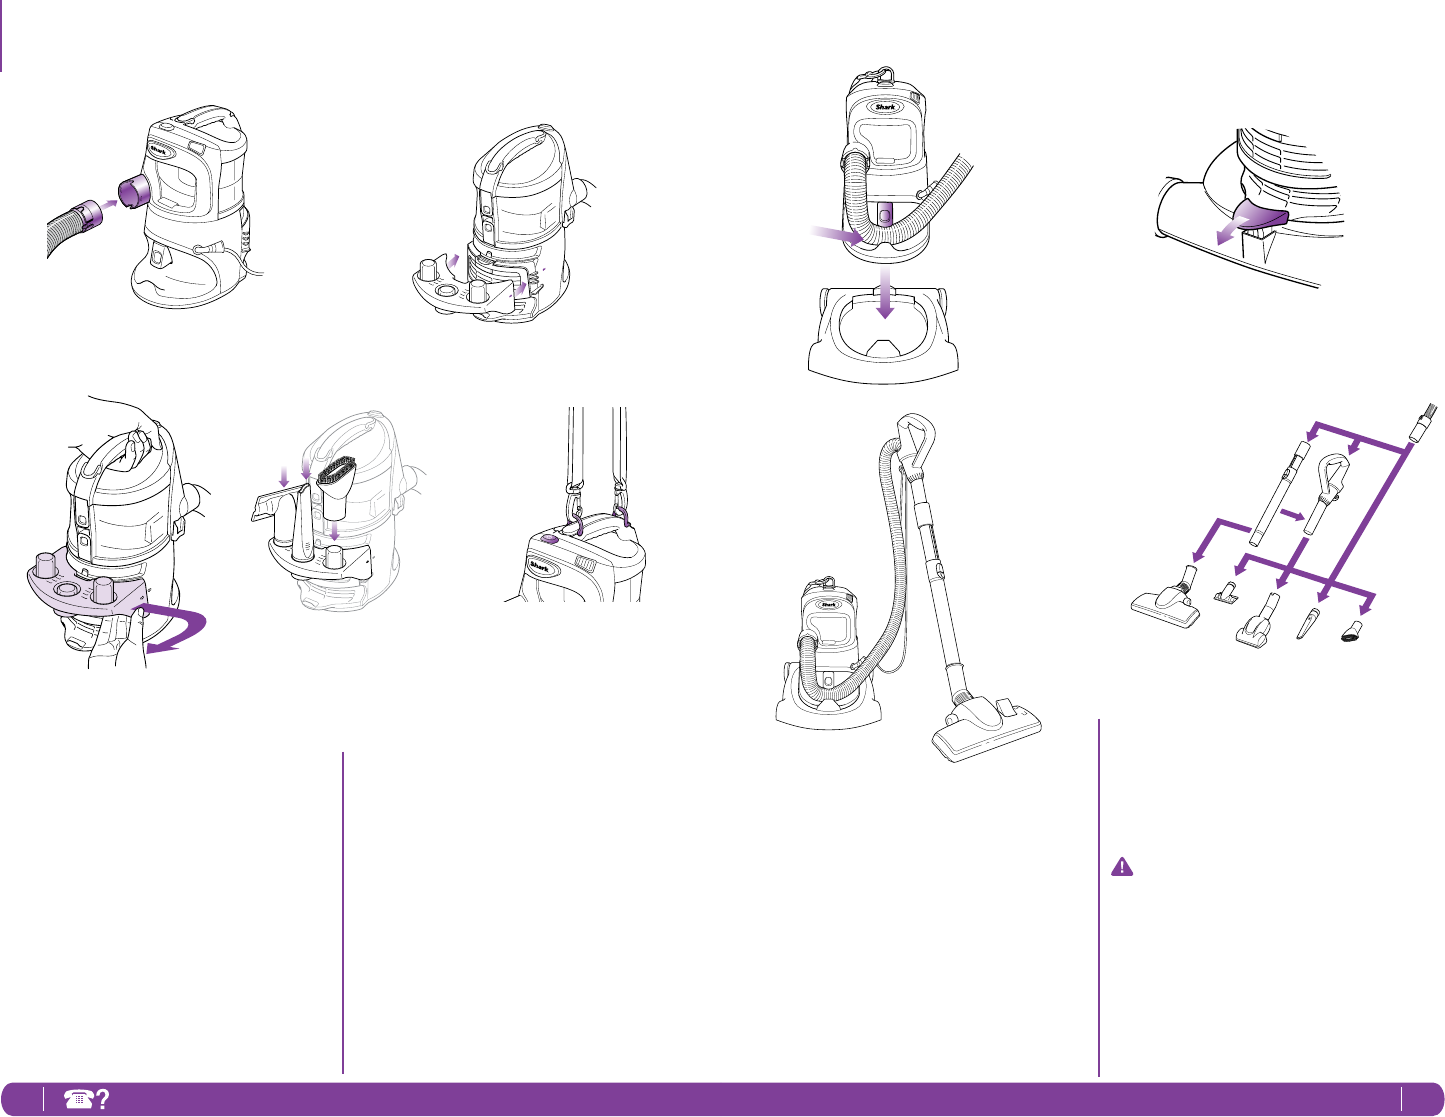
1 Insert the end of the flexible hose into the
connector on the front of the Lift-Around™
Canister Vac. (fig. 1)
2 Insert the removable tool caddy onto the back
of the Canister Vac. (fig. 2) To remove the tool
caddy, hold the vacuum by the handle, pull out
slightly from the right side and then remove it from
the Canister Vac. (fig. 3)
3 Insert the crevice tool, dusting brush, upholstery
brush or power brush into the openings on the tool
caddy. (fig. 4)
4 Attach the shoulder strap onto the hooks on the
handle of the Canister Vac. (fig. 5)
5 Empty Dust Cup after cleaning and periodically
during cleaning when it appears full. (See
“Maintenance” section for instructions.)
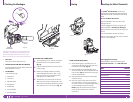
How to Use
Fig. 9
Fig. 1
Fig. 2
Fig. 4
Fig. 5
Power
Button
Align arrows to attach tool caddy
Pull out to remove tool caddy
Fig. 3
FOR ADDED COMFORT OR FOR AN EXTENDED
REACH
9 Attach the floor kit handle to the flexible hose.
Push it in until it is secure. (fig. 9)
10 Insert the telescopic tube into the end of the floor
kit handle. Push it in until it is secure. (fig. 9)
NOTE: All accessories may be used with the
flexible hose, the floor kit handle or the telescopic
tube.
11 Attach the desired accessory to the end of the
flexible hose, floor kit handle or telescopic tube by
pushing it in until it is tightly secured. (fig. 9)
12 While holding the Canister Vac by the handle,
press down on the power button to turn the
Canister Vac on and begin vacuuming. Press down
again to turn the vacuum off. (fig. 5)
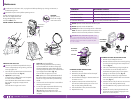
USE IN CANISTER MODE
6 Place the hose in the hose dock. (fig. 6)
7 Place the unit over the caddy and press down until
it locks into place. (fig. 6, fig. 7)
8 To release the vacuum from the caddy, press caddy
release button and lift the vacuum up. (fig. 8)
Fig. 8
Fig. 6
Hose
Dock
Caddy
Release
Fig. 7