


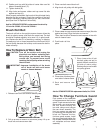
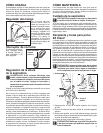
5. Place rubber end cap covers over both end caps (flat side
against end cap). Align the holes and secure.
Then, slant brush roll forward so end caps are in line with
slots in cleaner base.
6. Push brush roll into
place.
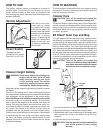
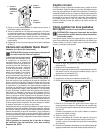
7. Place lower side of belt
into belt guide and pull to
stretch the belt around the
left side of motor pulley.
Rotate pulley to secure belt
into pulley groove.
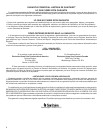
8. Place slots of bottom plate
over tabs of cleaner base.
9. Seat and secure cam
locks.
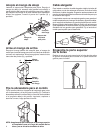
2. Pull up on belt to rotate it off the motor pulley. Lift up on
brush roll and remove worn belt.
9
9
8
8
3
4
Belt
Guide
6
5
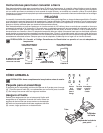
Ask for GENUINE EUREKA replacement belts, No. 52100
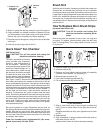
Brush Roll Belt
The brush roll belt on the upright vacuum cleaner drives the
brush to agitate, sweep, and comb the carpet nap. The belt
should be checked regularly to be sure it is in good condi-
tion. Replace the belt if it is stretching, cracking, or slipping.
Cut away any hair or thread wound around the brush roll or
the belt pulley because the buildup could cause the belt to
rotate unevenly.
How To Replace A Worn Belt
CAUTION: Turn off the switch and unplug the
electrical cord before replacing belt.
Belt pulleys can become hot during
normal use. To prevent burns, avoid
touching the belt pulley when servicing
the drive belt.
IMPORTANT: Improper installation of the brush
roll or brush roll belt could cause
carpet or cleaner damage.
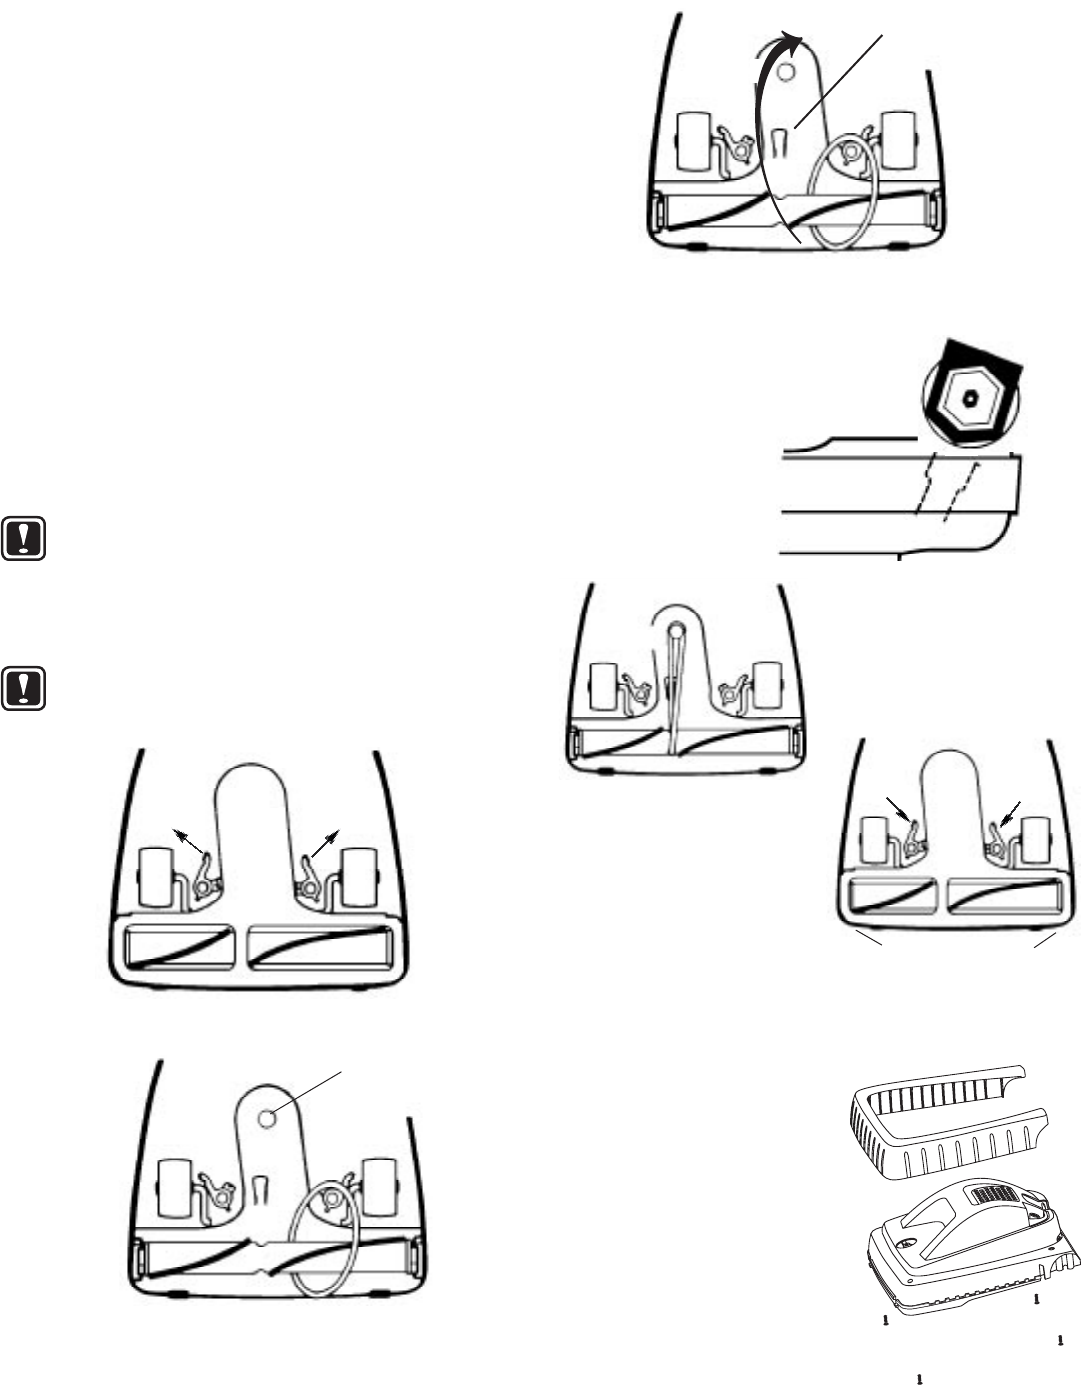
1. Release cam locks and remove bottom plate.
11
Motor
Pulley
2
7
7
3. Place new belt around brush roll.
4. Align brush roll pulley with belt guide.
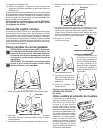
10. Position end cap with flat sides of center hole over flat
sides of threaded shaft (C).
11. Tighten locknut (B).
12. Align holes and secure rubber end cap cover flat side
against end cap (A).
When properly assembled, the brush roll should rotate freely
between the two end caps. Check the condition of the belt;
change if necessary. Replace the brush roll, belt, and bottom
plate (see How To Replace A Worn Belt).
Ask for GENUINE EUREKA replacement brush strip.
12 inch No. 52282; 16 inch No. 52246-1
How To Change Furniture Guard
Four screws on the underside
of the base secure the furniture
guard. To gain access to the two
rear screws, you must remove
the four screws holding the
two axle clamps and remove
the rear wheel assembly. The
front two screws are exposed
by removing the soleplate and
brush roll. Remove the four
furniture guard screws, install
the new guard and tighten the
four screws. Reinstall the brush
roll, soleplate and rear wheel
assembly.