


Regency P42-3 Zero Clearance Direct Vent Gas Fireplace
34
MAINTENANCE
WARNING
The use of substitute glass will
void all product warranties.
Do not operate the appliance
with the glass panel(s) re-
moved, cracked or broken.
Replacement of the glass
panel(s) should be done by an
authorized service person.
GLASS
REPLACEMENT
Your P42 stove is supplied with high tempera-
ture, 5 mm Neoceram ceramic glass that will
withstand the highest heat that your unit will
produce. In the event that you break the glass,
purchase your replacement glass from an au-
thorized Regency dealer only, and follow the
step-by-step instructions for glass, glass gas-
ket and door gasket replacement.
DOOR GLASS
Your Regency stove is supplied with high
temperature, 5 mm Neoceram ceramic glass
that will withstand the highest heat that your
unit will produce. If your glass requires
cleaning, we recommend using an approved
glass cleaner available at all authorized deal-
ers. Do not use abrasive materials. Do not clean
the glass when hot.
In the event that you break your glass by impact,
purchase your replacement from an authorized
Regency dealer only, and follow our step-by-
step instructions for replacement.
GOLD-PLATED
LOUVERS
The 24 carat gold-plated finish on the louvers
and trim requires little maintenance, and need
only be cleaned with a damp cloth.
DO NOT use abrasive materials or chemical
cleaners, as they may harm the finish and void
the warranty.
Clean any fingerprints off before turning
the unit on.
LOG REPLACEMENT
The unit should never be used with broken
logs. Turn off the gas valve and allow the unit
to cool before opening door and carefully
remove the logs. (The pilot light generates
enough heat to burn someone.) If for any
reason a log should need replacement, you
must use the proper replacement log. The
position of these logs must be as shown in the
diagrams under Log Installation.
Note: Improper positioning of logs may
create carbon build-up and will
severely alter the unit's perform-
ance which is not covered under
warranty.
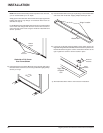
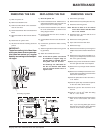
THERMOPILE/
THERMOCOUPLE
1) Remove the top louver and open the bottom
louvers.
2) Open and remove door.
3) Remove front logs.
4) Remove burner.
5) Loosen the thermocouple or thermopile
with a 7/16" wrench.
6) Disconnect thermocouple by loosening nut
from the valve with a 9mm wrench. Discon-
nect thermopile by loosening 2 screws
marked TP on the valve.
7) Peel the silicone from the hole in the base
of the unit and drop the thermocouple or
thermopile down from the bracket and pull
it out of the unit.
8) Reinstall the new ones in reverse order
making sure to seal the hole in the firebox
with silicone in order to maintain the seal
integrity of the firebox.
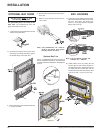
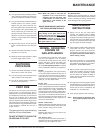
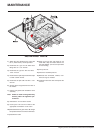
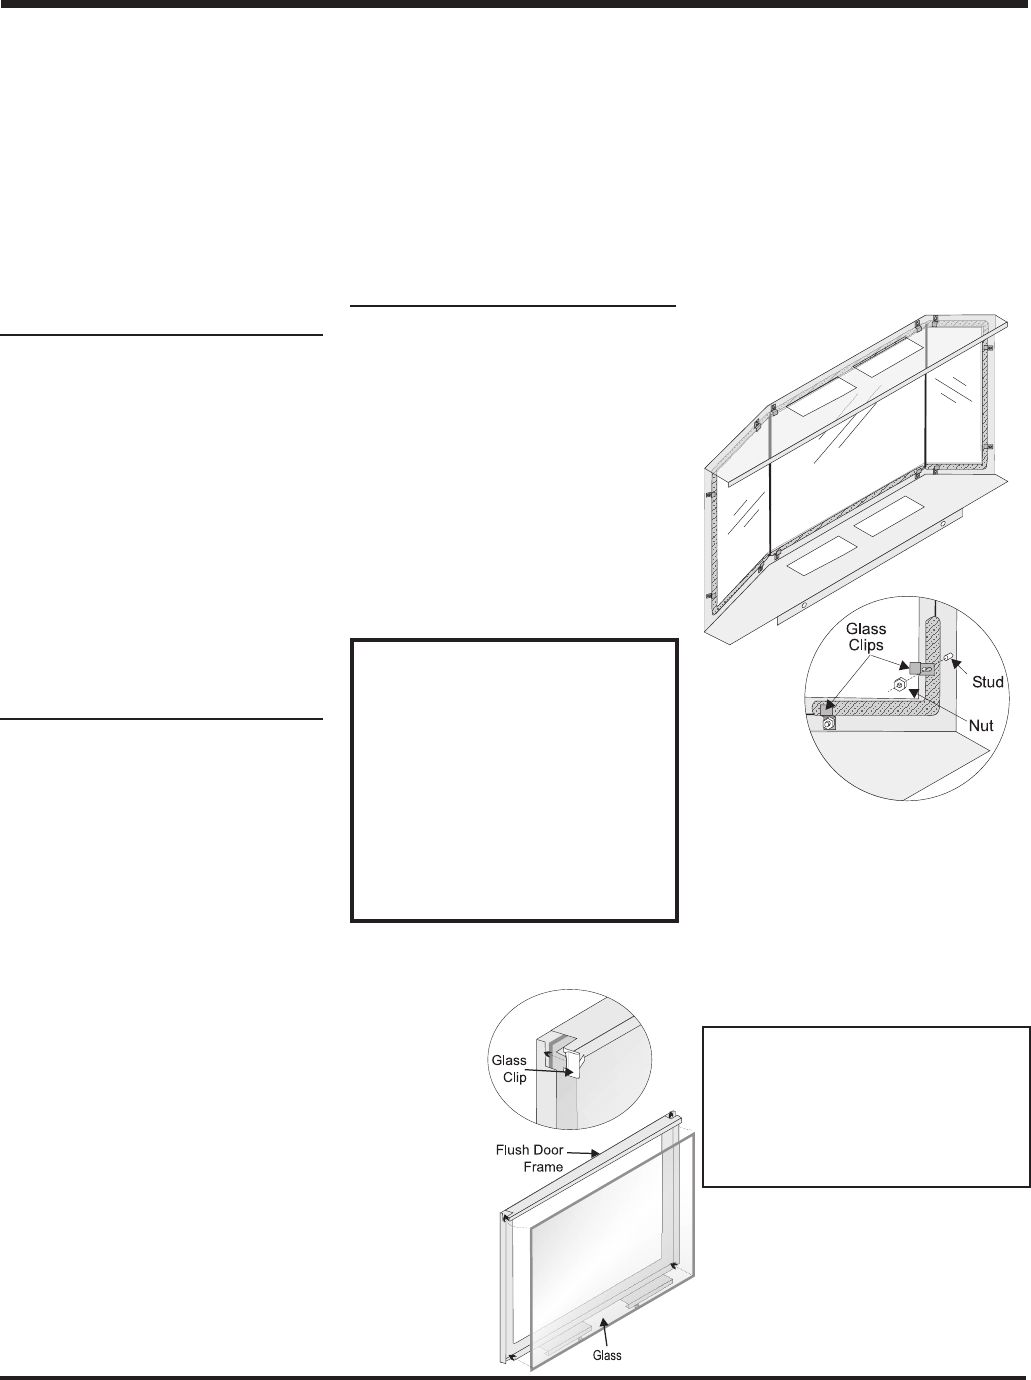
Flush Glass Replacement
Remove the flush
door front (as per
instructions on
page 25). Remove
the 4 glass clips
from each corner.
Slide in the new re-
placement glass.
Push the 4 glass
clips back onto the
frame.
The glass must
have gasketing
around it.
Caution: Wear gloves when remov-
ing damaged or broken glass.
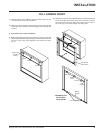
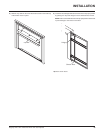
Bay Glass Replacement
1) Remove the door from the unit and place on
a soft surface to prevent scratching.
2) Remove the nuts holding the glass clips in
place and remove.
3) Replace the glass. The glass must have
gasketing around it.
4) Reverse the previous steps, replace the
glass clips and fasten with the nuts but do
not over tighten, as this can break the glass.
5) Replace door on the stove and check the
seal.
WARNING: Do not operate the
appliance with the glass panels
removed, cracked or broken. Re-
placement of the glass panels
should be done by a licensed or
qualified service person.