


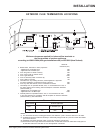

FG37 Regency Rear Flued Room Sealed Freestanding Gas Heater 15
INSTALLATION
C)02-44
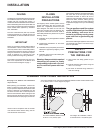
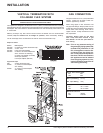
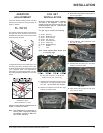
AERATION
ADJUSTMENT
The burner aeration is factory set but may need
adjusting due to either the local gas supply, air
supply or altitude.
NG: 10mm open
LPG: 10mm open
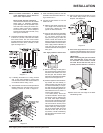
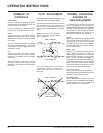
The aeration adjustment gears are located on
the right side of the burner box and can be
accessed from the side or from the front when
the louvres are removed.
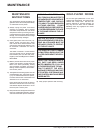
To adjust the aeration: use the allen key to turn
the turning gear which will adjust the air shut-
ter. Open the air shutter for a blue flame or close
it for a yellower flame. This adjustment is
performed by an authorized installer. The fac-
tory setting should be sufficient for most instal-
lations.
Clockwise to open,
counter-clockwise to close.
Caution: Carbon will be produced if the air
shutter is closed too much.
Note: Any damage due to carboning re-
sulting from improperly setting
the aeration controls is NOT cov-
ered under warranty.
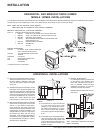
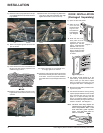
LOG SET
INSTALLATION
Read the instructions below carefully
and refer to the diagrams. If logs are
broken do not use the unit until they are
replaced. Broken logs can interfere with
the pilot operation.
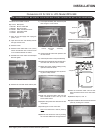
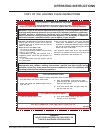
The gas log kit contains the following:
a) 02-65 Rear Log
b) 02-56 Middle Left Log
c) 02-44 Front Left Log
d) 02-46 Left Top Log
e) 02-45 Front Right Log
f) 02-47 Center Log
g) 02-48 Middle Right Log
h) Embers
i) Lava
Note: Install Optional Brick Panels prior
to installing logs.
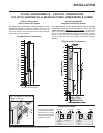
Embers Embers
The "02" refer numbers (i.e. 02-65) are
molded into the rear of each log.
1) Carefully remove the logs from the box and
unwrap them. The logs are fragile, handle
with care - do not force into position.
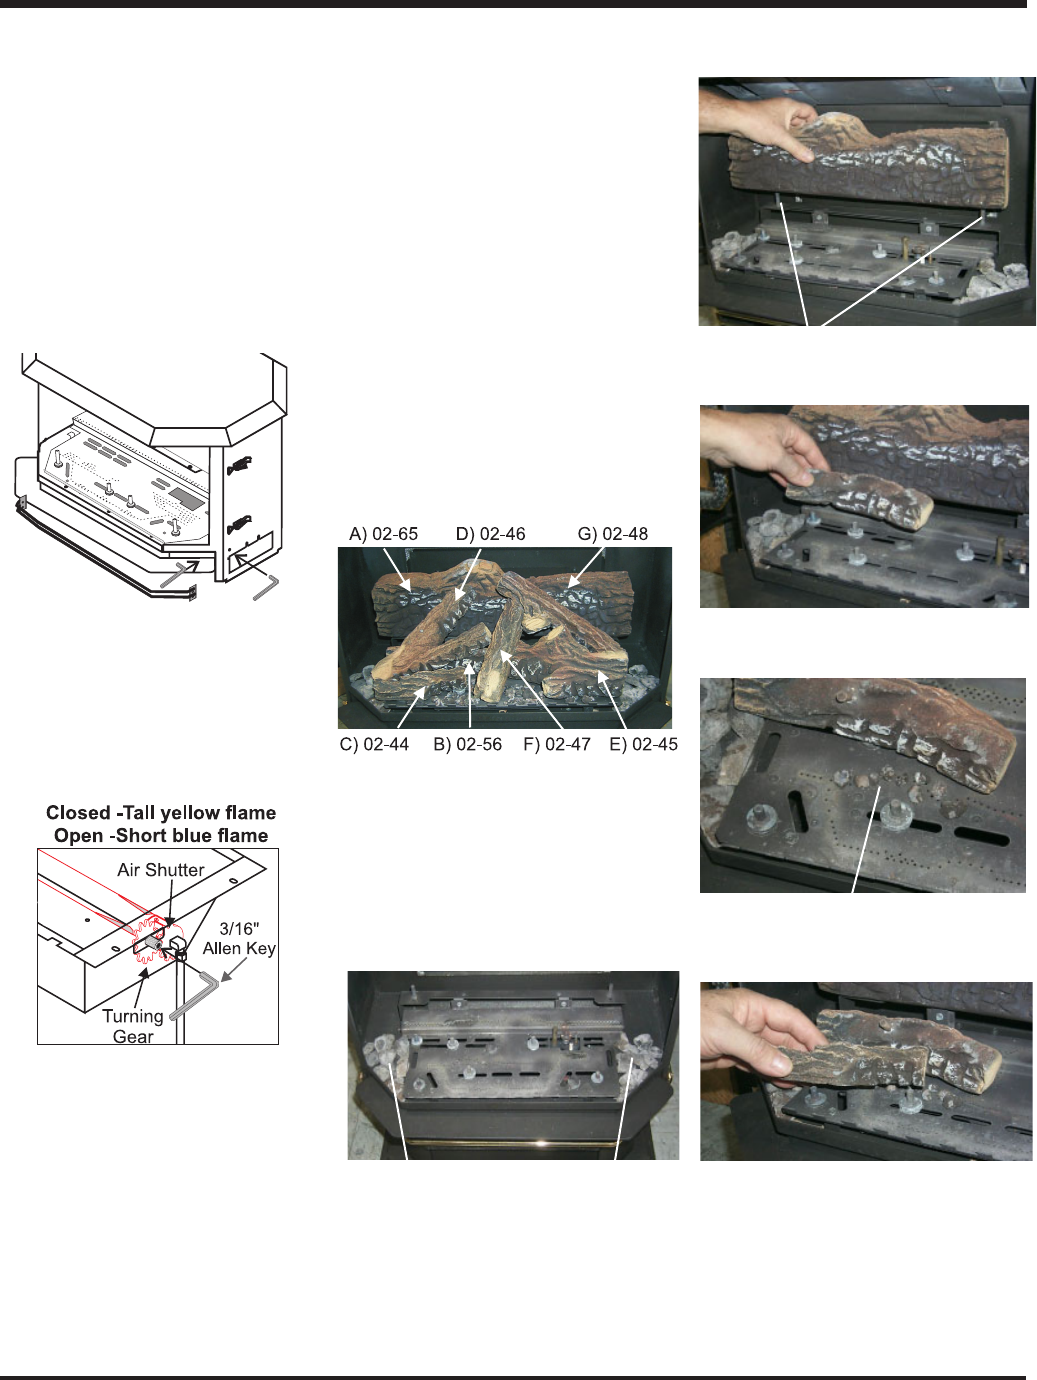
2) Sprinkle the embers on the left and right
sides of the firebox base.
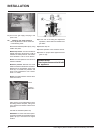
Pins on Rear Log Support
A)02-65
B)02-56
3) Place Rear Log A)02-65 on the two pins on
the rear log support.
4) Place the Middle Left Log B)02-56 on the
two pins as shown.
5) Sprinkle some lava rock just in front of B)
02-56 on the burner holes.
lava rock
B)02-56
6) Place Front Left Log C)02-44 onto the 2
front pins as shown.