37
12. OUTDOOR SENSOR CONNECTION
The user can program the desired supply temperature based on
the outdoor temperature. Once the outdoor sensor is connected
to the control board, the water temperature of the boiler will adjust
to run the boiler more efficiently and provide greater comfort to the
living space.
Connection Specification – Wire 22 AWG maximum to 100 ft (30 m).
Outdoor Sensor is connected in the junction box on the XPak.
Route wires from the terminal strip to your outdoor sensor, which
will allow the user to change the temperature going to the Central
Heating loop automatically. Place the outdoor sensor preferably
to the north or northwest or to the side which will be affected by
changing weather conditions outside. NOTE: Do not locate the
sensor in the direct sunlight.
14. REMOTE CONTROL CONNECTION
The boiler can be fully remoted using an open therm plus remote
control (use only Raypak REC 08 Part No 013073).
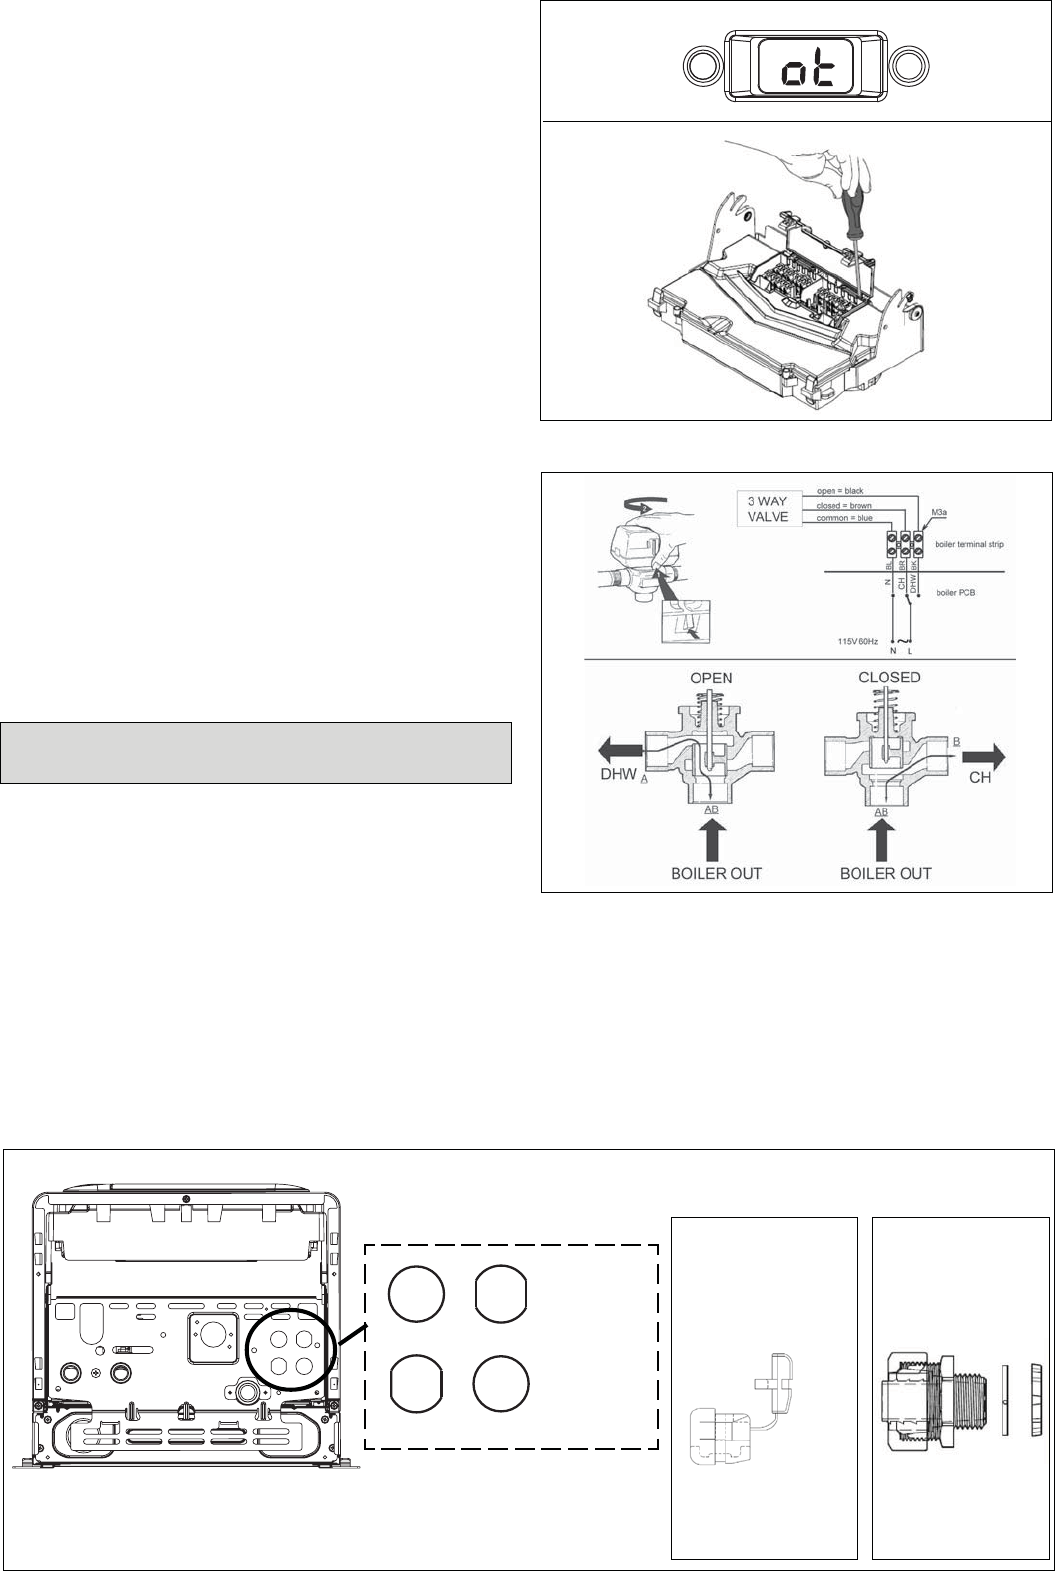
When the control is installed with the boiler display shows as per
Fig. 36. No operation can be made on the boiler control panel
once the remote control is installed.
All the boiler settings can be made only by Remote Control once
it is connected.
See Remote Control instruction for setting and use.
Fig. 36
Fig. 37
Fig. 38
13. 3-WAY VALVE WIRING CONNECTION
XPak boiler can manage an external 3-way valve (field supplied),
the terminal strip (M3a) output is 120V – 60 Hz (see electric
diagram).
Logic of the boiler managing 3-way valve
1. Boiler configuration in DHW (case A and case B), see Fig. 61
for boiler jumper configuration.
2. Once the jumper has set in DHW mode (tank with probe or
tank with thermostat), when there is a heat request from the
sensor or from the thermostat, there is power out (120V – 60
Hz) to the boiler terminal strip M3a (Fig. 35).
3. The output to the 3-way valve DHW pin is continuously supply
up to the heat is satisfied.
4. The room thermostat request is independent from the DHW
request (Priority is always given to DHW production).
5. The 3-way valve is always powered, even if there is no DHW
demand.
WARNING:
The 3-way valve is continuously powered even
if there is no heat request from the tank.
Wiring connections 3-way valve
Suggested source: Honeywell VC6011 (actuator) + VCZMK6000
Wiring the valve as per diagram Fig. 38.
Follow the installation of the piping referring to the diagram
showing the logic of working Fig. 38.
The connections colors and schematic refer to the Honeywell
VC6011 (actuator) + VCZMK6000.
Choose one of the two options for the strain relief that XPak allows
Main supply
cable
3 way valve
cable
1
Straight-Thru:
Heyco HFC-Z 1/2
Listed under UL
File #E-206446
2
Strain Relief
Bushings:
Heyco SR 7K-2
Listed under UL File
#E-15331 CSA
LR8919
2
2
1
1
Fig. 39


