Page 7
CHIMNEY CONNECTOR
The chimney connector must be 6 (152mm) diameter with a minimum thickness of 24 gauge. Do not use
aluminum or galvanized steel. They cannot properly withstand the extreme temperatures of a wood fire. Do not
use chimney connector pipe as a chimney. You must connect your stove to a chimney comparable to those
illustrated in this manual.
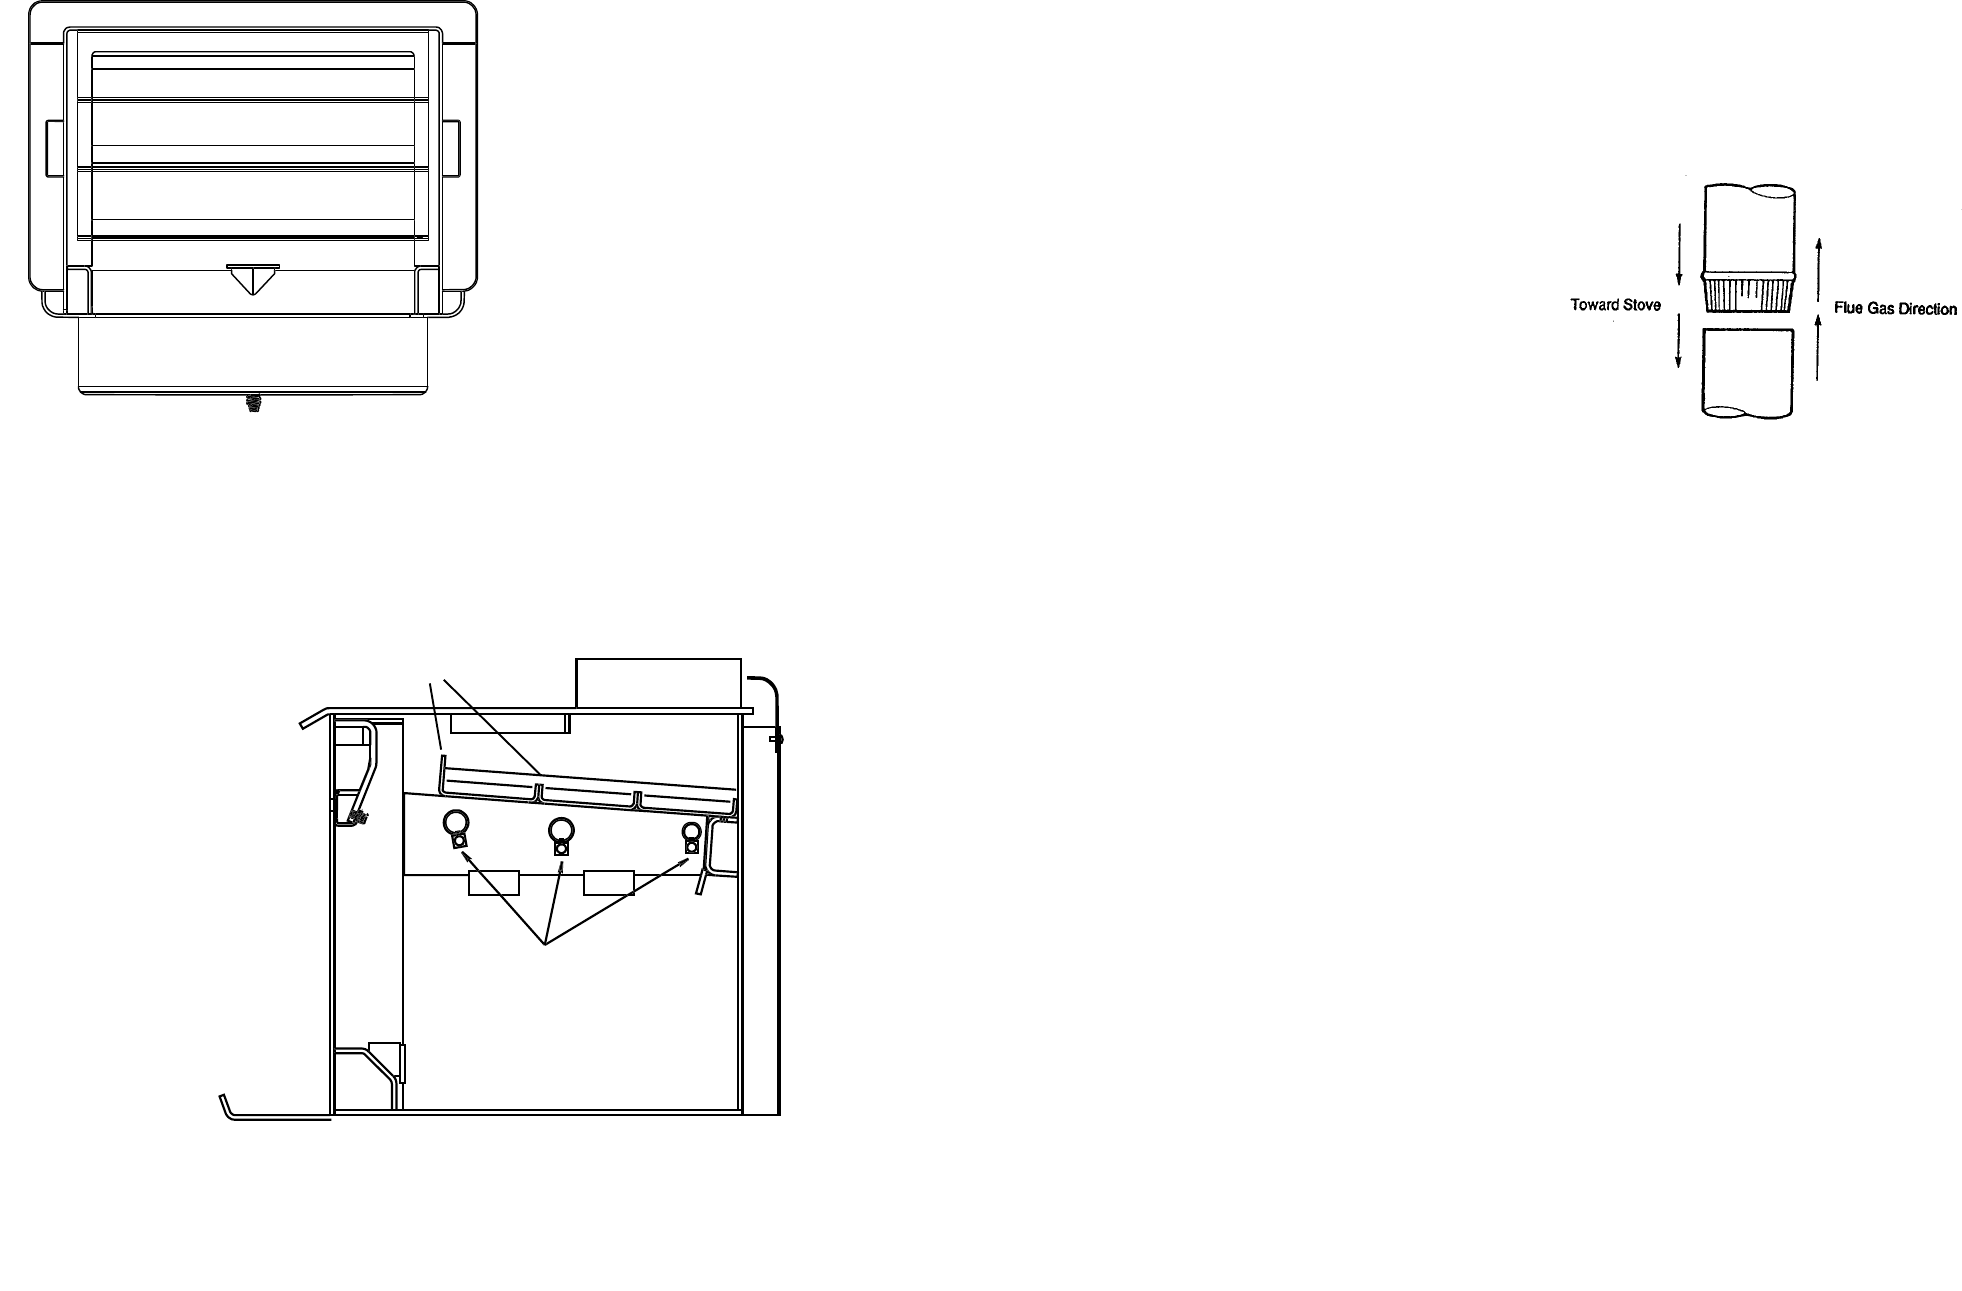
Chimney connector sections must be attached to the stove and to each other with the crimped end toward the
stove (Figure 3). This allows creosote to run into the stove and not onto the outside of the pipe. Attach the
chimney connector to the flue collar with three sheet metal screws. All joints should also be secured with three
sheet metal screws. Otherwise, in the event of a creosote fire, the connector may vibrate apart.
For proper operation, the chimney connector should be as short as possible. Horizontal lengths of chimney
connector should have a minimum upward slope from the stove of at least ¼ per foot.
CHIMNEY HEIGHT/DRAFT
To insure that your Quadra-Fire stove burns properly, the chimney draft (static pressure) should be
approximately 0.1 water column (W.C.) during a high burn and .04 W.C. during a low burn, measured 6
(152mm) above the top of the stove after one hour of operation at each burn setting.
NOTE: These are guidelines only, and may vary somewhat for individual installations.
Your Quadra-Fire stove was designed for and tested on a 6 (152mm) chimney, 12-14 (3.66-4.27m) high,
measured from the top of the stove. The further your stack height or diameter varies from this configuration, the
probability of performance problems increases. In addition, exterior conditions such as roof line, surrounding
trees, prevailing winds and nearby hills can influence stove performance.
CONNECTION TO A MASONRY CHIMNEY
1. CHIMNEY: Should the stove be connected to a masonry chimney, the chimney should be examined for
cracks, loose mortar, or other signs of deterioration and blockage. The stove should not be installed until it
is determined that the chimney is safe for use. Since an oversized flue contributes to the accumulation of
creosote, the size of the flue should be checked to determine that it is not too large for the stove. The
chimney should also be checked to insure it meets the minimum standards of the National Fire Protection
Association (NFPA) Standard 211. Following is a list of the more critical minimum requirements for a
properly constructed chimney.
The masonry wall of the chimney, if brick or modular block, must be a minimum of 4 (102mm) thick. A
mountain or rubble stone wall must be at least 12 (305mm) thick.
FIGURE 3
Page 22
BAFFLE REMOVAL AND REPLACEMENT
1. Remove manifold tubes and label each tube
(example: front, middle, rear).
NOTE: It is very important not to reverse the order
of the tubes.
2. Remove firebrick.
3. Slide middle baffle onto front baffle.
4. Remove rear baffle by sliding to one side, then lift
that side. The other side will then drop down.
5. Remove the middle baffle in the same way as the
rear baffle was removed.
6. Remove the front baffle by lifting one side and
sliding the other side toward the rear of the firebox
until it drops down.
7. Reinstall in reverse order. Be sure that the large
ceramic blanket is in place and the smaller ceramic
blankets are in each individual baffle before
reinstalling.
NOTE: For cleaning chimney, do not remove manifold
tubes. Slide the middle and rear baffles onto the front
baffle. Fold ceramic blanket down to gain access to
chimney pipe.
Baffles
Baffle manifold screws


