


DURAWATT
®
ELECTRIC WATER HEATER
PV500-6 09/07 4
CHECKING EQUIPMENT BEFORE YOU INSTALL
Inspect the unit completely upon receipt from the freight carrier before signing the bill of lading. Inspect the appliance and
all accompanying parts for signs of impact or mishandling. Verify the total number of pieces shown on packing slips with
those actually received. Contact the freight carrier immediately if any damage or shortage is detected.
WARRANTY
Factory warranty does not cover improper installation or operation. (See warranty for complete details).
Warranty exclusions include but are not limited to failure or malfunctions resulting from:
1. Failures to properly apply, install, operate, or maintain the appliance in accordance to printed instructions.
2. Abuse, alteration, accident, fire, flood and the like.
3. Sediment or lime buildup, freezing or any other conditions causing inadequate circulation.
4. Corrosive or contaminated atmosphere.
CODES
The equipment shall be installed in accordance with those installation regulations in force in the local area where the
installation is to be made. These shall be carefully followed in all cases. Authorities having jurisdiction shall be consulted
before installation is made. In the absence of such requirements, the installation shall conform to the latest edition of the
National Electrical Code.
LOCATION
1. Locate the unit in a clean and dry area as close as possible to the greatest hot water usage and as near to electrical
power as practical.
2. Install the unit on a firm, level foundation.
3. Locate the foundation on a pitched floor near a suitable drain, or make other provisions to prevent contact to areas
of the building subject to water damage should the boiler or a water connection leak. The drain must be sufficient to
contain water in excess of 210°F.
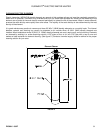
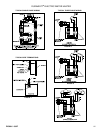
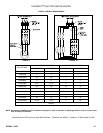
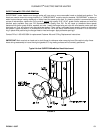
INSTALLATION
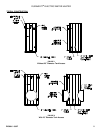
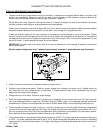
WARNING: Use industry standard safe rigging methods when attempting to lift or move this product. Failure to
follow these instructions could result in property damage, serious injury or death. One common method includes
the use of straps and spreader bars, lifting from the water heater base skid assembly.
1. Check the data decal on the heater. Be sure the electrical supply is adequate for the installation.
2. Carefully remove all shipping supports and bracing. (Float type devices have shipping plugs blocking the float).
3. Install shut-off valves and unions on the inlet and outlet water piping for servicing. Use caution when threading pipe
nipples into tank connections to prevent cross threading, or over-tightening. Always use a back-up wrench on tank
nipples when tightening unions, valves, etc.
4. Insulate hot water and return circulation lines. Insulate cold water supply lines if subject to freezing during shutdown
periods. IMPORTANT: Do not use the plumbing connected to the appliance as a ground for welding or any
other purpose.
5. The water heater is equipped with a temperature and pressure relief valve(s) rated for the input. Pipe the relief valve
discharge to a suitable open drain. The drain pipe may not be smaller than the relief valve opening and must be
secured to prevent it from lifting out of the drain under discharge pressure. Do not install valves or restrictions in the
discharge line.
6. Pipe the drain valve to a suitable open drain.