


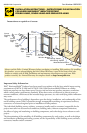
5 FRAME SCREW METHOD
5B
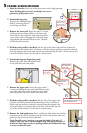
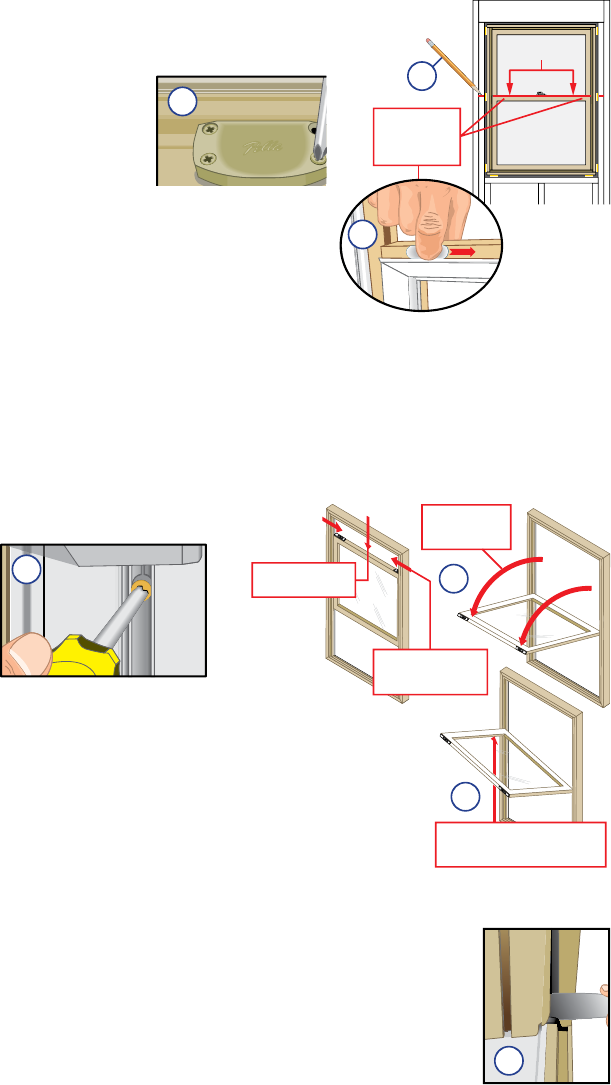
A. Mark the location of the top of the lower sash on the rough opening.
Note: Marking this location is needed for the correct
placement of the frame screws.
Interior
Top of lower sash
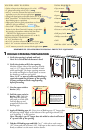
5A
Finger slides are
located on the
top, back side of
the lower sash.
5C
B. Simulated-hung only:
Remove the simulated-hung
lock by removing the four
screws from each lock.
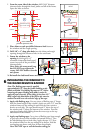
C. Remove the lower sash. Raise the sash 6" or more
and locate the two finger slides on the lower sash
check rail. At the same time, slide each toward the
center of the sash to disengage the wash lock stops
and pull the sash towards the room side. The sash
will tilt from the bottom.
D. With the sash parallel to the floor, lift one side of the lower sash until the terminal is
removed from the balance shoe. Continue to lift the sash up until the terminal is released
from the opposite side of the sash and can be removed from the shoe. Lift the sash up and
out of the window frame. Set the sash in a safe location.
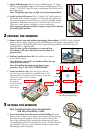
5E
E. Simulated-hung and Single-hung only:
Remove the screw from the balance shoe
in the jamb liner on both jambs.
F. Remove the upper sash. Lower the upper sash 6"
or more and locate the two wash lock releases on the
top of the sash. Slide each toward the center of the
sash and pull the top of the sash to the room side.
Lower upper sash
6” or more.
Slide the wash lock
releases toward
the center.
Pull the top of
the sash to the
room side.
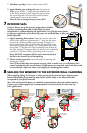
5F
Lift one side of the upper sash
until the terminal is removed
from the balance shoe.
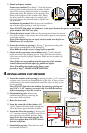
5G
'With the sash parallel to the floor, lift one side of the upper sash
until the terminal is removed from the balance shoe. Continue to
lift the sash up until the terminal is released from the opposite side
of the sash and can be removed from the shoe. Lift the sash up and
out of the window frame. Set the sash in a safe location.
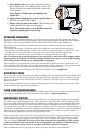
H. Remove the clad/wood insert. Place a stiff putty knife under the weather-
strip between the clad/wood insert and the vinyl on the interior side and
gently pry the insert out of the jamb liner.
Note: On taller units, continue to pry up the length of the unit, if
needed. Take care not to rip the weather-strip. The top of the insert is
behind the head stop; use care in pulling it down from behind the stop
so as not to dent the wood.
5H