


3 SETTING AND FASTENING THE DOOR
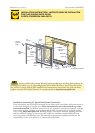
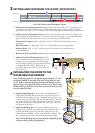
A. Place three 3/8" beads of sealant. e rst bead should be
approximately 3/4" from the exterior of the rough opening, the
second 2-1/2" in from the rst bead of sealant. Place a third bead
of sealant in the groove of the sill support or 1/4" from the exterior
edge of the wood blocking.
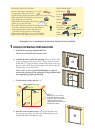
TWO OR MORE PEOPLE WILL BE REQUIRED
FOR THE FOLLOWING STEPS.
3A
1
2
0
3
04
05
0
6
0
7
0
2
3
IN
CHE
S
m
m
3D
Interior
3C
shim
3E
shim
3E
3F
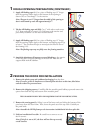
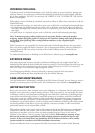
C. Plumb and square door. Insert shims, as necessary, between
the door and the sides of the rough opening starting up 6"
from the bottom of the door.
Note: DO NOT over shim.
Exterior
3B
3B
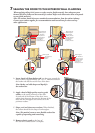
B. Insert the door from the exterior of the building. DO NOT
slide the bottom of the door into the opening. Sliding
will damage the sealant lines. Place the bottom of
the door at the bottom of the opening, then tilt
the top into position. Center the door between
the sides of the opening to allow equal clearance
for shimming and insert one roong nail in the
rst hole from the corner on each end of the top
nailing n. ese are used to hold the door in
place while shimming it plumb and square.
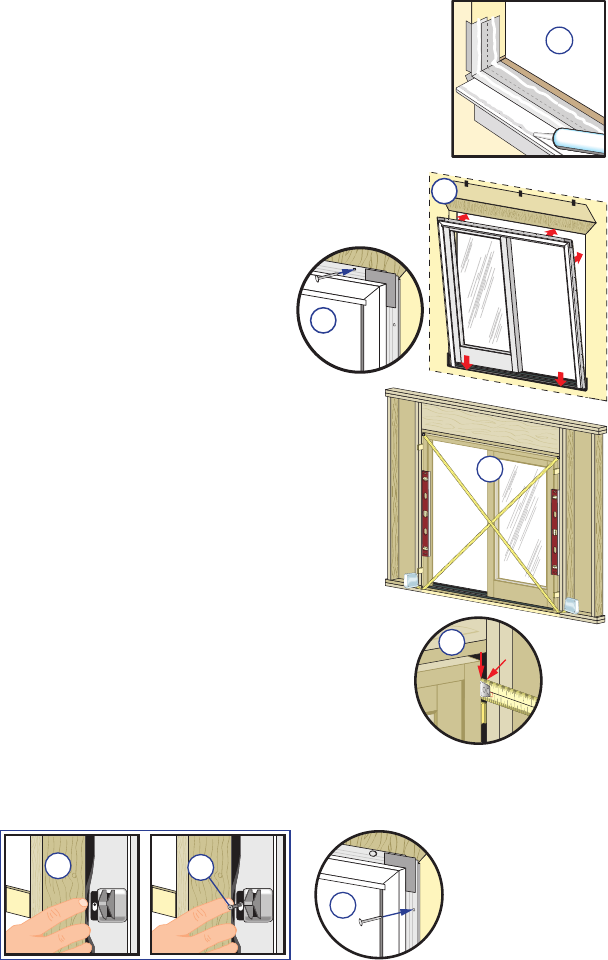
D. Check the interior reveal. Make sure the measurement from
the interior face of the door to the interior face of the wall is
equal at several points around the door.
Note: If the dimensions are not equal, check to make sure
the ns are folded out to 90° at all points.
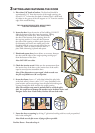
E. Secure the frame. Insert a 1" wide shim behind the pilot hole
at the lock strike(s). Insert a #8 x 2-1/2" screw (included in the
panel retainer and screw package) into the pilot hole making sure
it passes through the shim and into the rough opening.
Note: e weather strip must be pushed aside to reveal the pilot
hole. Be careful not to damage the weather strip. Architect Series
®
and
Designer Series
®
have 2 lock strikes, ProLine
®
has one lock strike.
F. Fasten the door to opening by driving 2" galvanized roong nails into each pre-punched
hole in the nailing n.
Note: Make sure the n corner is lying as at as possible.
ProLine Doors - Proceed to Step 4.