


C2410M-J (2/08) 7
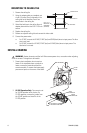
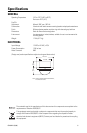
3. If the heater is installed, plug the heater
connector from the camera into the
mating connector inside the base. Plug
the video connector from the camera into
the mating connector inside the base.
Turn on power to the camera and monitor.
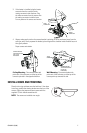
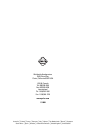
4. Always make sure the tab on the camera bracket is pointing out of the enclosure (away from the
ceiling or wall). Gently squeeze the bracket, place it against the shoulder inside the back box, and
then gently release.
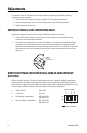
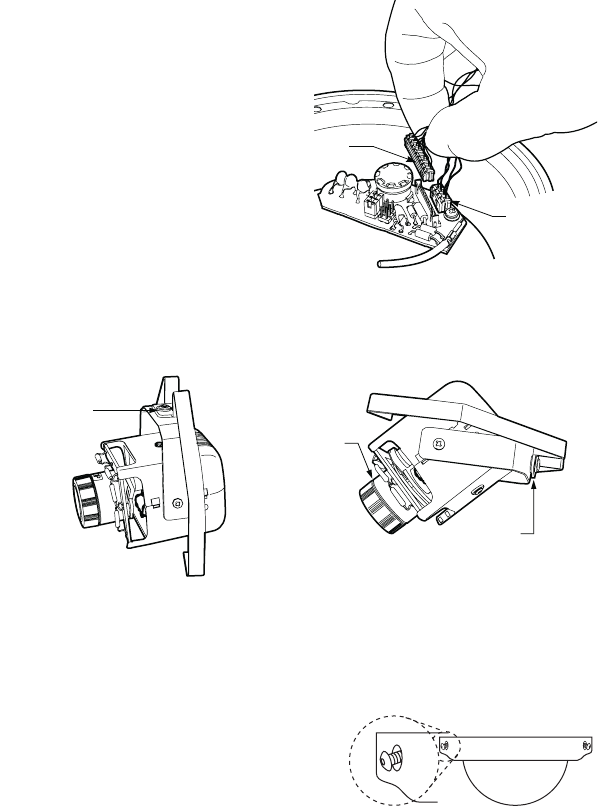
Proper camera orientation:
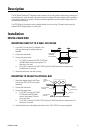
INSTALL DOME AND TRIM RING
Place the trim ring and dome over the back box. If the dome
has a liner, position the viewing window over the lens of the
camera. Tighten the tamper-resistant screws with the
supplied 1/8-inch hollow screwdriver bit.
NOTE: The screws are installed at an angle.
VIDEO
CONNECTOR
HEATER
CONNECTOR
CAMERA BRACKET
TAB ALWAYS POINTS
OUT OF THE
ENCLOSURE
CAMERA BRACKET
TAB ALWAYS POINTS
OUT OF THE
ENCLOSURE
TOP OF
CAMERA
Ceiling Mounting: The camera bracket tab
points out of the enclosure, and the top of the
camera is pointed in the opposite direction.
Wall Mounting: The camera bracket tab
points out of the enclosure, and the top of the
camera points up towards the tab.