- 26 -
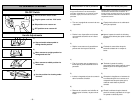
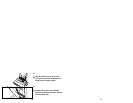
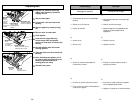
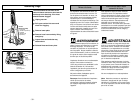
1)
➢ Ne brancher qu’une fois l’assemblage
terminé.
➢ Retirer la vis du manche.
➢ Insérer le manche.
2)
➢ Insérer la vis.
➢ Serrer la vis.
3)
➢ Insérer le cordon d’alimentation à
l’intérieur du crochet.
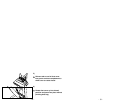
4)
➢ Enrouler le cordon autour du crochet.
➢ Fixer la fiche au cordon d’alimentation à
l’aide de son agrafe.
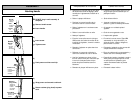
Colocación del mango
Montaje
Assemblage
Montage du manche
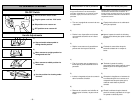
1)
➢ No enchufe hasta que el montaje esté
completo.
➢ Quite el tornillo del mango.
➢ Meta el mango con los sujetadores del
cordón en la parte posterior de la
aspiradora.
2)
➢ Instale el tornillo.
➢ Apriete el tornillo.
3)
➢ Empuje el cordón eléctrico hacia el
soporte del cordón.
4)
➢ Envuelva el cordón eléctrico alrededor
de los sujetadores del cordón.
➢ Asegure la clavija en el cordón eléctrico.
- 15 -
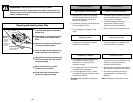
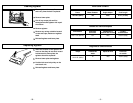
Replacing Belt
+
+
Lift Agitator Up
Soulever l’agitateur
Unidad del agitador
Felt Packing
Cale en feutre
Empaquetadura
de filtro
Rear Belt
Cover
Couvre-
courroie
arrière
Cubierta
de la correa
trasera
Install New Belt
Poser la nouvelle courroie
Instalación de la correa
Motor Shaft
Arbre
d’entraînement
du moteur
Eje del motor
+
+
Groove
Ouverture
Ranura
End Cap
Bouchon
Tapa del extremo
➢➢
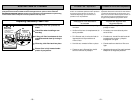
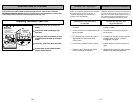
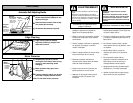
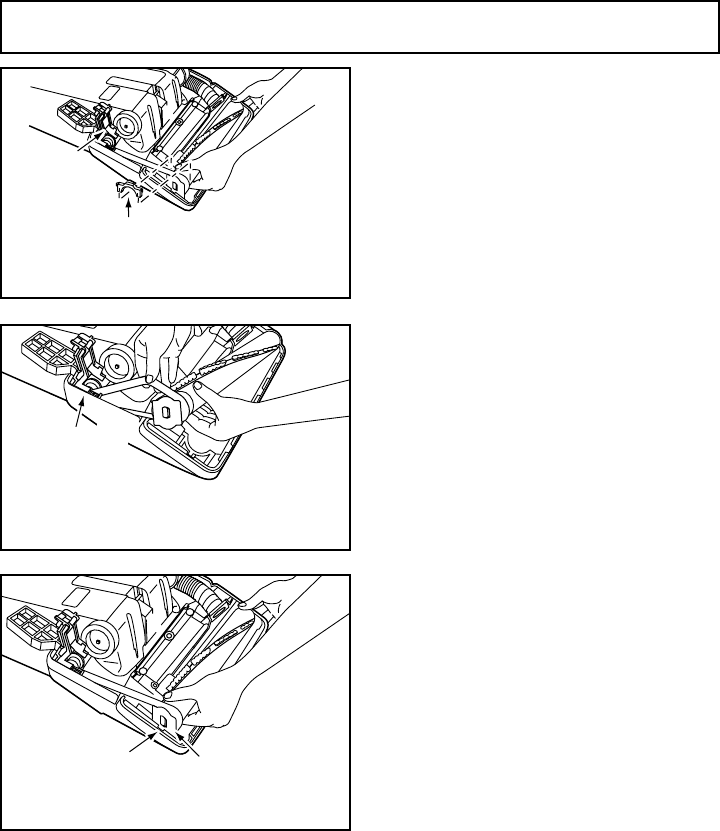
Replace belt whenever a burning
rubber smell caused by excessive
slippage occurs.
➢➢
Remove lower plate.
➢➢
Lift rear belt cover and remove felt
packing.
➢➢
Remove agitator by carefully lifting
out.
➢➢
Remove worn or broken belt.
➢➢
Clean agitator.
➢➢
Loop new belt (Type UB8 only)
around motor shaft and agitator
pulley; see illustration for correct belt
routing.
➢➢
Reinstall agitator back into nozzle
housing grooves.
➢➢
Close rear belt cover and reinstall felt
packing.
➢➢
After reinstalling the agitator, turn it
by hand to make sure that belt is not
twisted or pinched and that all
rotating parts turn freely.
➢➢
Reinstall lower plate.


