2
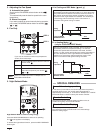
A. Installing with in-wall junction box
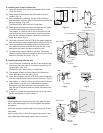
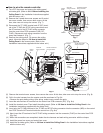
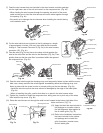
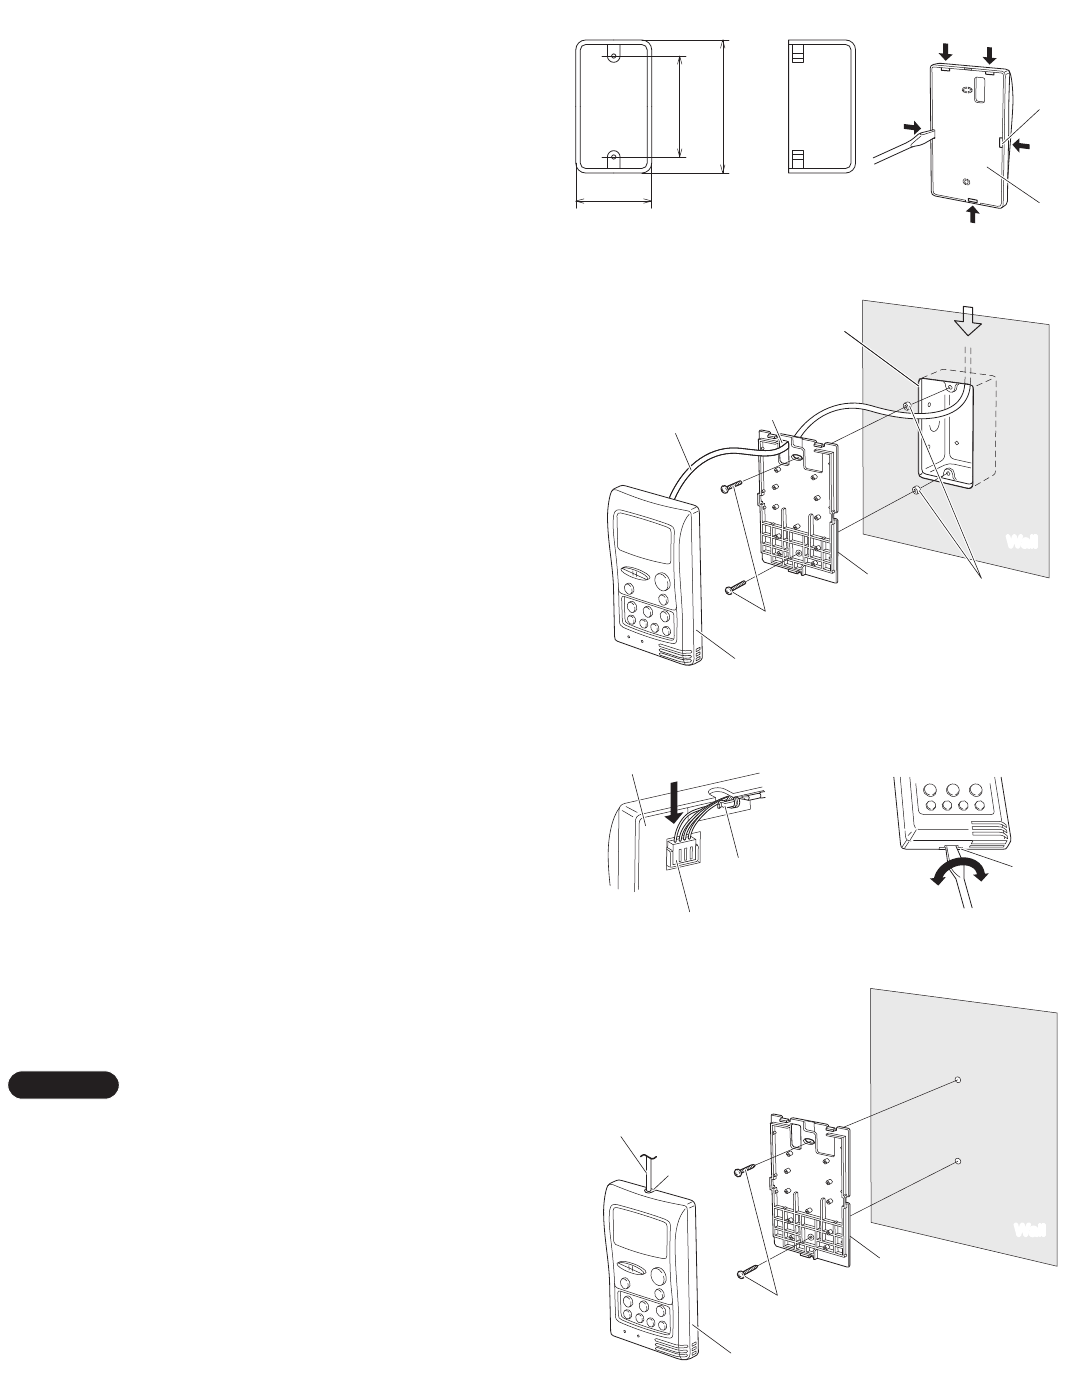
(1) Install the junction box (locally purchased) into the wall.
(Figs. 2-a and 3)
(2) Pass the wire harness through the junction box and
conduit. (Fig. 3)
(3) Insert a flathead screwdriver into the 5 tab locations
and disconnect the back plate of the remote controller by
lifting up slightly. (Fig. 2-b)
The tabs are thin; take care not to chip them.
(4) Pass the wire harness connector through the cord open-
ing on the back plate of the remote controller.
Use nippers or a similar tool to cut out the slots for the
remote controller back plate screws. Insert the spacers
and use the machine screws to install the remote con-
troller back plate. (Fig. 3)
(5) Insert the connector into the PCB of the remote controller
unit, and wrap the wire harness around the hook. (Fig. 4)
(6) Store the excess wire harness inside the junction box,
then hook the remote controller unit onto the top of the
back plate and install the remote controller unit.
(7) To remove the remote controller unit after it has been
installed, insert a flathead screwdriver into the slot on the
bottom of the case and turn it. (Fig. 5)
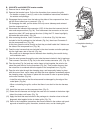
B. Installing directly onto the
wall
(1) Insert a flathead screwdriver into the 5 tab locations and
disconnect the back plate of the remote controller by lift-
ing up slightly. (Fig. 2-b)
The tabs are thin; take care not to chip them.
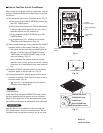
(2) Use tapping screws to directly fasten the remote con-
troller back plate onto the wall. (Fig. 6)
(3) Insert the connector into the PCB of the remote controller
unit, and wrap the wire harness around the hook. (Fig. 4)
(4) Use nippers or a similar tool to cut out the slot on the top
of the remote controller unit. Pass the wire harness
through the slot, then hook the remote controller unit
onto the top of the back plate and install the remote con-
troller unit.
(5) In order to conceal the exposed wiring, use a wire cover
(locally purchased) or similar means.
When installing the remote controller back plate, be sure
that it is flat and straight. Do not over-tighten the installa-
tion screws.
Install the remote controller away from all sources of elec-
trical noise.
Install a noise filter or take other appropriate action if elec-
trical noise affects the power supply circuit of the unit.
NOTE
Fig. 3
Remote
controller
Machine
Opening
In-wall junction box
from the indoor unit
Wire harness
Spacers
W
all
screws
Back plate
Wall
Fig. 6
Remote
controller
Wire harness
Tapping
screws
Back plate
W
allWall
Cut out
Fig. 4
Connector
Hook
PCB
Fig. 5
Slot
Fig. 2-b
Tab
Back
plate
Fig. 2-a
2-3/8"
(60mm)
In-wall junction box (locally purchased)
4-3/16"
(106mm)
3-9/32"
(83.5mm)


