


2
EN
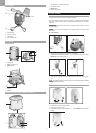
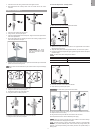
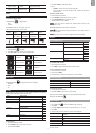
ASSEMBLY PARTS
1x Vertical
Attachment Bracket
1 x Cone-Shaped
End
1 x Horizontal
Attachment Bracket
1 x Bottom Pole
1 x Mid Pole
1x Top Pole
2 x Round U- bolts
2 x Rectangular
Base Legs
3 x Eye pins
1 x Versatile Base (Wall
or Ground Fixable)
4 x screws (Type A)
ACCESSORIES - SENSORS
This product can work with up to 10 sensors at any one time to capture outdoor
temperature, relative humidity or UV readings in various locations.
Optional wireless remote sensors such as those listed below can be purchased
separately. For more information, please contact your local retailer.*
• Thermo-hygro THGR800 (3-Ch)
• Thermo-hygro THGR810 (10-Ch)
• UV UVN800
* Features and accessories will not be available in all countries.
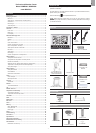
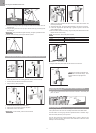
OVERVIEW
FRONT VIEW
2
1
5
6
7
8
3
4
1. MEM: View current, maximum and minimum readings
2. CH: Toggle between 10 different channels
3. AL: Set and view status of Clock and HI / LO alarms
4. SET: Enter setting modes
5. Antenna
6. UP / DWN: Increase / decrease the values of the selected readings
7. AL ON/OFF: Turn alarms on and off
8. UNIT: Change display units
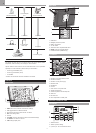
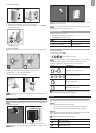
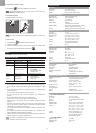
BACK VIEW
1
4
6
5
7
2
3
1. USB socket
2. Backlight (continuous) On/Off
3. Battery compartment
4. AC / DC socket
5. Wall mount holes / Adjustable table stand
6. RESET: Reset unit to default settings
7. EU/UK slide switch (WMR200 only)
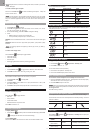
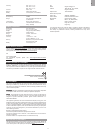
LCD DISPLAY
FEET M
MIN
USB
2
1
8
9
10
11
12
3
4
5
6
7
1. Indicates a successful USB connection
2. Indicates low battery
3. Indicates no main power supply
4. Barometer area
5. Rainfall area
6. UV area
7. Clock / alarm / moon phase area
8. Weather forecast area
9. Outdoor temperature and humidity area
10. Wind area
11. Bar chart area
12. Indoor temperature / humidity area
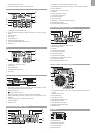
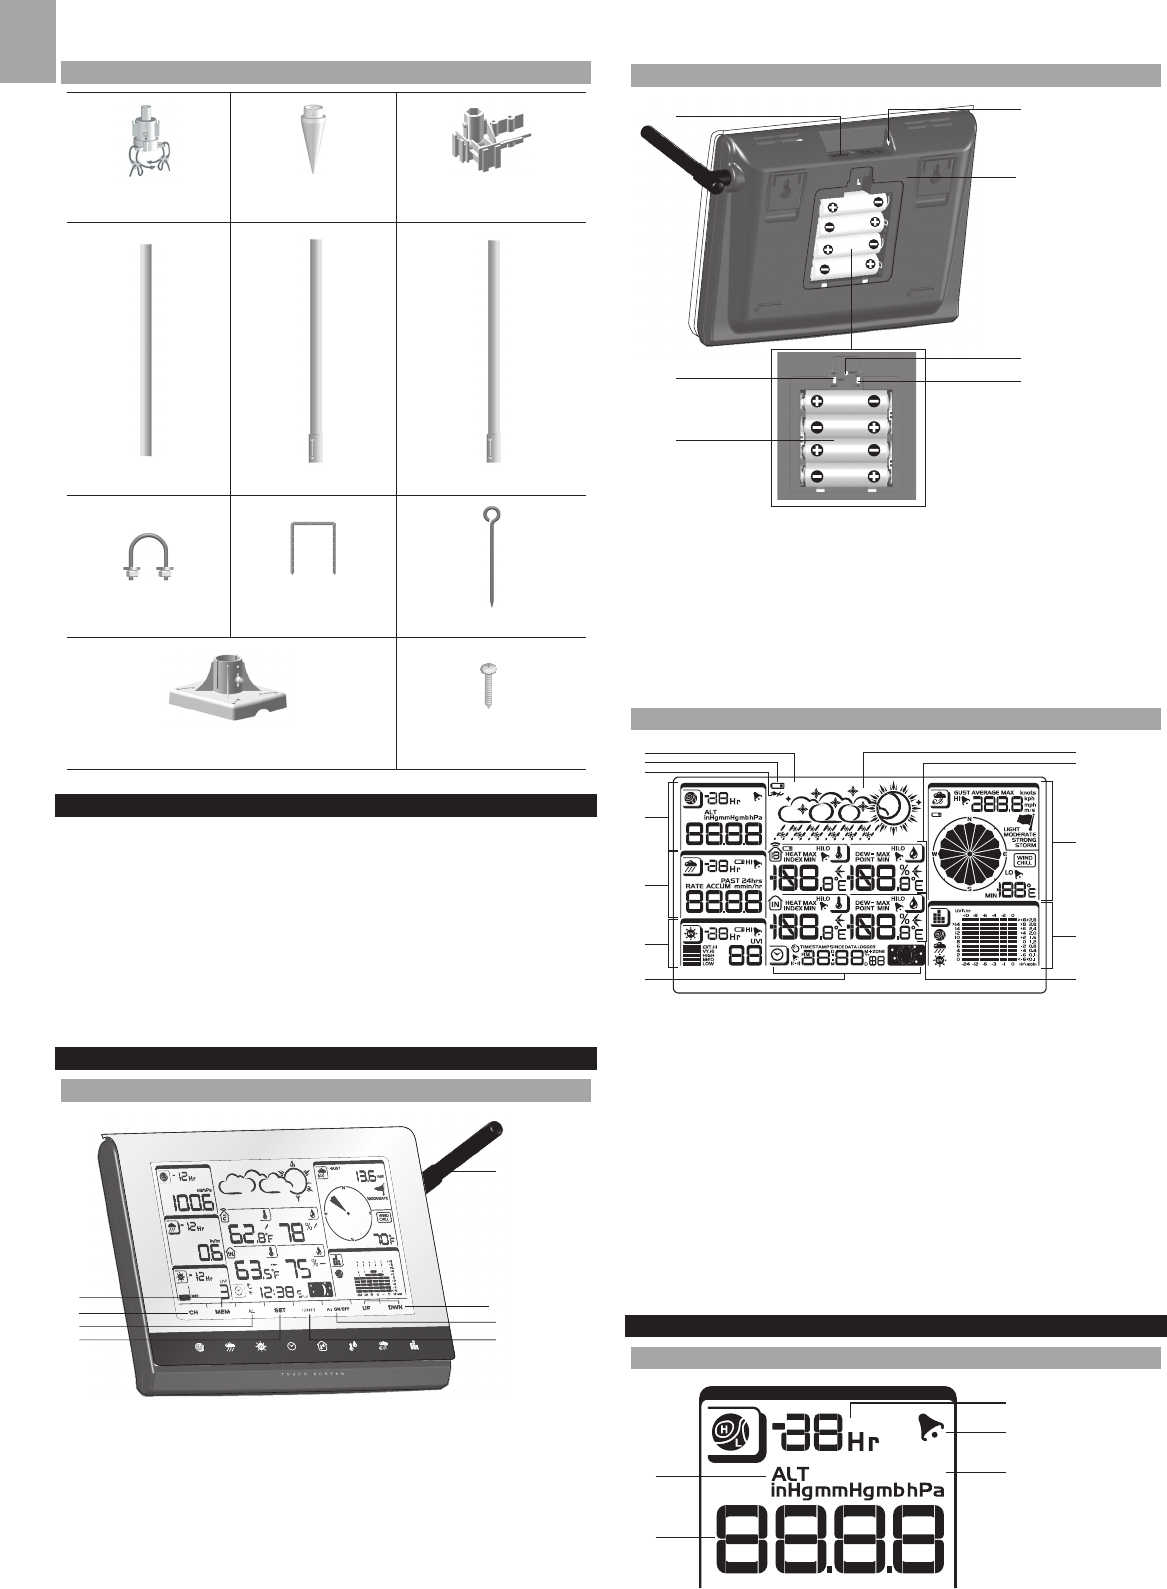
DETAILED LCD DISPLAY VIEW
BAROMETER
FEET M
1
2
3
4
5
1. Altitude indicator
2. Altitude / pressure reading
3. 0 (current) to – 24 hours barometer record