


I NTELLIP AD
®
Ci TOUCH
S CREEN K EYPAD
41
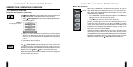
2. On the Manual Programming screen (see page 34, step 2), touch
Send Configuration
once.
3. The new configuration settings will be sent to other connected TS-1s. If an error occurs, a
prompt will appear, so repeat step 2 again.
4. If finished with all manual programming, touch
OK
once to exit the program. Otherwise,
continue with other program options.
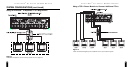
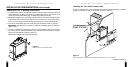
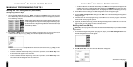
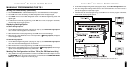
Figure 22
How to connect a newly-configured TS-1 to a ZR receiver to send data to other connected TS-1s.
TS-1
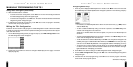
MANUALLY PROGRAMMING THE TS-1
Setting the Zone ON Key (continued)
3. Touch
Last Selected
or a labeled Master Key once. The associated button will highlight.
4. Touch
OK
once to save the setting. The Edit Configuration screen will appear again.
5. Touch
EXIT
once to exit the Edit Configuration screen. The Manual Programming screen will
appear again.
6. If finished with all manual programming, touch
OK
once to exit the program. Otherwise,
continue with other program options.
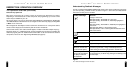
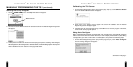
Displaying Settings Option
To Show Settings Option:
1. On the Manual Programming screen (see page 34, step 2), touch
Show Settings Option
once. A check mark will appear in the check box.
2. When finished with manual programming, touch
OK
once to save the settings.
3. When the TS-1 Touch Screen returns to normal operation, (
Settings Option
) will appear
on the Navigation Keys.
To Hide Settings Option:
1. On the Manual Programming screen (see page 34, step 2), touch
Show Settings Option
once. The check mark will disappear in the check box.
2. When finished with manual programming, touch
OK
once to save the setting.
3. When the TS-1 Touch Screenreturns to normal operation, (
Settings Option
) will no longer
appear on the Navigation Keys and the key will be blank.
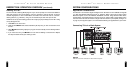
Sending The Configuration to Other TS-1s (For ZR Receivers Only)
1. Using a DB9 to mini-plug serial cable and a male-to-male DB9 null-modem adapter, connect
the
PROGRAM
jack on the newly-configured TS-1 to the ZR receiver’s
COMPUTER INTER-
FACE
port, as shown in Figure 22 on the next page.
I NTELLIP AD
®
Ci TOUCH
S CREEN K EYPAD
40