


10
W415-0153 / A / 10.29.01
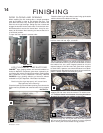
Ensure that the sealant is not visible on the exte-
rior pipes once installation is completed. An op-
tional decorative brass band is available for this
use. (Standard with a GD175 kit). In the event that
the venting must be disassembled, care must be
taken to reseal the venting.
MOBILE HOME INSTALLATION
In Canada, mobile home installation may be vented hori-
zontally or vertically. In the United States, it may only be
installed vertically. See "Vertical Venting" or "Horizontal Air
Terminal Installation" for installation.
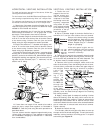
The fireplace is equipped with two 5/16" diameter holes
located near each corner of the base. For mobile home
installations, the fireplace must be fastened in place. Use
#10 screws, inserted through the holes in the base to se-
cure. It is recommended that the fireplace be secured in all
installations.
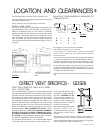
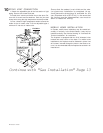
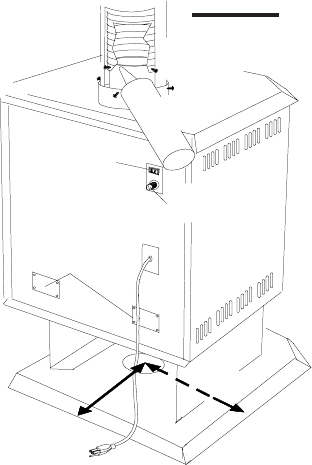
STOVE VENT CONNECTION
1. Attach the adjustable pipe to the last section of rigid
piping. Secure with screws and seal.
2. Install the 4" aluminium flexible liner to the stove. Se-
cure with 3 screws and flat washers. Seal the joint and
screw holes using the high temperature sealant provided.
3. Run a bead of high temperature sealant around the
inside of the air intake collar. Pull the adjustable pipe a
minimum 2" into the air intake collar.
Continue with "Gas Installation" Page 13
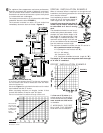
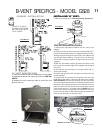
SEALANT
SPEED SWITCH
COMBUSTION AIR
COVER PLATES
& GASKETS
8"
SWITCH
ON/OFF
2" OVERLAP
11½"
VARIABLE
SELF DRILLING
SCREWS
#8x1/2"
HI-TEMP
FIGURE 21