


6
SECTION 4: ASSEMBLY INSTRUCTIONS
IMPORTANT: This unit is shipped WITHOUT
GASOLINE or OIL in the engine. After assembly,
see separate engine operator’s manual for
proper fuel and engine oil recommendations.
NOTE: To determine right and left hand sides of
your chipper-shredder-vacuum, stand behind the
unit, in the operating position.
REMOVE CHIPPER-SHREDDER-
VACUUM FROM CARTON
Remove staples, break glue on top flaps, or cut tape
at carton end and peel along top flap to open carton.
Remove loose parts included with unit (i.e., owner’s
manual, etc.). Cut along dotted lines and lay carton
down flat. Remove packing material and roll unit out
of carton. Check carton thoroughly for loose parts.
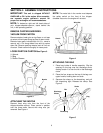
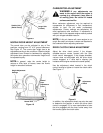
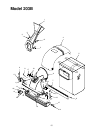
LOOSE PARTS IN CARTON See Figure 3.
(1)-Nozzle
(1)-Bag
(1)-Safety Glasses
Figure 3
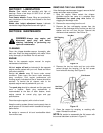
ATTACHING THE NOZZLE
Remove three wing nuts from the front of the
chipper-shredder-vacuum. Place nozzle in position
over the three studs. Secure with wing nuts just
removed. See Figure 4.
NOTE: The metal tab in the nozzle must depress
the safety switch on the front of the chipper-
shredder-vacuum or the engine will not start.
Figure 4
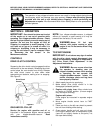
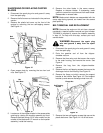
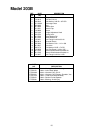
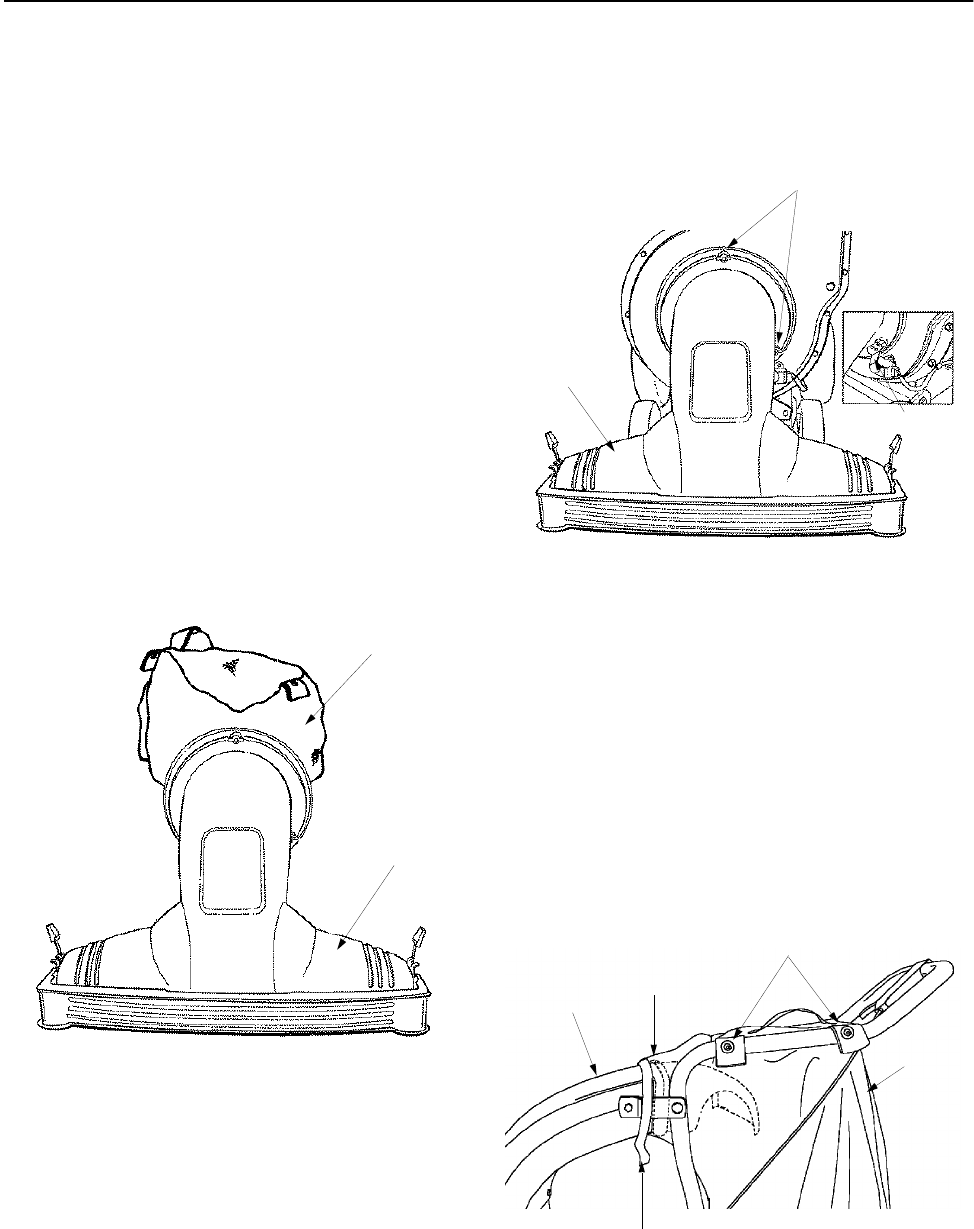
ATTACHING THE BAG
1. Place bag inside of handle assembly. Slip the
opening on the bag over the discharge chute,
making certain it is over the rib on the discharge
chute.
2. Place the four straps on the top of the bag over
upper handle, hooking them on studs.
3. Squeeze the clamp on the drawstring, and pull
the drawstring tight. Release the clamp. See
Figure 5.
Figure 5
Bag
Nozzle
Metal Tabs
Nozzle
Wing Nut
Studs
Rib
Discharge
Chute
Bag
Drawstring