


81D0107 23
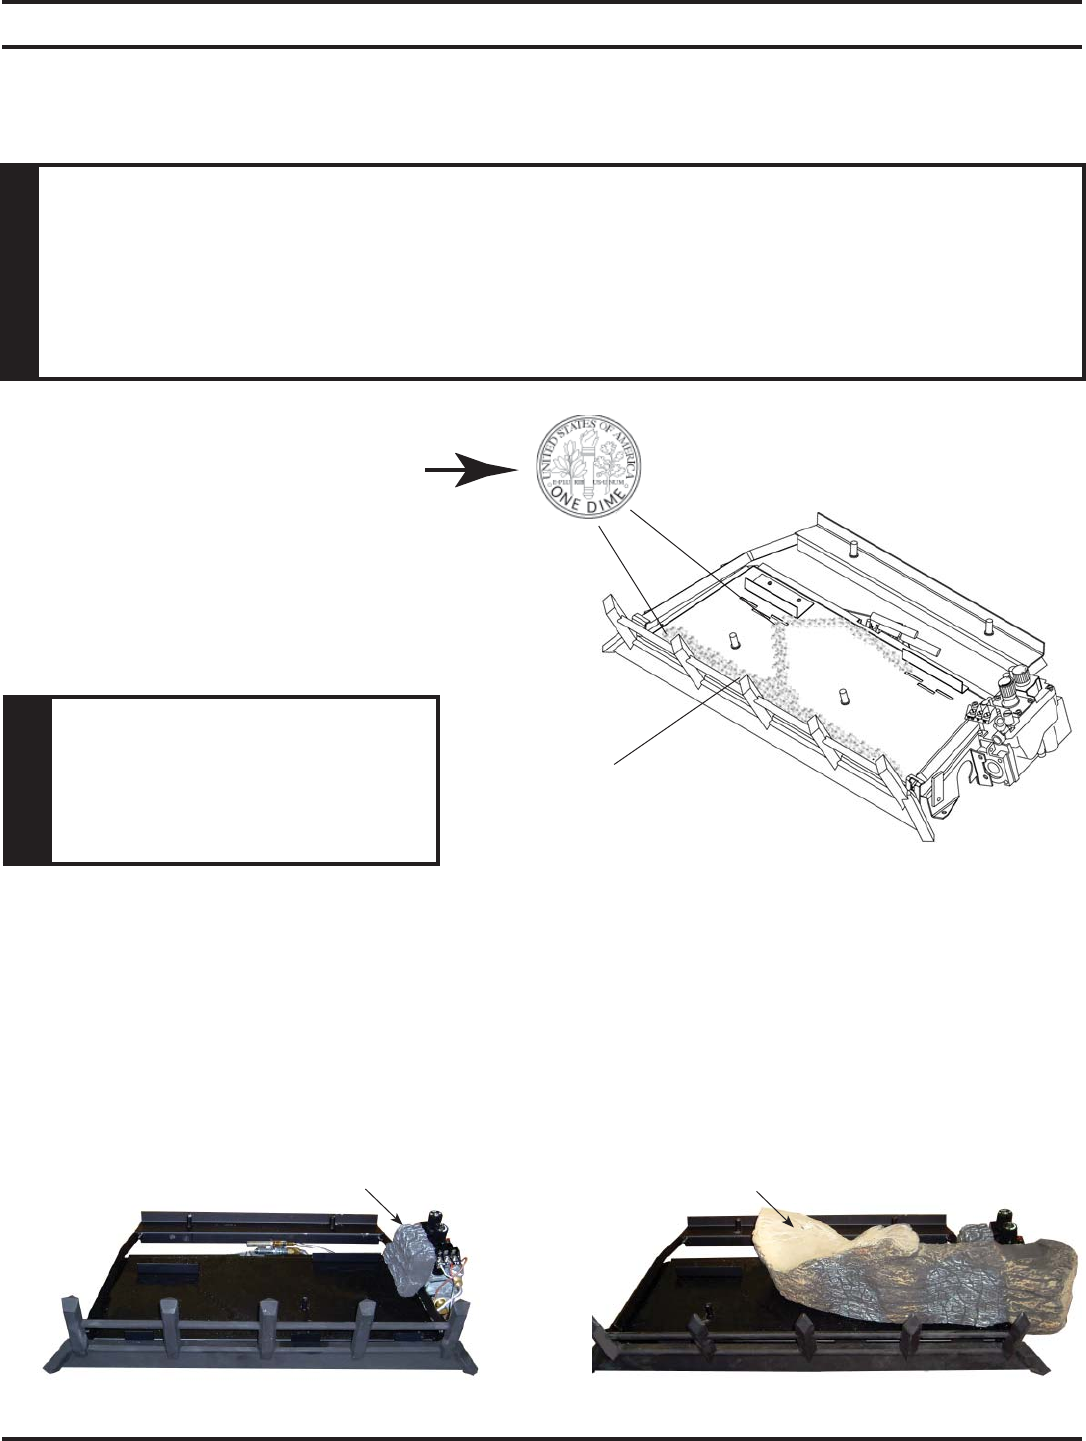
Dime-Size
Rock Wool
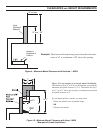
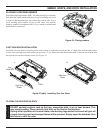
Figure 19 - Placing Rock Wool
#1
#2
LOG PLACEMENT
Before you begin — This unit is supplied with seven (7) ceramic fiber logs. Do not handle these logs with your bare
hands. Always wear gloves to prevent skin irritation from ceramic fibers. After handling the logs, wash your hands
gently with soap and water to remove any traces of fibers.
WARNING
The positioning of the logs is critical to the safe and clean operation of this heater. Sooting and
other problems may result if the logs are not properly and fi rmly positioned in the appliance.
Never add additional logs or embellishments such as pine cones, vermiculite or rock wool to
the heater. Only use the logs and 2G-RW rock wool (for NB18), or 3G-RW rock wool (for NB24)
supplied with the unit.
Failure to position the parts in accordance with diagrams below or to use only parts specifi cally
approved for this heater may result in property damage or personal injury.
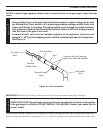
PLACING ROCK WOOL
Before installing logs, place rockwool in
dime size pieces evenly over small burner
ports starting in the rear of the burner going
towards the front. Avoid placing rock wool
on slots on each side of rear burner and on
large yellow flame ports on front of burner.
Wash hands after placing rock wool. Itching
may occur.
NOTE: Installation instructions are the
same for 18", 24", and 30" log sets. Pictures used in this manual illustrate the 24" set. Some variation may exist
between the images and the set included with this manual.
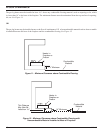
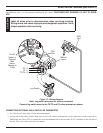
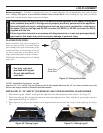
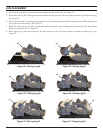
INSTALLING 18", 24" AND 30" (F,R) BERKLEY OAK LOGS ON NATURAL BLAZE BURNER
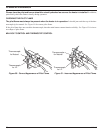
1. Place the #1 log (the “chunk”) on the grate bar right side of the burner adjacent to the controls. See Figure 20
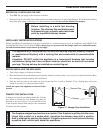
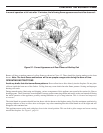
2. Place front right log (#2) on right pin located on burner and right grate bar. Then, slide the #1 log foward so that it is
tight against the #2 log. See Figure 21
3. Place right rear log (#3) on pin located on rear support bracket and rest left side of log on front right log. See Figure
22
Figure 20 - Placing Log #1
Figure 21 - Placing Log #2
WARNING
• Use only rock wool
provided with log set.
• Do not add additional
rock wool.