[ IX Troubleshooting ]
- 242 -
HWE09120 GB
-3- Solenoid Valve
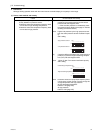
Check whether the output signal from the control board and the operation of the solenoid valve match.
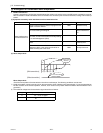
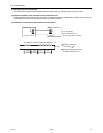
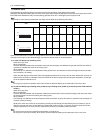
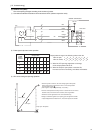
Setting the self-diagnosis switch (SW1) as shown in the figure below causes the ON signal of each relay to be output to the LED's.
Each LED shows whether the relays for the following parts are ON or OFF. LEDs light up when relays are ON.
The circuits on some parts are closed when the relays are ON. Refer to the following instructions.
When a valve malfunctions, check if the wrong solenoid valve coil is not attached the lead wire of the coil is not disconnected, the
connector on the board is not inserted wrongly, or the wire for the connector is not disconnected.
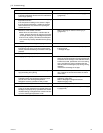
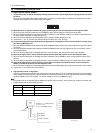
(1) In case of 21S4a (4-way switching valve)
About this 4-way valve
When not powered:
Conducts electricity between the oil separator outlet and heat exchanger, and between the gas ball valve (BV1) and the ac-
cumulator to complete the circuit for the cooling cycle.
When powered:
The electricity runs between the oil separator and the gas ball valve, and between the heat exchanger and the accumulator.
This circulation is for heating.
Check the LED display and the intake and the discharge temperature for the 4-way valve to check whether the valve has no
faults and the electricity runs between where and where.Do not touch the pipe when checking the temperature, as the pipe
on the oil separator side will be hot.
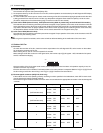
Do not give an impact from outside, as the outer hull will be deformed leading to the malfunction of the inner valve.
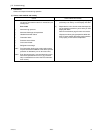
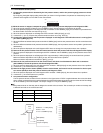
(2) In case of 21S4b (4-way switching valve), 21S4c (4-way switching valve) (21S4c is present only on the P120 and P144
models.)
About this 4-way valve
When not powered:
Conducts electricity between the oil separator outlet and the heat exchaner1 (the top heat exchanger) and opens and closes
the heat exchanger circuit for the heating and cooling cycles.
When powered:
The electricity runs between the heat exchanger and the accumulator, and the valve opens or closes the heat exchanger cir-
cuit when cooling or heating.
Whether the valve has no fault can be checked by checking the LED display and the switching sound; however, it may be
difficult to check by the sound, as the switching coincides with 21S4b or 21S4c. In this case, check the intake and the dis-
charge temperature for the 4-way valve to check that the electricity runs between where and where.
Do not touch the valve when checking the temperature, as it will be hot.
Do not give an impact from outside, as the outer hull will be deformed leading to the malfunction of the inner valve.
SW1
Display
LD1 LD2 LD3 LD4 LD5 LD6 LD7 LD8
Upper 21S4a CH11 SV1a
Lower 21S4b SV5b
Upper SV5c 21S4c SV9
Lower 52F
12345678910
ON
SW1
ON
SW1
12345678910


