– 12 –
■ Direct wall installation (when running the
cable along the wall)
• Thread the cable through the access
hole at the top of the remote controller.
• Seal the cut-out part of the cover with
putty.
• Use a cable cover.
Installation is complete.
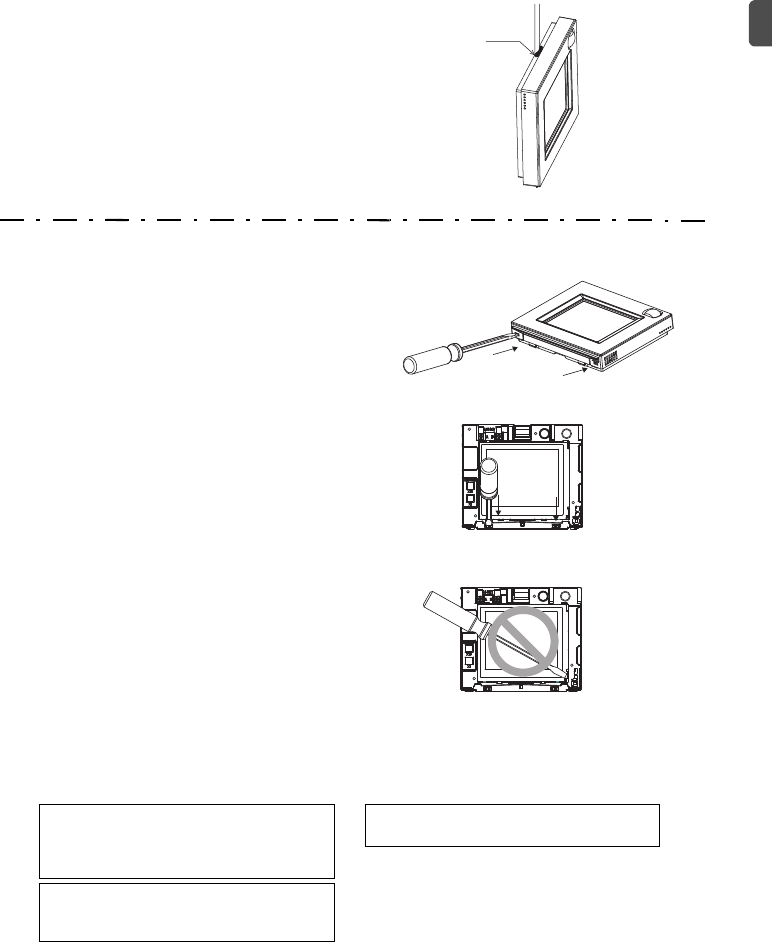
Follow the instructions below when uninstalling
them.
• Uninstalling the front cover and top case
1 Uninstalling the front cover
Insert a flat-tip screwdriver (with a blade width
of 5.5 mm (7/32 in) or less) into either of the
two latches at the bottom of the remote
controller as shown in the figure at right.
Lightly push the tip of the flat-head
screwdriver in the direction of the arrow in the
figure to remove the front cover.
2 Uninstalling the top case
Insert a flat-tip screwdriver (with a blade width
of 5.5 mm (7/32 in) or less) into either of the
two latches at the front of the remote controller
as shown in the figure at right.
Push the tip of the flat-head screwdriver in the
direction of the arrow in the figure to remove
the top case.
Putty
Lightly push
the tip in.
Use a flat-head screwdriver with a blade
width of 4-5.5 mm (5/32-7/32 in). The use of
a screwdriver with a narrower or wider blade
tip may damage the controller casing.
To prevent damage to the controller casing,
do not force the driver to turn with its tip
inserted in the slot.
To prevent damage to the control board, do
not insert the driver into the slot strongly.
Important
WT06829X02.book Page 12 Wednesday, June 26, 2013 4:03 PM


